Posted by Tara on Monday, July 29th, 2013

This recipe is adapted from Woman’s Day August 2013 edition. I was looking for something special to welcome hubby back home from a week long work trip. Since he loves cherries and chocolate, and ice cream, this was a winning combination here. And I love the fact that there is no cooking or freezing in a traditional ice cream maker. Just whip the cream and condensed milk until soft peaks form and add the cherry sauce and chocolate.
- 2 cups pitted cherries
- juice of 1 lemon
- 1/3 cup sugar
- 2 Tablespoons water
- 1 teaspoon almond extract
- 1 pint (16 oz) real whipping cream
- 1 can sweetened condensed milk
- 1 10 oz package chocoalte chunk pieces
- 2 teaspoons vanilla
In a medium sized sauce pan add the pitted cherries, sugar, and water and lemon juice. Stir over heat until mixutre starts to boil. Reduce heat and continue to stir and cook 10-15 minutes until the mixutre becomes thick and kind of syrup like in texture. Add almond extract and stir to blend. Set cherry surup aside and let it cool.
In a large mixing bowl add the whipping cream and the sweetened condensed milk and vanilla. Beat on high speed until soft peaks form. Pour half the mixture into a loaf pan. Add half the cherry syrup and half the bag of chocolate chunks. Use a knife to make strokes through the mixture. Then add the rest of the whipping cream mixture, then the remaining cherry syrup and chocolate chunks. Again, run a knife through the mixture in long lines to make swirls. Cover and freeze at least 4 hours. Recipe makes about a quart of ice cream.
 Share on Facebook
Tags: black cherry, cherry, ice cream
Filed in Desserts | 2 responses so far
Posted by Tara on Friday, July 26th, 2013
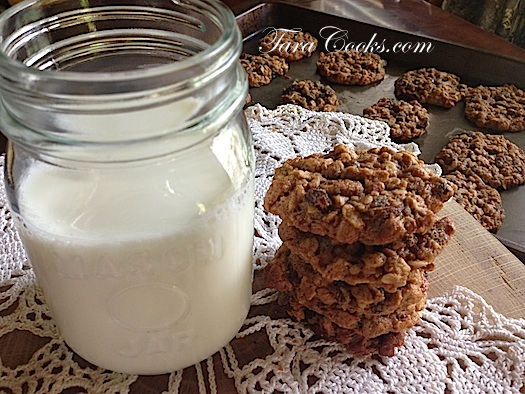
I do believe this is my all time favorite cookie recipe. Since our family has moved towards a more gluten-free diet, I’ve been experimenting with some of my old favorite recipes to adapt to our new diet. I am happy to report that these cookies taste even better made with Bob’s Gluten Free Baking Mix and coconut sugar. Although I used raisins and pecans, your favorite variety of chopped dried fruit could be used with our without the nuts.
- 1 1/2 cups old fashioned gluten-free rolled oats
- 3/4 cup Bob’s Baking Mix
- 1/2 teaspoon baking powder
- 1/4 teaspoon salt
- 1 teaspoon cinnamon
- 1/2 cup melted real butter (no substitutions)
- 1/2 cup dark brown sugar
- 3/4 cup coconut sugar (can use regular white sugar but coconut sugar tastes better, lower glycemic index)
- 1 egg
- 1 teaspoon vanilla
- 1 cup chopped raisins or other dried fruit
- 3/4 cup chopped pecans or walnuts (optional)
Combine oats, flour, baking powder, salt, and cinnamon. Set aside. Cream butter and both sugars together. Add egg and vanilla. Add oat mixture and mix until just combined then fold in the raisins and nuts. Use a 1 oz cookie dough scoop to place dough on cookie sheet about 1 inch apart. Bake 8-9 minutes at 350 degrees. Yield approximately 2 dozen cookies.
 Share on Facebook
Tags: cookie, Gluten Free, raisin, spice
Filed in Cookies, Candies, and Squares | One response so far
Posted by Tara on Monday, July 22nd, 2013

My family sure is loving all the fresh summer veggies we pick up each week from Lester Farms in our CSA basket. The produce is high quality and so fresh and flavorful. I have also enjoyed creating recipes for the CSA baskets. Today for lunch we feasted on Chicken Garden Pasta Bowls made with fresh asparagus and cherry tomatoes tossed in a garlic sauce with grilled chicken, all served over pasta.
For the chicken marinade:
- 2 Tablespoons grape seed oil
- 1 teaspoon black pepper
- 1 teaspoon sea salt
- 1-2 Tablespoons fresh chopped thyme
- zest from 2 lemons
- juice from 2 lemons
- 1 teaspoon garlic powder, or 2-3 minced cloves of fresh garlic
- 4-5 medium chicken breasts or approximately 1 1/2 pounds fresh chicken tenders
Combine all the above ingredients in a gallon Zip-Lock bag. Place bag in refrigerator overnight or at least 30 minutes for quick marinade. When ready to cook your meal, remove chicken and place on prepared grill (can also bake at 425 degrees for 30 minutes). Grill chicken over gas or charcoal until nicely browned and done. Cook times will vary depending on grill temperature and chicken thickness. Chop cooked chicken into bite size pieces and set aside.
For the Garlic Sauce:
- 1/2 stick real butter – no substitutions
- 2 Tablespoon grape seed oil
- 3-4 fresh cloves minced garlic
- 2 Tablespoons corn starch
- 1 1/2 cups chicken broth
- 3/4 cup half and half
- salt and pepper to taste
- 2-3 cups fresh cherry tomatoes
- 1/4 cup fresh basil – chopped
- 1 bunch fresh asparagus spear tips
- 1/2 cup fresh grated parmesan cheese
- 1/2 cup fresh grated Romano cheese
- 2-3 Tablespoons fresh chopped parsley
- Zest another lemon
In a large skillet melt the butter with the oil over medium heat. Add the fresh garlic and sautee for a minute. Next add the corn starch and blend with a wire whisk for a minute. Slowly add the chicken broth and the half and half and continue to whisk over medium heat until mixture starts to thicken. Add the grilled cut up chicken to the sauce along with the parmesan cheese and basil. Stir over medium heat until cheese is melted, then add the tomatoes and asparagus spears. Cook another minute or two. Add salt and pepper to taste. Then serve the garden sauce in pasta bowls over hot prepared noodles of your choice. Garnish each bowl with the fresh grated Romano cheese and some lemon zest if desired.
 Share on Facebook
Tags: Chicken, garden, pasta
Filed in Chicken,Italian | 2 responses so far
Posted by Tara on Friday, July 19th, 2013
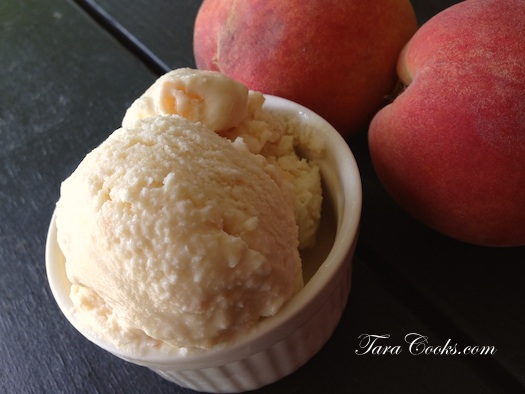
Peaches are ripe for harvest here in the south. And the weather has turned hot, humid, and hazy here in Tennessee. What better way to use those juicy ripe peaches and beat the heat than enjoying a tasty bowl of home made MAPLE PEACH ICECREAM? There is no cooking with this recipe, you just pour, dump, and whisk – then freeze.
- 1 pint whipping cream
- 1 quart half and half
- 2 cans sweetened condensed milk
- 1 cup real maple syrup
- 2 cups fresh peeled and crushed peaches
In a large mixing bowl add the cream, half and half, condensed milk, and maple syrup. Blend with a wire whisk and pour mixture into a half-gallon ice cream freezer. Add ice and salt. Freeze ice cream according to manufacturer’s instructions. Add the crushed peaches the last 5-10 minutes of the freezing process. Transfer any leftovers to an airtight container and store in freezer.
 Share on Facebook
Tags: ice cream, icecream, maple, peach
Filed in Desserts | 2 responses so far
Posted by Tara on Friday, July 12th, 2013
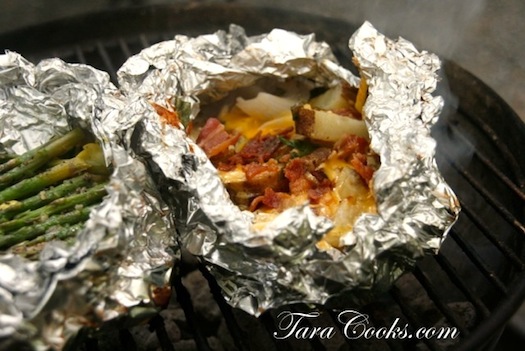
Our favorite family activity is CAMPING! We love the beauty of creation, especially inside our country’s national parks. Last summer we were able to visit 8 national parks on a 2 weeks adventure. Many of our campsites were primative, which meant I had to be a little creative with the cooking. Campfire Loaded Baked Potatoes are easy and perfect side dish for a campout, a back yard BBQ or family reunion.
This recipe is for 1 foil pouch which feeds approximately 2 people. The recipe can be doubled, tripled, or quadrupled to accomodate the number of guests who need to be fed.
- 2 medium baking potatoes
- 2 Tablespoons real butter
- 2 pieces of cooked, crumbled bacon
- 2 oz shredded cheddar cheese
- 2 Tablespoons sour cream
- 2 Tablespoons chopped fresh chives
- salt, pepper, papricka, and/or ground red pepper to taste
- 2 Foil sheets torn into 18″ lengths
Thouroghly wash potatoes and slice into 1/4″ rounds. Arange potato slices flat sides down, in the middle of a piece of foil. I like to make a pile about 6-7″ in diameter. Next sprinkle potato with salt and pepper, papricka, or ground red pepper to suit your taste. Cut butter into thin pats, and arrange over top of potato pile. Top with shredded cheese, crumbled bacon, and chives. Bring 2 opposite ends of foil together and fold down then repeat with other sides of foil. I like to double wrap my potato pouches with a second layer of foil for extra protection while traveling. Also I want a tight seal to hold all the butter and flavors inside the pouch. Pouches can be stored in a cooler over ice in a Zip Lock bag for 2-3 days before cooking. Place pouches on a prepared grill and cook for 25-30 minutes or until potatoes are tender. Use care when opening steaming hot foil pouches.
 Share on Facebook
Tags: baked potatoes, BBQ, campfire, grilling, loaded
Filed in Side Dishes | One response so far
Posted by Tara on Friday, June 28th, 2013
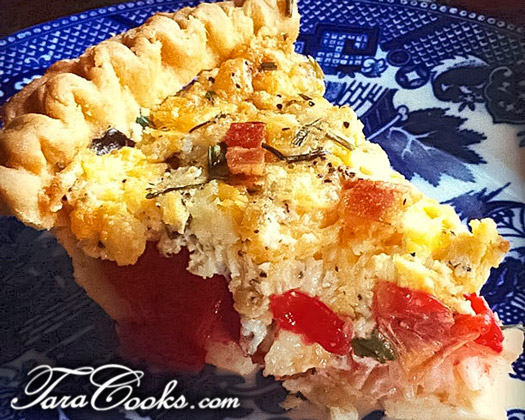
Nothing sceams SOUTHERN quite like garden fresh tomatoes and bacon. Try this recipe for a quick summer dinner or even for breakfast. It’s yummy!
You will need
- 1 9″ deep dish pie crust (cooked at 350 for 12 minutes)
- 1/2 chopped sweet yellow onion
- 3 cups diced tomatoes (squeeze juice out of tomatoes and let them drain some before measuring)
- 1/4 cup fresh chopped basil
- 2 Tablespoons fresh chopped chives (reserve some for garnish)
- 8 pieces cooked crumbled bacon (reserve some for garnish)
- 1 cup shredded sharp cheddar cheese
- 1 cup shredded Monterey jack cheese
- 3/4 cup mayonnaise
- dash Tabasco sauce or a dash of ground red pepper
- salt and black pepper to taste
Partially bake the pie crust by placing it in a 350 degree preheated oven for 10-12 minutes. Prick holes in bottom of crust before baking. Remove pie crust from oven and let cool.
While pie crust is cooking, chop the onions, tomatoes, chives and and basil. Shred the cheese if needed and crumble the bacon. Mix the cheese and mayo together then add the Tabasco sauce or the ground red pepper, and enough salt and black pepper to suit your taste. Set cheese mayo mixture aside.
When pie crust is cool, spread the onions, then the drained tomatoes, followed by the basil and chives, then the bacon into the pie crust. Then spread the mayo/cheese mixture over the top of the other ingredients. Garnish with remaining bacon and chives. Bake at 350 degrees for approximately 30 minutes or until cheese is golden brown and bubbly. Let pie cool slightly before serving.
It is important to really drain those tomatoes else the pie crust will be soggy. You can also use canned diced tomatoes – just be sure to drain them well.
 Share on Facebook
Filed in Main Dishes | 2 responses so far
Posted by Tara on Friday, June 21st, 2013
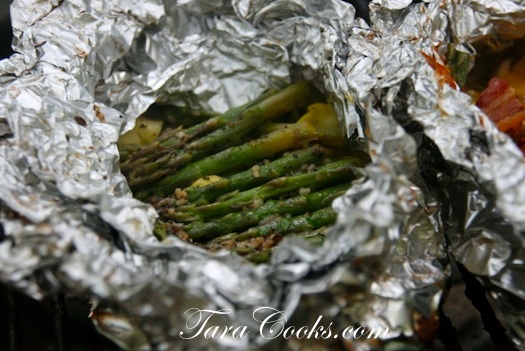
To kick off the first day of summer, here’s a recipe perfect for camping, grilling, picnics, or 4th of July – Campfire Veggies. Last weekend my hubby and I were able to retreat to the Smokey Mountain National Park for some overdue alone time together. We primitive tent camped at Cades Cove Campground. I prepared a couple of these foil pouches before we departed and set them on a hot grill for 15 minutes before dinner time at our campsite. E A S Y!
Of course you could vary your veggies a little, but I used sliced fresh squash, zucchini, and asparagus. I believe broccoli would be suitable as well. Here’s what went into each 2 serving foil pouch:
- 1 cup yellow squash sliced into 1/4″ circles
- 1 cup zucchini sliced into 1/4″ circles
- 1/2 bunch asparagus spear tops
- 1/2 sweet onion cut into large chunks
- McCormick Montreal Steak Seasoning
- Real Butter pats (approximately 1 Tablespoon of butter per pouch)
Tear off a couple of 18″ long pieces of foil and lay each one flat on the counter. Then pile the veggies in the middle of the pouch, dot with butter pats, and sprinkle with seasoning. Bring opposite edges of foil together and fold down, repeating with other side. Use another piece of foil if needed. Keep pouch refrigerated or in cooler until ready to grill (1-3 days). Place pouches in Zip-Lock bags before placing them in a cooler. Set unopened pouch on prepared grill for 10-15 minutes or until veggies are tender. Use caution when opening, veggies are hot and full of steam!
 Share on Facebook
Tags: 4th of July, campfire, grilling, vegetables
Filed in Gluten Free,Healthy Cooking,Holidays | One response so far
Posted by Tara on Monday, June 17th, 2013
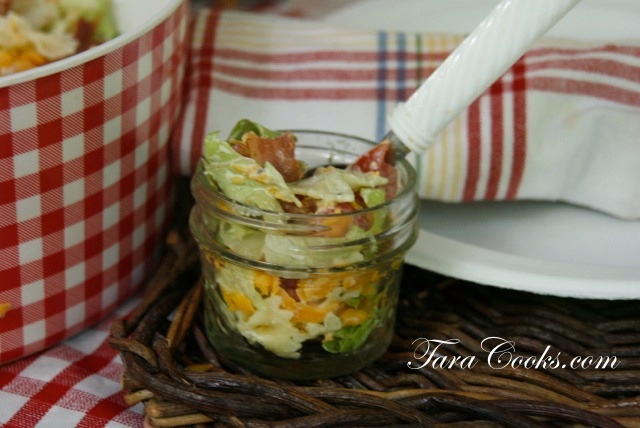
The 4th of July will be here before too long. If you are looking for some cool salad or grilling recipes, stay tuned here to TaraCooks.com. I’ve got quite a few new recipes to post. BLT Ranch Pasta Salad is a new summer time favorite at our house. It is the perfect salad to compliment a back yard barbeque or it can stand alone as a lunch meal for many light eaters. And for the Gluten Free diners in your life, make this recipe with your favorite gluten free pasta.
- 8 oz bow tie, elbow, or other small pasta (can use any gluten free variety for GF diners) cooked, drained, and cooled
- 1 small head of green, red, or iceburg lettuce (leaves washed and dried, then cut into very small pieces)
- 8-12 strips cooked nitrate free bacon – crumbled
- 2 cups shredded cheddar cheese
- 2 medium seeded tomatoes chopped
- 1-2 cups Home Made Herbal Ranch Dressing (more or less to suit your taste)
- Salt and Pepper to taste
Cook pasta according to package directions. Rinse pasta and let pasta cool. While pasta cools, prepare bacon, lettuce, tomatoes, and shred cheese if needed. I find it works best to place all ingredients in separate Zip-Lock bags until close to meal time. Then each ingredient can be poured into a large serving bowl and tossed together. Although bottled dressing could be used, fresh home made dressing is tastier. Pour dressing over assembled salad starting with 1 cup. Add more if you prefer a thicker coating of dressing on your salad. Add salt and pepper to taste.
 Share on Facebook
Filed in Gluten Free,Soups and Salads | 2 responses so far
Posted by Tara on Thursday, June 13th, 2013
Every time I see, taste, smell, or make coffee, I am reminded of my Dad – Alton Bybee. Thanks to Dad, I was familiar at a very young age with different blends and tastes of various coffees – instant, regular, decaf, mountain, Columbian, Uban.
Both my parents were coffee drinkers and my Dad’s livelihood was made as a coffee salesman. He was a uncommon individual with a unique job which he did quite well I might add. He was tops in this area for years as well as #1 in the entire Southeast USA. He’s on the left in this picture.


I often wonder what he would think of the Starbucks craze that has graced America over the past decade. Although Dad passed away over 20 years ago, I imagine he would be astonished at the success of Starbucks. I bet he would be even more amazed that people actually pay the asking price for his favorite beverage – if he were here to witness such madness and passion for coffee.
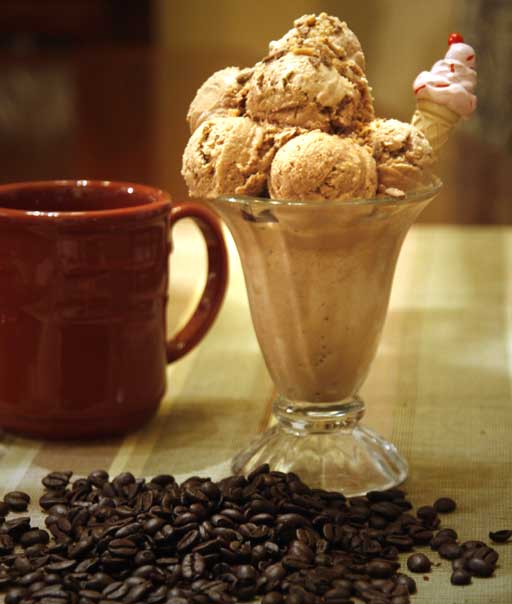
In honor of Father’s Day, and my Dad – Alton Bybee, here’s my own frozen creation of one of my favorite coffee blends, MOCHA FRAPPUCINO. This one’s for you Dad!
- 1 pint real whipping cream (preferably organic)
- 1 can Hershey’s chocolate syrup or Hershey’s Special Dark Syrup
- 1 quart half and half (preferably organic)
- 2 cans sweetened condensed milk
- 8 oz STRONGLY brewed coffee or espresso – cooled
Mix all ingredients together in a large mixing bowl. Pour into a 1 gallon ice cream freezer and freeze according to manufacturer’s instructions. Don’t forget the ice cream salt and extra ice. Freezing takes about 30 minutes in my freezer. The freezing time can be diminished by placing all ingredients in the fridge for a couple of hours prior to mixing.
Variations:
Try Mint Mocha Frappucino by adding a teaspoon or two of mint flavor to the mix. Top with Andes Mint pieces.
Try adding crushed Heath Bar bits when serving ice cream for a Caramel Mocha Frappucino.
Make a Mocha Chip Frapp by adding mini chocolate chips to the mix.
And for those coffee bean lovers – add some crushed coffee beans and mini chocolate chips for a Java Chip Mocha Frappucino.
Printable Recipe
Download Adobe Reader
 Share on Facebook
Tags: Mocha Frappucino Ice Cream
Filed in Desserts | 9 responses so far
Posted by Tara on Wednesday, June 5th, 2013
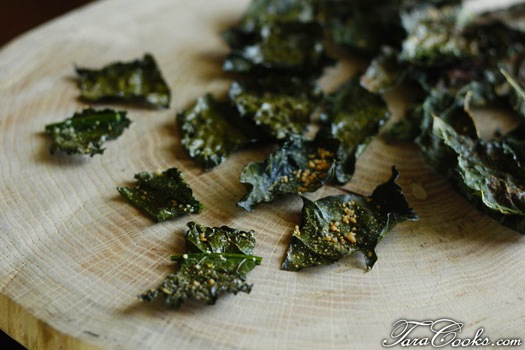
Did you know kale is one of the most nutrient dense foods you can eat? If you are not accustomed to eating kale, you may find the taste a bit over powering at first. Cooking pieces of kale in the oven for a few minutes with a little oil, salt, and some creative flavorings is one way I have learned to eat these healthy greens. Kale chips are easy to prepare. Here’s how:
- 1 head kale – washed, dried, and stems removed
- 2 Tablespoons Grape seed Oil or spray kale pieces with Trader Joe’s Coconut Oil (worked great, tastes yummy)
- sea salt
- optional flavorings:
- Parmesan cheese and Italian Seasoning
- Chili Powder and Garlic Powder
Preheat oven to 275 degrees.
Prepare kale and cut into 2 inch by 2 inch pieces. Place kale pieces in a large bowl and lightly toss with grape seed oil or spray kale pieces with Trader Joe’s Coconut Oil. Arrange kale pieces on a couple of cookie sheets, trying not to overlap them. Then sprinkle kale with salt, and any variety of seasoning you prefer. Bake kale for 10 minutes at 275, turn pieces over, then cook for 10 more minutes.
I tried a combination of chili and garlic powders and salt on one batch. My favorite chips were sprinkled with salt, Parmesan Cheese and Garlic Powder, and a little Italian Seasoning.
These did not last long enough for me to do a length of freshness test. If I had any leftovers I would certainly store them in an air tight container.
 Share on Facebook
Tags: chili, kale chips, parmesan
Filed in Appetizers,Gluten Free,Healthy Cooking | One response so far


