Posted by Tara on Monday, June 3rd, 2013
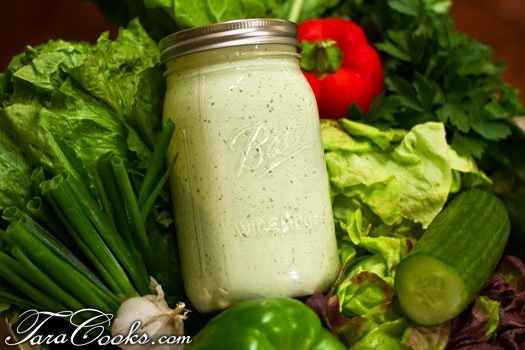
One of the best things about spring and summer is all the fresh herbs and vegetables to be harvested. Our family is enjoying our CSA box of fresh locally grown lettuces and greens each week from Lester Farms. I used to buy bottled dressings but once I made a couple of varieties of home made dressings with fresh herbs – I knew it would be very hard to go back to store bought dressing. This recipe does not take too long to make if you have a blender or food processor. The taste is definately worth the effort though. The buttermilk can be omitted to create a ranch chip or veggie dip.
- 1 clove garlic – minced
- 1/2 teaspoon salt
- 1/4 cup fresh Italian Parsley – rough chopped
- 1/4 cup fresh dill – rough chopped
- 2 Tablespoons fresh chopped chives
- 2 teaspoons Worchestersire Sauce
- 1/2 teaspoon black pepper
- 1 teaspoon white vinegar
- 1 cup real mayonnaise
- 3/4 cup sour cream
- 1/3 -1/2 cup buttermilk
In a blender or food processor, combine all the ingredients EXCEPT the buttermilk and pulse to blend. Add 1/3 cup buttermilk and pulse again. You can increase the buttermilk to achieve the desired consistency. I used 1/2 cup buttermilk. Store in a quart jar in refrigerator at least 2 hours before serving. Keeps for up to 7 days in refrigerator.
To make chip or veggie dip, omit the buttermilk.
To make Jalepeno Ranch Dressing or dip, add a fresh Jalapeno pepper (remove seeds to reduce heat) to the blender with the other herbs.
To make Salsa Dressing, mix equal parts fresh salsa and fresh ranch dressing together. This combo is excellent over fajita or taco salads.
 Share on Facebook
Tags: dressing, jalepeno ranch, ranch, ranch dip, ranch dressing, salsa ranch
Filed in Appetizers,Healthy Cooking,Miscellaneous,Soups and Salads,Weight Watchers | One response so far
Posted by Tara on Thursday, May 30th, 2013
![Fruit-Salad-and-Strawberry-Dressing[2] copy Fruit-Salad-and-Strawberry-Dressing[2] copy](http://taracooks.com/wp-content/uploads/2013/05/Fruit-Salad-and-Strawberry-Dressing2-copy.jpg)
Here is a perfect side dish for a potluck, a special brunch, a baby or wedding shower, a light dessert, and a refreshing summer time treat – Fresh Strawberry Fruit Salad wih Strawberry Poppy Seed Dressing. Nuts and mini marshmallows are optional but delicious additions.
- 2 cups fresh strawberries (washed, stems removed, and sliced)
- 1 cup red or purple seedless grapes (washed and sliced in halves)
- 1 fresh apple (washed, cored, and diced)
- 1 fresh pear (washed, cored, and diced)
- 1 cup fresh blueberries
- 1 cup walnut or pecan pieces (optional)
- 1 cup mini marshmallows (optional)
- Fresh Strawberry Poppy Seed Dressing
Mix all the fruit and nuts together in a large serving bowl. Drizzle Fresh Strawberry Poppy Seed Dressing over fruit and stir to coat. Serve right away. Makes 6-8 servings. Add 1 cup mini marshmallows if desired and serve as a dessert.
For the Dressing:
- 1/3 cup Mayo
- 1/3 cup Sour Cream
- 1/3 cup Powdered Sugar (or 2-3 Tablespoons honey or Stevia)
- 1/2 cup Fresh Strawberries (washed and stems removed)
- Juice from half a lemon
- 1 Tablespoon Balsamic Vinegar
- 1/4 teaspoon Ground Ginger
- 2 teaspoons Poppy Seeds
Place all ingredients EXCEPT Poppy Seeds in a blender. Blend on high speed until dressing is smooth and berries are fully pureed. Transfer dressing to a pint sized jar for storage. Add the poppy seeds and whisk to blend. Store in fridge a couple hours until ready to use over fruit or green salad. Keeps well for up to 7 days.
 Share on Facebook
Tags: fruit, poppy seed, salad, strawberry salad
Filed in Breakfast,Christmas,Desserts,Soups and Salads | Comments Off on Fresh Strawberry Poppy Seed Fruit Salad
Posted by Tara on Tuesday, May 28th, 2013
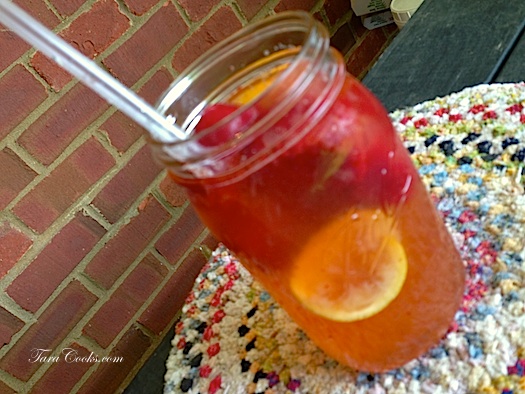
Last week, I posted about making Strawberry Cubes in ice cube trays as a way to preserve all those fresh berries. Here’s one of my favorite summertime treats – fresh squeezed lemonade with a few strawberry cubes tossed in for flavor. Simple. Delcious. Yum!
 Share on Facebook
Filed in Beverages,Miscellaneous | Comments Off on Strawberry Lemonade Made With Strawberry Cubes
Posted by Tara on Saturday, May 25th, 2013

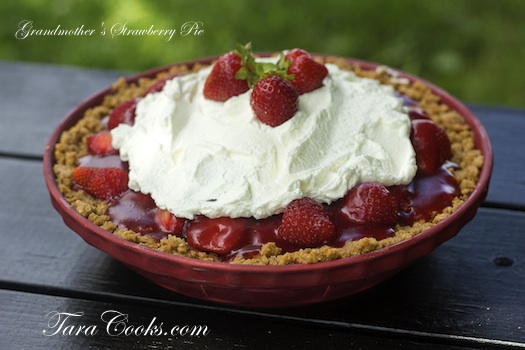
When I think about spring and summer, I am often taken back to my childhood where I find myself helping Grandmother pick fresh strawberries from her own patch, or at her backyard picnic table being served up a cold slice of her Strawberry Pie. I treasure my copy of Grandmother’s hand written recipe for her Strawberry Pie as much as I treasure all the times we have spent together. I have learned so much in her presence. Today I am sharing the recipe my sweet Grandmother passed along to me with all my followers. Strawberry picking here in Tennessee will soon come to an end, so get your fresh berries now and make a pie or two to share with those you love.
The Crust:
You will need either a regular pastry crust that has been cooked already, or you can make your own graham cracker crust. Here’s how I make my graham cracker crust:
- 1/3 box Honey Graham crackers crumbs (I put mine in a gallon Zip Lock bag and pound away with the flat end of my extra special hand carved rolling pin- more on that later).
- 3/4 stick melted butter
- ¼ cup sugar
Pour graham cracker crumbs in a deep dish pie plate, pour butter and sugar over crumbs. Mix well then press mixture firmly with a fork, the flat bottom of a glass, or some other suitable kitchen gadget.
The Pie:
Wash, cap, and halve about 2 cups fresh strawberries. Toss them into the pie crust and spread them evenly.
Bring 1 cup water to a rolling boil in a small sauce pan.
While water is heating, combine 1 cup sugar, 3 Tablespoons Wild Strawberry Jello and 3 Tablespoons corn starch in a small mixing bowl. When water boils, add Jello mixture to the boiling water, stirring constantly with wire whisk. Continue boiling and stirring until mixture begins to thicken. Remove from heat and let cool slightly. Pour over berries and place in refrigerator.
The Topping:
One could certainly use fresh whipped cream for the topping. Here’s a whipped cream cheese version also:
Beat 1 3 oz package of room temperature cream cheese with ½ cup powdered sugar. Whip ½ pint real whipping cream and fold in the cream cheese mixture. Spread over firmed strawberry pie and enjoy!
I also discovered that one small package of Jello is approximately 6 Tablespoons. This recipe could easily be doubled by using a whole package of Jello, 6 Tablespoons cornstarch, 2 cups boiling water, and 4 cups strawberries. The topping could be made with an 8 oz package of cream cheese, 1 cup powdered sugar, and a whole pint of whipping cream. Make two pies and be the Hero of the Day!
Printable Recipe
Download Adobe Reader
 Share on Facebook
Tags: Grandmother's Strawberry Pie
Filed in Desserts,Pies and Cakes | One response so far
Posted by Tara on Saturday, May 25th, 2013
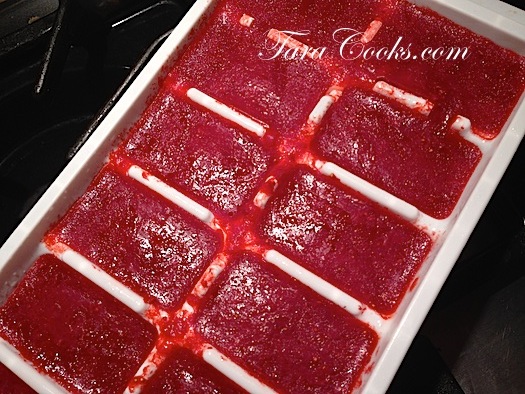
One of the easiest ways I have found to preserve fresh fruit is by making fruit cubes. In this post, I am featuring Strawberry Cubes which prove to have many uses through the summer and into the winter months. Here’s how to make them and what to do with them.
Start with 2 quarts or more of fresh strawberries. Wash them and remove the stems. Fill a VitaMix or food processor or even a blender with fresh berries. Pulse or blend until berries have been smoothly pureed. Pour puree into ice cube trays and freeze. When puree is frozen hard, remove strawberry cubes from ice cube trays and place them in a quart or even gallon Zip-Lock bag(s). You can remove any excess air with a straw inserted into the corner of an almost sealed Zip-Lock bag. Inhale through the straw to remove any extra air in the Zip-Lock bag then remove the straw, being careful not to let any air into the bag, then finish sealing the bag. Place cubes in freezer until ready to use. 2 quarts of strawberry puree should fill about 4 ice cube trays. The cubes should last up to a year in the freezer.
Strawberry cubes can be thawed later to make strawberry jam! Or try tossing 2 or 3 cubes in glass of lemonade or tea. Put 2 or 3 stawberry cubes in the blender and add frozen pineapple, coconut milk, OJ, and some vanilla protein powder for a healthy shake. Or add 1 or 2 cubes to a hot bowl of oatmeal or quinoa (may require reheating). Make my Fresh Strawberry Poppy Seed Dressing during the winter months with a couple of these cubes. And if you think of other uses for these tasty little cubes, let me know!
 Share on Facebook
Tags: freezing strawberries, lemonade, strawberry, tea
Filed in Miscellaneous | 2 responses so far
Posted by Tara on Friday, May 17th, 2013
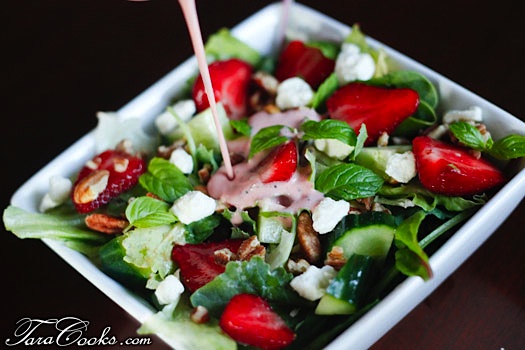
Here’s a refreshing salad to kick start spring – Fresh Strawberry Greens Salad with Fresh Strawberry Poppy Seed Dressing. I used a mix of kale, spinach, and baby Romaine but you certainly could vary the greens to suit your tastebuds. The cold English cucumber, pecan pieces, and Feta cheese nicely compliment the greens and berries. And the dressing makes the perfect taste marriage! Here’s how:
- 2 cups baby kale
- 2 cups fresh spinach
- 2 cups baby Romaine
- 1 cucumber – diced
- 2 cups fresh strawberries (washed, stems removed and sliced lengthwise)
- 1 cup pecan or walnut pieces
- 1 cup crumbled Feta cheese
- 1/2 cup fresh mint leaves (optional)
- Fresh Strawberry Poppy Seed Dressing
In a large serving bowl place the greens and diced cucumber. Top with sliced strawberries, nuts, cheese, and mint leaves. Drizzle Fresh Strawberry Poppy Seed Dressing over salad right before serving. Makes 6 hearty servings.

For the dressing:
- 1/3 cup Mayo
- 1/3 cup Sour Cream
- 1/3 cup Powdered Sugar (or 2-3 Tablespoons honey or Stevia)
- 1/2 cup Fresh Strawberries (washed and stems removed)
- 1 Tablespoon Balsamic Vinegar
- 1/4 teaspoon Ground Ginger
- 2 teaspoons Poppy Seeds
Place the mayo, sour cream, powdered sugar (or honey or Stevia), fresh strawberries, balsamic vinegar, and ground ginger in a blender or high powered food processor. Blend on high speed until dressing is smooth and berries are fully pureed. Transfer dressing to a pint sized jar for storage. Add the poppy seeds and whisk to blend. Store in fridge until ready to use over fruit or green salad. Keeps well for up to 7 days.
 Share on Facebook
Tags: dressing, greens, kale, poppy seed, strawberry
Filed in Soups and Salads | 4 responses so far
Posted by Tara on Friday, May 17th, 2013
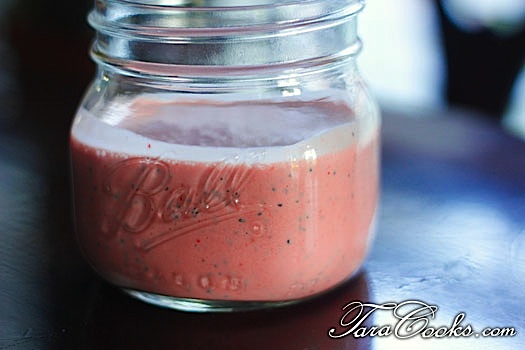
I am excited to be working up some recipes for Lester’s Farms. With the coming of May and strawberry harvest, I’ve created a Fresh Strawberry Poppy Seed Dressing. This dressing compliments Fresh Strawberry Greens Salad as well as Fresh Strawberry Fruit Salad. This dressing is perfectly tongue teasing, being just sweet and tangy and light enough to be refreshing without overpowering.
- 1/3 cup Mayo
- 1/3 cup Sour Cream
- 1/3 cup Powdered Sugar (or 2-3 Tablespoons honey or Stevia)
- 1/2 cup Fresh Strawberries (washed and stems removed)
- 1 Tablespoon Balsamic Vinegar
- Juice of half a lemon
- 1/4 teaspoon Ground Ginger
- 2 teaspoons Poppy Seeds
Place the mayo, sour cream, powdered sugar (or honey or Stevia), fresh strawberries, balsamic vinegar, lemon juice, and ground ginger in a blender or high powered food processor. Blend on high speed until dressing is smooth and berries are fully pureed. Transfer dressing to a pint sized jar for storage. Add the poppy seeds and whisk to blend. Store in fridge until ready to use over fruit or green salad. Keeps well for up to 7 days. Makes approximately 1 3/4 cups.
 Share on Facebook
Tags: dressing, poppy seed, strawberry
Filed in Miscellaneous,Soups and Salads | Comments Off on Fresh Strawberry Poppy Seed Dressing
Posted by Tara on Friday, May 17th, 2013

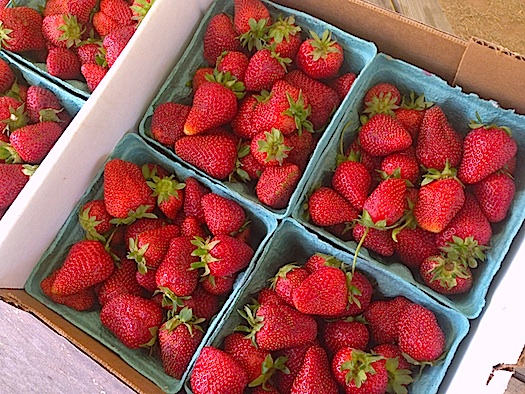
I’ve got 3 reasons to be happy. First May is finally here. And May brings me a second reason to be happy – Tennessee Strawberries! California and Florida berreis cannot beat the taste and sweetness of my home state’s strawberry. And the third reason to be happy is that I live only a couple of miles from our local CSA supplier – Lester Farms! Today is the start of fresh veggie season when I pick up our first CSA box of the season from Lester Farms.
I’ve already bought a flat of strawberries from Lester Farms and frozen a few, pureed a few, turned puree into strawberry ice cubes, made shortcake with a few, and created a strawberry dressing to compliment a couple of new strawberry salads. Please check back to Taracooks.com often in the coming days as I get all theses yummy recipes posted. For now I leave you with this beautiful photo of ORGANIC STRAWBERRIES from Lester’s Farms. Can you taste the berries yet?
 Share on Facebook
Filed in Uncategorized | Comments Off on Highlight – Lester Farm’s Local CSA
Posted by Tara on Tuesday, May 14th, 2013
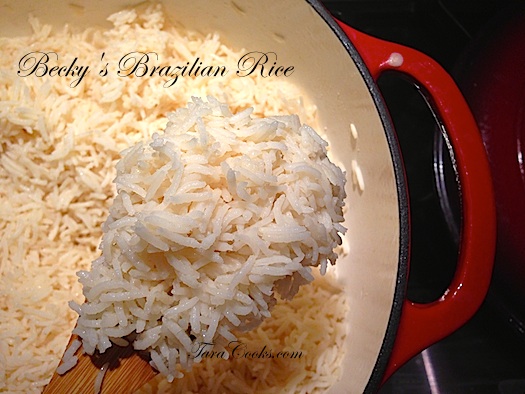 My Sister-In-Law Becky served as a missionary in Brazil for over 30 years. Brazilians eat a lot of dried beans and rice and I do believe Becky’s Brazilian Rice is the BEST rice I’ve ever eaten. Becky taught me how to easily make this dish years ago and since then I’ve served this rice along side Cuban, Mexican, Chinese, and American entrees. These days I double this recipe and keep in in the fridge to serve with a variety of meats through out the week. It also freezes well in Zip-Lock bags and can be defrosted and reheated later.
- 2 Tablespoons Butter
- 2 Tablespoons Grape Seed Oil
- 1 1/2 teaspoons garlic powder
- 1 32 oz carton organic chicken broth
- 2 cups long grain or Jasmine rice
In a large pot or Dutch oven add the butter, oil, garlic powder, and rice. Turn heat to medium and saute mixture 2-3 minutes until rice begins to turn translucent – stir constantly to prevent burning. Slowly add the chicken broth and stir to combine. Turn heat to high and cover pot. Let rice come to a rolling boil. Reduce heat and simmer unit liquid is absorbed. Add salt if desired. I find the chicken broth provides enough salt for our taste.
 Share on Facebook
Tags: Brazilian Rice, Rice, side dish
Filed in Side Dishes | One response so far
Posted by Tara on Monday, May 6th, 2013

Each summer here at Taracooks.com, I have created a new ice cream recipe to share. This year I wanted to create something uniquely Southern, something rich and creamy, something with chunks of ooey gooey goodness. So I’ve taken one of the all time Southern classics – Gooey Butter Cake and married it with a simple no cook ice cream recipe to create the ultimate Southern summertime treat – Gooey Butter Cake Ice Cream. I originally intended to enter this recipe in the recent local county fair but decided to wait until next year. My son reminded me that I had promised to post the recipe after the fair and I am a woman of my word.
The first step is to make the Gooey Butter Cake ahead of time. Here’s how I make mine:
- 1 butter recipe cake mix
- 1 stick melted butter
- 1 egg
Mix the cake mix, melted butter, and egg together in a large mixing bowl until well blended. Spread the mixture over the bottom of a 9×13 glass baking dish then set dish aside while mixing the gooey layer For the gooey layer:
- 1 8oz package cream cheese softened
- 1 stick real butter softened
- 3 eggs
- 1 Tablespoon vanilla
- 1 pound box powdered sugar
Cream the butter and cream cheese on low speed with a mixer. Add the eggs one at a time and blend well after each addition. Add the vanilla and blend well. Slowly add the powdered sugar and beat a couple of minutes on medium speed. Pour mixture over unbaked crust mixture. Place dish in a preheated 350 degree oven and bake for 30-35 minutes or until top is golden brown. Remove dish from oven and let cool for an hour. Then cut the butter cake into 1/2 inch squares, cover dish with plastic wrap, and place dish in freezer for 4 hours, or overnight, or until the ice cream is almost frozen.
For the ice cream:
- 2 cans sweetened condensed milk – chilled
- 1 quart half and half
- 1 quart heavy whipping cream
- 10 pound bag frozen ice chips for freezing ice cream
- rock salt for freezing ice cream
Place the condensed milk in a large bowl. Add the half and half and mix with a whisk until blended. Pour mixture into ice cream maker canister. Add the whipping cream. Add the paddle to the canister and place the top on. Follow manufacturer’s instructions for adding the ice, rock salt, and for freezing ice cream. While ice cream is freezing, remove Gooey Butter Cake from freezer and separate the cut frozen squares. When ice cream is almost completely frozen (after 25-30 minutes in my freezer), stop the freezer, remove the lid but not the paddle and add the Gooey Butter Cake squares. Turn the paddle a few times by hand to mix the squares into the ice cream. Replace the lid and let the ice cream continue turning and freezing until motor stops. Ice cream can be served right away or poured into a large container, covered, and placed in the freezer for later consumption. If all of the ice cream is placed in the freezer to be used later, I like to fluff it a couple of times by stirring it with a large spoon before it completely freezes hard.
I have made this ice cream 3 times already. I have tried it on a few test subjects and their reaction to the taste of this ice cream was far more rewarding than any blue ribbon it might have one at the fair. This recipe is certain winner in the hearts of my family for sure.
 Share on Facebook
Tags: gooey butter cake, ice cream
Filed in Desserts | 2 responses so far
 One of the best things about spring and summer is all the fresh herbs and vegetables to be harvested. Our family is enjoying our CSA box of fresh locally grown lettuces and greens each week from Lester Farms. I used to buy bottled dressings but once I made a couple of varieties of home made dressings with fresh herbs – I knew it would be very hard to go back to store bought dressing. This recipe does not take too long to make if you have a blender or food processor. The taste is definately worth the effort though. The buttermilk can be omitted to create a ranch chip or veggie dip.
![Fruit-Salad-and-Strawberry-Dressing[2] copy Fruit-Salad-and-Strawberry-Dressing[2] copy](http://taracooks.com/wp-content/uploads/2013/05/Fruit-Salad-and-Strawberry-Dressing2-copy.jpg)


