Posted by Tara on Wednesday, April 24th, 2013
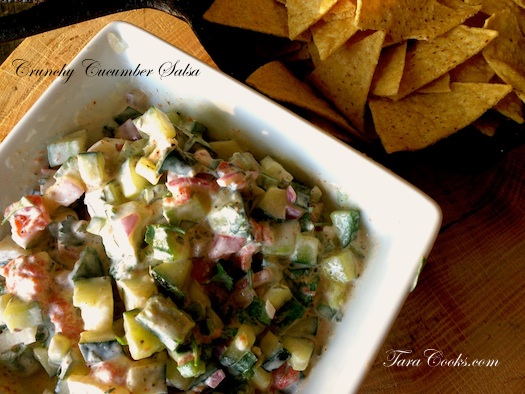
Looking for a healthy and cool summer side dish? Give Crunchy Cucumber Salsa a try. This recipe is GLUTEN FREE, packed with veggies and spice. It can be served with carrot sticks or corn chips for dipping even pita chips if you don’t mind the gluten. This recipe passed the kid and the hubby taste test so it is definitely a keeper here at our house!
- 2 cups finely chopped seeded cucumber (I used an English cucumber)
- 1/2 cup finely chopped seeded tomato (squeeze excess juice out of tomato and press with paper towel)
- 1/2 cup diced red Bell pepper
- 1/4 cup chopped red or sweet yellow onion
- 2 Tbsp minced fresh parsley
- 1 jalapeno pepper, seeded and chopped
- 1/3 cup minced fresh cilantro
- 2 garlic cloves, minced fine or pressed
- 2-3 green onions sliced
- 1/2 cup sour cream
- 1 Tablespoon lemon juice
- 1 Tablespoon lime juice
- 1/4 tsp ground cumin
- 1/4 tsp seasoned salt
- Tortilla chips or Pita chips or carrot sticks for dipping
Place the chopped cucumber, tomato, red or sweet onion, red pepper, jalapeno pepper, cilantro, parsley, garlic, and green onion in a large bowl and toss gently to mix ingredients together. Cover and store chopped ingredients in refrigerator for a couple of hours until ready to serve. In a separate bowl combine the sour cream, lemon and lime juice, cumin, seasoning salt and blend with a wire whisk. This is the dressing for the salsa. Store it until ready to serve salsa. Then pour the dressing mixture over the chilled fresh veggies. Serve right away with corn chips or pita chips or even some carrot sticks for dipping.
Next time I think I will add a little dill weed and some cayenne pepper for a little extra kick.
 Share on Facebook
Tags: cucumber, Gluten Free, healthy, salad, Salsa
Filed in Appetizers,Gluten Free,Low Cal / Low Carb,Side Dishes,Soups and Salads | Comments Off on Crunchy Cucumber Salsa
Posted by Tara on Monday, April 22nd, 2013
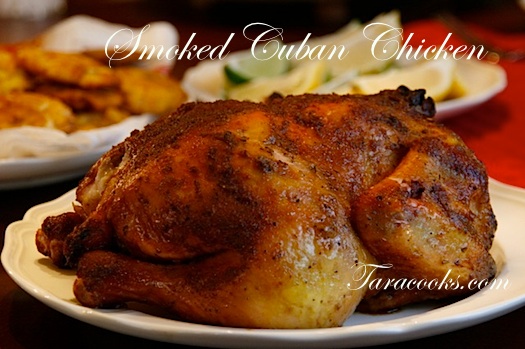
If there is a single category of food that greatly pleases the male population it would have to be SMOKED MEATS! We smoked 2 hens yesterday and fed 6 people. By the time we packed 2 lunch containers with the leftovers, the carcasses were picked clean. Next time your local grocery store has a sale on whole chickens, pick up a couple.
Although we prepared our lady birds in our smoker, the birds could be roasted in the oven just as easily. Here’s how to prepare 2 small hens for the smoker:
For the Brine:
- 2 Large Zip-Lock Bags (I used 2 gallon size)
- 1 cup salt
- 6 cups water
For the marinade:
- 1 cup lime juice (if squeezing fresh limes, zest them first and save the zest, also save a few of the squeezed lime halves)
To season the chickens;
- CUBAN ADOBO DRY RUB SEASONING (click link for recipe)
- Grapeseed Oil
- Lime zest (if you juiced fresh limes, zest them and use with seasoning)
- Lime halves (if you used fresh limes and saved the squeezed halves)
The Brining step is OPTIONAL but sure makes a bird moister and tastier. I was able to fit both hens into a 2 gallon zip lock bag. I dissoved the salt in the cold water and poured the solution into the Zip-Lock bag with the chickens. I then placed the bag inside a large bowl and set it all in the fridge to brine overnight.
Next morning I removed the hens and rinsed them slightly. I placed them inside a clean 2 gallon Zip-Lock bag and added the lime juice. Fresh or bottled juice can be used. I zested, halved, and squeezed 5 limes and had to add a little more bottled juice to make a cup. I let the birds marinate in the lime juice for about 4 hours. Then the birds were ready for the CUBAN ADOBO DRY RUB SEASONING
After the hens marinated, I removed them from the bag and patted them dry with a paper towel. Then I used grapeseed oil (my personal oil preference) to spread over the birds. This oil helps the dry rub stick to the birds. Then I evenly sprinkled the CUBAN ADOBO DRY RUB SEASONING over the top and bottom and sides of the bird. I placed the birds on smoker rack and stuffed the inside with the leftover lime halfs. I finally sprinkled the lime zest over the hens and these little ladies were finally ready for the preheated smoker.
We have a digital thermometer designed for meat smoking. Our firstborn is the expert smoker here. He inserted the probe of the thermometer into the thickest part of the breast and monitored the temperature throughout the cooking process. When the internal temperature reached 165 degrees, the birds were done! We then wrapped the birds in foil, and towels and placed them in a cooler (without ice) to keep them warm until the rest of our dinner was completed and all family member were present for dining. It took about 3 hours for the birds to fully cook in the smoker. However I am pretty sure if they were baked in the oven at 375 degrees, the cooking time would have been faster.
 Share on Facebook
Filed in Main Dishes | 2 responses so far
Posted by Tara on Saturday, April 20th, 2013
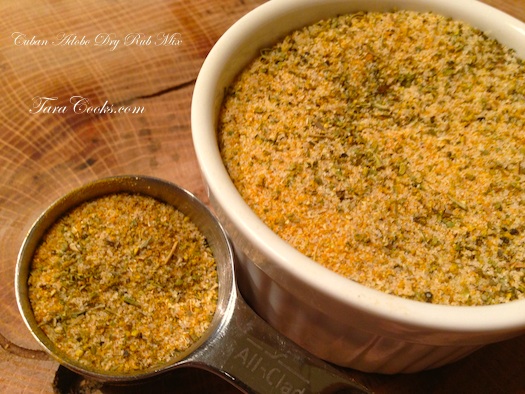
We continue to experiment with our smoker and try different kinds of meats, sauces, rubs, and methods. In order to please dear hubby, I recently created a Cuban feast at our house and I think he was very pleased. We smoked 2 chickens and a pork roast. Here is the recipe I created for the Cuban Adobo Dry Rub. We used this rub on both the chicken and the pork. And I do believe this rub would be tasty on some grilled fish! Since this rub is home made, there are no preservatives or MSG added!
Mix the following ingredients in a 2 cup jar or airtight container:
- 4 Tablespoons sea salt
- 6 Tablespoons garlic powder
- 4 Tablespoons Italian Seasoning or Oregano
- 2 Tablespoons Black Pepper
- 2 Tablespoons Turmeric
- 2 Tablespoons Onion Powder
- 2 Tablespoons Cumin
Makes about 1 1/2 cups rub mix.
 Share on Facebook
Tags: Adobo, Cuban Rub, Dry Rub, Seasoning
Filed in Beef,Fish,Healthy Cooking,Main Dishes,Miscellaneous,Pork | One response so far
Posted by Tara on Sunday, April 14th, 2013
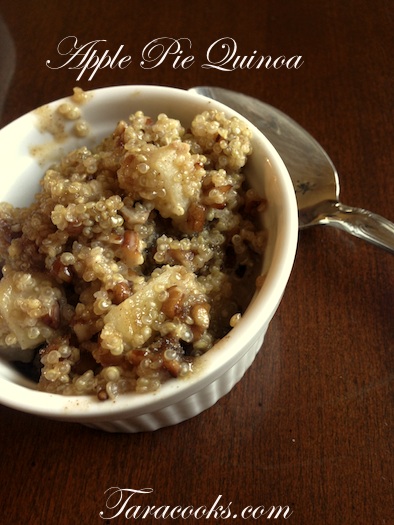
Since most of us around here have either gone Gluten Free or have reduced/eliminated most grains – we thought it was time to give QUINOA a try. I wanted my first attempt cooking QUINOA to become a regular breakfast staple. Apple Pie Quinoa was just the thing to win over dear hubby and at least one of the kids. I cook this recipe on the stove top. Sometimes I make a double batch, pour it up in those little half pint jars and let them cool before sealing them. On the go breakfast is now easy and healthier for us. The little jars can be reheated and taken along for the ride to work or school or where ever. This batch will make about 4 1 cup servings, or fill 8 half pint jars.
- 1 cup rinsed organic quinoa
- 2 cups water, or milk, or unsweetened coconut milk
- dash salt
- 1 small tart apple cored and diced into small bits (peeling is optional)
- 1 teaspoon cinnamon (more or less to suit your taste buds)
- 1/3 cup toasted chopped pecans or walnuts
- 1 Tablespoon butter
- 1-2 Tablespoons dark brown sugar OR 1-2 Stevia packets (I like to use Toffee Flavored Stevia Drops)
In a medium sized sauce pan, add the rinsed quinoa and the water or milk, along with the diced apple. Bring mixture to boil then reduce to a simmer, cover, and continue cooking seeds until they are translucent and have spiraled a bit (10-15 minutes). Watch pan carefully and do not let quinoa boil dry. A little extra water can be added if needed. When grain is cooked, add the salt, cinnamon, nuts, butter, and brown sugar or Stevia. Best served warm. Someone here put real cream over the top of theirs. I heard it was yummy!
 Share on Facebook
Tags: apple pie, Breakfast, Gluten Free, quinoa
Filed in Breakfast,Gluten Free | 2 responses so far
Posted by Tara on Wednesday, April 10th, 2013
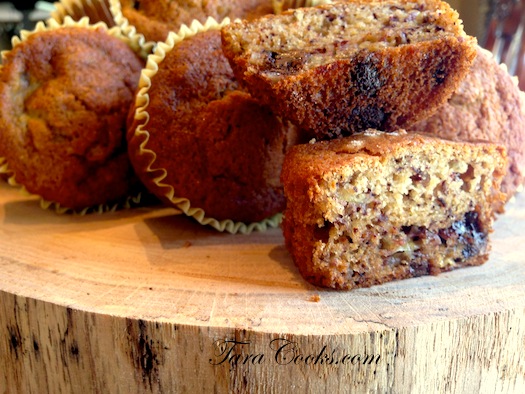
These are a family favorite around here. Nobody will ever know they are Gluten Free unless you tell them. I adapted this recipe just a bit from Dr. Axe’s cookbook.
Preheat oven to 350 degrees and line 24 muffin cups with cupcake liners.
In a medium bowl mix the following:
- 1 3/4 cups Bob’s Gluten Free Flour
- 1 teaspoon baking powder
- 1 teaspoon baking soda
- 1/2 teaspoon sea salt
In a separate bowl add the following, using a wire whisk to blend:
- 1 egg
- 2/3 cup maple syrup or honey
- 1/2 cup grapeseed oil
- 1/2 cup unsweetened coconut milk or yogurt
- 1 teaspoon vanilla
Add wet ingredients to the dry ingredients and mix well. Then add the following:
- 2-3 ripe mashed bananas
- 1 cup chocolate chips (mini chips work best)
- 1/2 cup pecans or walnuts
Use a 1/4 cup measure to fill muffin cups lined with cupcake liners 2/3 full. Place in preheated oven and bake approximately 20-25 minutes or until muffins are golden brown and fully cooked.
 Share on Facebook
Tags: banana, Gluten Free, Muffins
Filed in Breads, Doughs, and Crusts,Breakfast,Gluten Free | 3 responses so far
Posted by Tara on Tuesday, April 9th, 2013
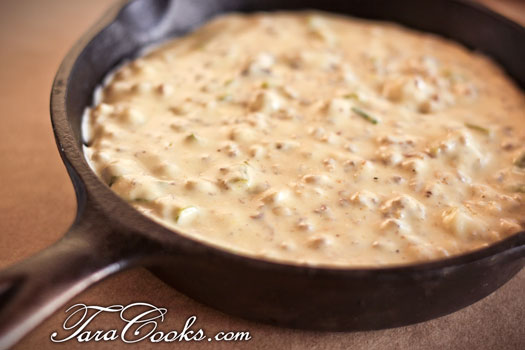
If you were raised in the South, you probably are familiar with the term “HISSY FIT.” A HISSY FIT can be “pitched” or “thrown”. In my childhood, I would often hear a friend refer to his or her mom pitching a HISSY FIT. This simply means that someone or something had caused Mom to become quite agitated with said person or circumstances to the point where Mom would be come hot with anger and in a temper, throw or pitch a fit. I only know of 2 people who ever caused my own Mom to “pitch a hissy fit.” One was my Dad. I’m not telling who the other person was.
The name of this recipe is quite fitting since it will smack your taste buds with a passionate dose of heat. It can be used to dip crackers, corn chips, or even veggie sticks for those Low Carbers out there. Whatever you choose to dip, this recipe is a welcome change to the typical Rotel/Velveeta dip. It was a hit here at a family gathering. I first heard of this recipe from Texas Recipes.com and of course changed it up a little. There are different versions out there though.
Add the following to a preheated crock pot:
- 16 oz sour cream
- 8 oz Velveeta Cheese
- 1 cup Pepper Jack, Monterey Jack, or White Cheddar Cheese
- 8-16 oz cooked pork sausage (mild or HOT to suit your taste)
- 1/2 cup diced green onions
- 1 T Worcestershire sauce
- 1 teaspoon onion powder
- 1/2 teaspoon dried sage
- 1/4 teaspoon curry powder
- 1/8-1/4 teaspoon cayenne pepper
- 1 teaspoon garlic salt
- salt and black pepper to suit your taste
Stir ingredients occasionally until cheeses are melted and ingredients are well blended. Serve with corn chips, saltines, or sliced veggies. Leftoever dip can be stored in fridge and reheated in the microwave or crock pot IF there are any!
 Share on Facebook
Tags: cheese, dip, hissy fit, low carb, sausage
Filed in Appetizers,Halloween,Low Cal / Low Carb,New Years Day,Pork | Comments Off on Hissy Fit Dip
Posted by Tara on Friday, March 29th, 2013

These Easter Egg Bird Nests are a tradition at our house. This is another fun recipe the kids enjoy helping me make each Easter. They are incredibly tasty and equally easy to make. They don’t last long so make a batch and enjoy!
-
1 12oz package of Chow Mien Noodles –slightly crunched
-
1 12 oz package of chocolate chips
-
8 oz (1/2 pound) white almond bark
-
1 cup peanut butter
-
1 package malted Easter eggs, (multi colored)
In microwave safe bowl melt chocolate chips and white almond bark. Microwave a minute at a time, stirring after each minute. Repeat process until chocolate is melted and smooth.
Then add the peanut butter and mix well.
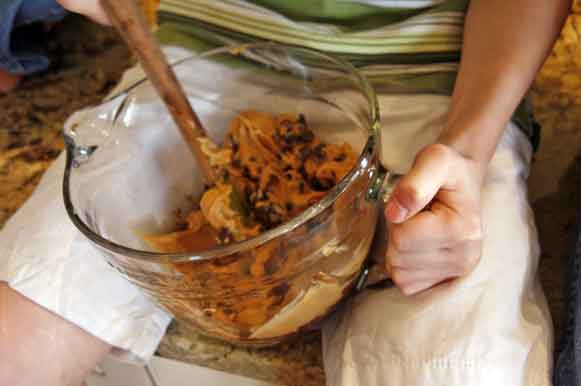
Next add the chow mien noodles and stir until all noodles are well coated.
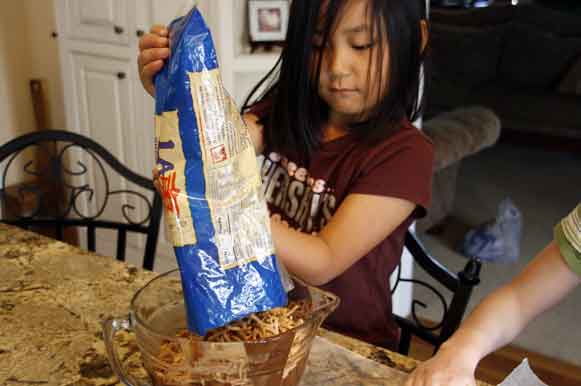
Tear off a couple of 18” sheets of wax paper.
Using a ¼ cup measure, scoop out some of the chocolate noodle mixture. Drop mixture onto wax paper.
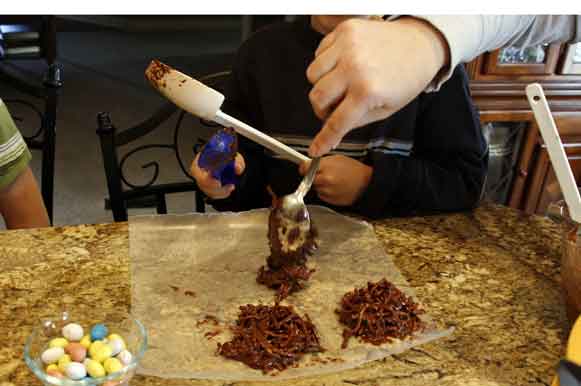
Use a spoon to finish shaping the nests. Our nests were 3-4” in diameter. Use the back side of a spoon or scoop to make the “bowl” of each nest. Drop 3-4 malted eggs into each “bowl” of the nest.
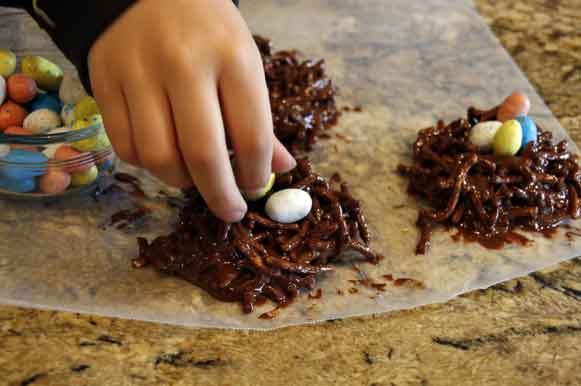
When nests have hardened, remove them from wax paper and transfer to a pretty serving dish. These are quite festive served atop edible Easter grass.
Printable Recipe
Download Adobe Reader
 Share on Facebook
Tags: Easter Egg Bird Nests
Filed in Cookies, Candies, and Squares,Desserts,Easter,Holidays | 2 responses so far
Posted by Tara on Thursday, March 14th, 2013
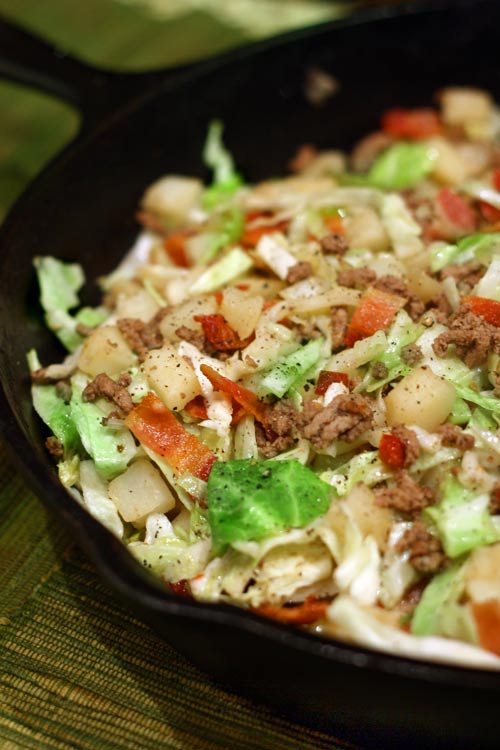
I intended to create a corn beef and hash recipe for St. Patrick’s Day, but did not need to pay $20 for a beef brisket cut at the grocery. Here’s a poor man’s version of an Irish beef dinner called Irish Skillet Beef. The bacon and cabbage compliment the tanginess of the seasoning and mustard. All you need is some Irish soda bread and you’ve got yourself a complete meal.
- 1 pound lean ground beef
- 1/2 cup fresh diced onion
- 2 Tablespoons oil
- 1 pound Ore Ida Hash Brown Potatoes O’Brian
- 1 cup beef broth
- 1/4 cup apple juice
- 2 Tablespoons Mustard
- 2 Tablespoons Vinegar
- 1 Tablespoon Worcestershire Sauce
- 1 teaspoon salt
- 1 teaspoon course ground black pepper
- 4 cups shredded green cabbage
- 4 strips cooked crumbled bacon
In a small mixing bowl, combine the beef broth, apple juice, white vinegar, yellow mustard, worcestershire sauce, salt, and pepper. Whisk to blend and set aside.
In a large iron skillet, brown the ground beef with the fresh diced onion. Drain any excess grease. Add the vegetable oil and hash browns to the beef and onions. Cook over medium heat for about 10 minutes or until hash browns are lightly browned, stirring frequently to prevent sticking. Add the liquid mixture and the shredded cabbage and bacon and cook another 5-10 minutes over medium heat until most of the liquid is absorbed. Serve immediately while hot with some Irish soda bread.
 Share on Facebook
Filed in Uncategorized | 10 responses so far
Posted by Tara on Tuesday, February 26th, 2013
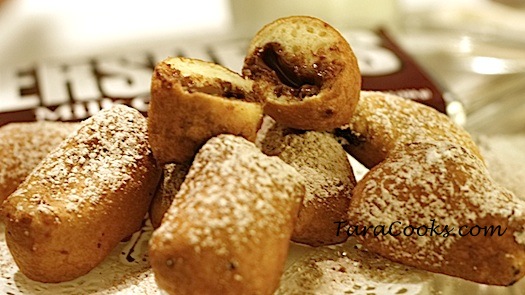
Ever had a fried Hershey Bar? They are incredible! We made these on our last camping trip of this season. How can one go wrong with fried batter and chocolate? I used 2 of the large 4.4 oz size bars (I regular, one Special Dark) and scored each along the retangular lines printed on the bar. There are no words I can think of to describe these delectable chocolate treats. Appreciation and comprehension will only come by tasting these for yourself.
- 3 cups vegetable oil
- 2 cups plain flour
- 2 Tablespoons granulated sugar
- 1 teaspoon baking powder
- 1/4 teaspoon salt
- 1 1/4 cups milk
- 1 ½ teaspoons Vanilla
- 2 medium eggs
- 2 large 4.4 oz Hershey Bars cut along score lines (the family preferred Heshey’s Special Dark)
- Confectioners’ sugar, for dusting
Directions:
In a deep medium skillet or deep fryer, heat the oil over medium-high heat until temperature reaches 375 degrees. (Use a deep-fat thermometer).
Meanwhile, in a large bowl, whisk together the flour, granulated sugar, baking powder and salt. Make a well in the center and add the milk, vanilla, and eggs; whisk until smooth.
When oil reaches 375 degrees, the pieces of scored Hershey bar can be dipped in batter. Using a small set of tongs or a fork, carefully lift the battered piece of chocolate out of the mixture, letting excess drip off chocolate. Place dipped pieces of chocolate into hot grease, being careful not to splatter grease. Fry 6-8 pieces at a time in skillet. Use tongs or fork to flip battered chocolate if necessary. Fry pieces until golden brown, approximately 4-5 minutes. Remove fried Hershey bites from hot oil and drain on layers of paper towels. Sprinkle fried Hershey bites with powdered sugar. Serve while bites are still warm and have lots of milk handy!
 Share on Facebook
Tags: Fried, Fried Hershey Bars, Hershey Bar
Filed in Cookies, Candies, and Squares,Desserts,Uncategorized | 5 responses so far
Posted by Tara on Wednesday, February 13th, 2013
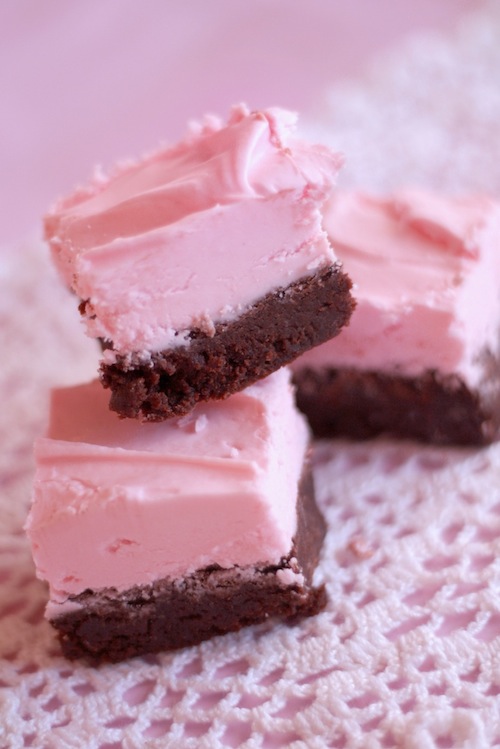
Here’s an easy variation of Best Brownies. I’ve added some instant coffee and frosted them with a mint butter cream icing. Perfect for Valentine’s Day! Bake them for all the people you love who also love coffee, or just bake them for yourself. Enjoy!
- 2 sticks melted butter
- 1/4 to 1/2 cup instant coffee crystals (1/2 cup if you like your coffee strong!)
- 2 cups sugar
- 3/4 cup cocoa
- 4 eggs
- 1 Tablespoon vanilla
- 1 Tablespoon peppermint extract
- 1 cup plain flour
- 1/2 teaspoon baking powder
- 1/2 teaspoon salt
In a small mixing bowl, sift together the flour, cocoa, salt, and baking powder. Set aside.
In a large mixing bowl, add the butter and instant coffee crystals. Microwave for a minute or until butter melts. Mix butter and instant coffee until coffee crystals are dissolved and well blended. Add the sugar and mix well. Next add the eggs and mix well. Add vanilla and peppermint extract and blend. Finally add the flour mixture and stir until well blended. Pour brownie batter into a greased 13×9 baking dish. Bake at 350 degrees for 20-25 minutes. Remove brownies from oven and cool them completely before frosting.
For the frosting:
- 2 pounds of powdered sugar
- 2 stick butter
- 4 Tablespoons milk or cream
- 1 Tablespoon peppermint extract
- 4-6 drops red food coloring
In a deep bowl add the soft butter and powdered sugar. Mix on low speed with electric mixer until butter is well blending into powdered sugar. Add the peppermint extract and the milk. Whip on high speed until frosting is fluffy and spreading consistency. Add another Tablespoon of milk to make icing a little thinner if desired. Add enough red food coloring to make a pink tinted frosting. Ice brownies. Chill slightly before cutting into squares.
 Share on Facebook
Tags: Brownies, peppermint mocha, valentine's day
Filed in Cookies, Candies, and Squares,Holidays | 11 responses so far
