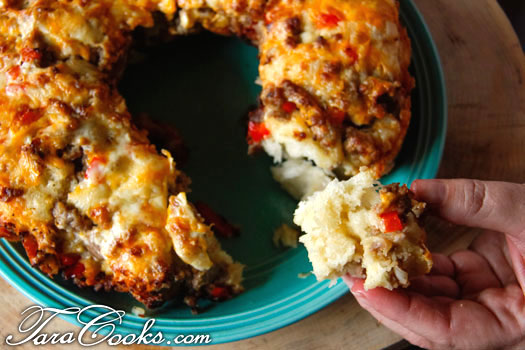
Breakfast Pull Apart Sausage Bread

Posted by on Tuesday, July 29th, 2014

Breakfast Pull Apart Bread

First let me start by stating I WON’T be making this again for a while.  Then why post the recipe if I don’t plan to bake this again?  Because it was so amazingly delicious I couldn’t stop eating it is the reason why!  This recipe can be assembled at night, placed in the refrigerator, and baked for breakfast.  Use frozen bread dough balls or whip up a batch of  ARTISAN BREAD IN 5 MINUTES A DAY.  YUM!

  • Frozen Bread Dough Balls or 1/3 batch of ARTISIAN BREAD IN 5 MINUTES A DAY rolled into 1″ balls
  • 1/2 pound sausage (not links)
  • 1/2 medium onion – diced
  • 1/2 red or green bell pepper – diced
  • 1/2 stick real butter cut into pieces

In a medium skillet over medium heat scramble the sausage until mostly browned, then add the diced peppers and onions. Sautee for a couple of minutes or until onions begin to turn translucent.  Set mixture aside.

Generously grease a bundt pan.  For a crispy tasty flavor go all out and use some bacon drippings.  Then fill the bottom of the pan approximately 1/3-1/2 full of 1″ bread dough balls.  I had a batch of the ARTISAN BREAD IN 5 MINUTES A DAY made and stored in the fridge. I used about 1/3 of the batch to make the bread dough balls.  Place the cooked sausaage, peppers and onions on top of the bread dough.  Add the shredded cheddar cheese and dot generously with butter.  Cover pan with foil and place it in the refrigerator overnight.  Remove the pan from refrigerator when ready to bake.   Preheat oven to 425 degrees. Let pan set on counter top about 20-30 minutes, while oven preheats.  Bake for 20 minutes, then uncover pan and bake another 10-15 minutes, or until bread is fully cooked in center of pan, and cheese is golden brown.  Use a knife to go around the bread, and to help gently remove bread when it is cool enough to handle.  Place a pretty plate on top of bundt pan and flip all upside down to release breakfast bread.  Serve while bread is still pretty warm.

Filed in Appetizers,Breads, Doughs, and Crusts,Breakfast,Christmas,Pork | One response so far
Katrina’s Cream Chicken Tetrazinni – Can Be Gluten Free

Posted by on Wednesday, July 23rd, 2014

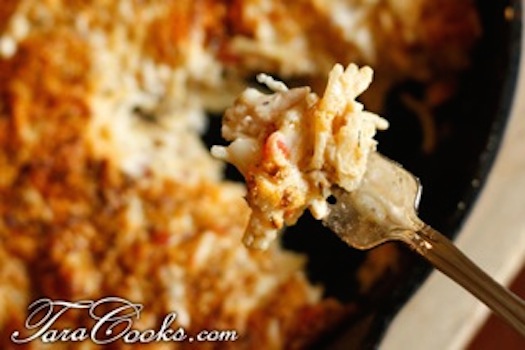
Tettrazini-2

Our family modified this recipe from Ms. Katrina’s slightly. We like to make our own cream of chicken soup to avoid MSG and gluten.  Instructions are given here for making your own cream soup for this recipe.  2 10 oz cans of store bought cream of chicken soup can be used in place of the home made but the home made adds extra creaminess to the dish.

  • 1 12 oz can evaporated milk
  • 2 Tablespoons butter
  • 1 1/2 cups water
  • 4 Tablespoons Cornstarch
  • 2 NOT CHICKEN brand bullion cubes
  • 1 teaspoon black pepper
  • 1/2 teaspoon celery salt

In a medium size pan add the butter and let it melt over medium heat. While butter is melting add the corn starch and water to a pint jar, place lid on jar, and shake vigorously to dissolve the corn starch.  Add this mixture along with the evaporated milk, chicken bullion cubes, pepper, and celery salt to the melted butter.  Use a wire whisk to stir almost constantly until mixture thickens.

*****************************

  • 8 oz sour cream
  • 3/4 cup Parmesan cheese
  • 1 cup shredded Montery jack cheese
  • 1 deli chicken, meat pulled and diced into small pieces
  • 4 oz jar sliced mushrooms – drained
  • 4 oz jar diced pimentoes
  • 8 oz angel hair pasta, broken into 2″ pieces and cooked according to package directions, then drained (can use gluten free pasta instead)
  • 8 oz melted butter mixed with 2 minced cloves of garlic
  • more Parmesan cheese for topping casserole -about 1/2 cup
  • dried dill weed
  • paprika

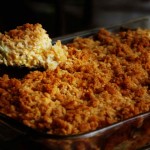
As soon as the home made cream of chicken soup has thickened, add the Montery jack cheese, Parmesan cheese, and sour cream to the soup and stir to melt and blend the cheeses.  Set aside creamy mixture.  In a large mixing bowl add the diced chicken, mushrooms, pimento, and 8oz melted butter.  Stir to blend well.  Then add the cream soup/cheese mixture to the chicken/pasta mixture and stir slightly to mix well.  Pour mixture into a  gerased 13×9  dish or a large greased 10″ iron skillet.  Spread mixture evenly over dish or skillet.  Top with more Parmesan cheese, dried dill weed, and paprika.  Bake in 350 degree preheated oven 30-40 minutes or until cheese is golden brown and casserole is bubbly.

This recipe freezes well and is the perfect dish to make for large crowds or take to someone who is sick or on bed rest.

Filed in Casseroles,Gluten Free | 2 responses so far

Southern Peach Cobbler with Gluten Free Option

Posted by on Sunday, July 20th, 2014

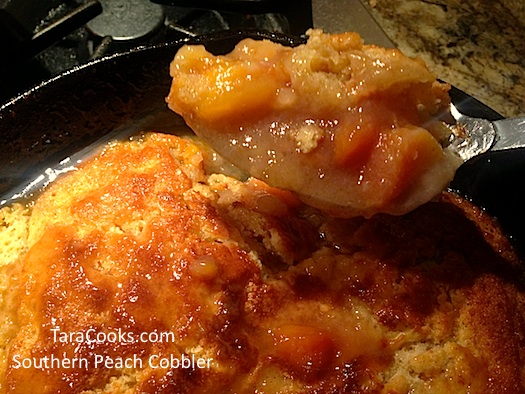
Southern Peach CobblerHarvest is in full swing here in the south, including one of my summer time favorites – PEACHES! Lester Farms is selling peaches now  and I can think of no easier dessert to whip up with them than a good old fashioned southern peach cobbler.  You can have one ready to pop into the oven in the time it takes for it to preheat.
  • 3/4 cup plain flour (or Bob’s Gluten Free Baking Mix)
  • 3/4 cup sugar
  • 2 teaspoons baking powder
  • 1/4 teaspoon salt
  • 3/4 cup whole milk
  • 6 Tablespoons butter
  • 2 cups fresh peeled and sliced peaches (or apples or blackberries)
  • 3/4 cup sugar

Combine the flour, sugar, baking powder, salt, and milk in a medium sized bowl and set aside.  In a 2 quart baking dish, add the melted butter.  Peel and slice the peaches, then toss in a separate bowl with remaining sugar.  Add a dash of nutmeg or cinnamon if desired.  Pour flour/milk mixture into the baking dish with melted butter.  Then pour the sliced, sweetened peaches evenly over batter/butter mixture. DO NOT STIR!  Bake in 350 degree preheated oven for 50-60 minutes or until cobbler is golden brown and cooked thoroughly.  Serve warm with vanilla ice cream.  This recipe can also be cooked in an iron skillet, making a beautiful southern presentation.  For a gluten free recipe, substitute Bob’s Gluten Free Baking Mix for the flour.

Filed in Breads, Doughs, and Crusts,Desserts,Gluten Free | Comments Off on Southern Peach Cobbler with Gluten Free Option

Veggie Puppies – With Gluten Free Option

Posted by on Saturday, July 19th, 2014

veggie puppies

I am loving all the fresh garden vegetables in harvest right now.  My Lester Farm’s CSA basket is full of garden fresh goodness each week.  The items in one of my recent baskets were an inspiration for this recipe.  For a gluten free version, see instructions at the end of the recipe.

  • 1/2 cup fine chopped broccoli
  • 1/2 cup diced squash
  • 1/2 cup diced zucchini
  • 1/2 cup fresh corn nibblets
  • 1/2 cup shredded carrots
  • 1/2 medium onion diced
  • 1 1/2  cups self-rising corn meal
  • 1/2 cup self-rising flour
  • 1/2 cup buttermilk
  • 1 egg
  • 1 teaspoon seasoned salt

Place the diced/chopped broccoli, squash, zucchini, corn, carrots, and onions in a glass dish and microwave 3-5 minutes until vegetables are slightly tender. While vegetables are cooking, mix the self-rising meal, buttermilk, egg, and seasoned-salt  together.  Add the cooked vegetables and blend to mix well. Prepare a deep fryer with 3-4 cups of vegetable oil and preheat to 400 degrees. When fryer is preheated, use a 1 oz cookie dough scoop to drop batter into hot grease. Cook 2-3 minutes or until golden brown on underside, then use tongs to flip puppies over.  Cook another 1-2 minutes, or until puppies are brown on both sides.  Remove them from hot oil, and drain them on fresh paper towels.  Serve while warm with dipping sauce.

Dipping Sauce

  • 1/2 cup mayo
  • 1/2 cup ketchup
  • 1-2 teaspoons Tobasco sauce

Mix together in small bowl for dipping puppies!

* For a gluten free version, use 2 cups of plain gluten free corn meal along with 2 teaspoons of baking powder, 1 teaspoon baking soda, and 1 teasoon salt in place of the self-rising corn meal and flour.

Filed in Appetizers,Breads, Doughs, and Crusts,Gluten Free,Side Dishes | Comments Off on Veggie Puppies – With Gluten Free Option

Garden Fresh Lemon Pasta Bowls

Posted by on Thursday, July 10th, 2014

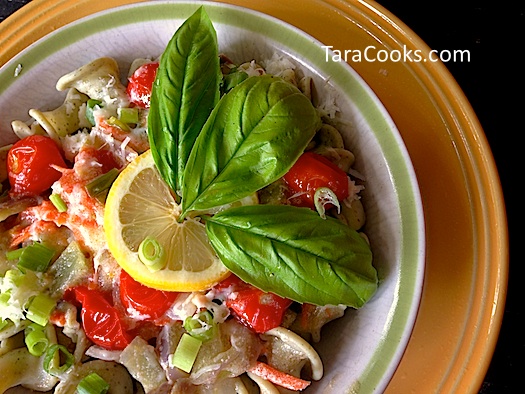
Lemon Pasta Bowl

These pasta bowls can be whipped up in a snap and made with some fresh garden veggies and specialty pasta.  Feel free to vary the vegetables as your garden is harvested this summer.

  • 16 oz pasta variety (pictured is gluten free Lemon Parsley Pasta) – cooked and drained according to package directions
  • 6 tablespoons browned butter
  • 2 large cloves minced garlic
  • 1/2 sweet chopped onion
  • 1 green, purple, red, or yellow Bell pepper – diced
  • 2 cups cherry tomatoes – halved
  • 3/4 cup shredded carrots
  • 3-4 basil leaves chopped
  • 3-4 chopped green onions
  • 1 chicken bullion cube (I use NOT CHICKEN, MSG free)
  • 1 cup half and half
  • 1 cup water
  • 2 tablespoons cornstarch
  • juice from 2 lemons
  • zest from 2 lemons
  • salt and pepper to taste
  • fresh grated Parmesan cheese
  • extra basil leaves for garnish
  • fresh lemon slices for garnish

Cook pasta according to package directions, drain, rinse, and set aside.

In a large skillet brown the butter.  Add the minced garlic, chopped sweet onion, diced peppers, halved tomatoes, shredded carrots, chopped green onions, and chopped basil leaves to the browned butter.  Toss vegetables to coat them with the browned butter.  Add the chicken bullion cube.  Let the veggies simmer 3-4 minutes. While vegetables are simmering, add the half and half, water, and corn starch to a jar. Place lid on jar, and shake to blend corn starch.  Add mixture to the skillet of vegetables and simmer just long enough for the sauce to begin to thicken. Add the lemon juice and lemon zest along with the salt and pepper to taste to the mixture and remove skillet from heat.  Serve the vegetables over pasta.  Garnish with Parmesan cheese, lemon slices and basil leaves.

This dish can be served in individual bowls or mixed together in a large dish for serving buffet style.  The sauce is gluten free and the whole dish can be gluten free depending on the pasta choice.  Add some baked lemon pepper chicken to the pasta for variety.

Filed in Gluten Free,Healthy Cooking,Main Dishes,Meatless Monday | Comments Off on Garden Fresh Lemon Pasta Bowls

Just Peachy Lemonade

Posted by on Sunday, July 6th, 2014

peachlemonade3

Just Peachy Lemonade is a refreshing way to beat this Tennessee heat.  The peaches are ready to harvest around here.  Saturday I whipped up some peach lemonade,with fresh peaches and real lemons, and it was all gone by nightfall.  It was a hit here at home!

  • 2 cups peach puree (from fresh or frozen peaches)
  • 2 cups fresh lemon juice  (about 12 lemons)
  • 2 cups sugar
  • cold water

Puree fresh or frozen peaches in a Magic Bullet or a blender.  Pour peach puree into a gallon pitcher, add lemon juice, sugar, and stir until sugar is dissolved.  Then fill pitcher with cold water and ice.  Find a happy place to sit a spell, prop up your feet, relax and sip peachy lemonade.

This recipe can easily be halved to make 1/2 gallon.

Filed in Beverages | 12 responses so far

Cool as a Cucumber Salad

Posted by on Wednesday, July 2nd, 2014

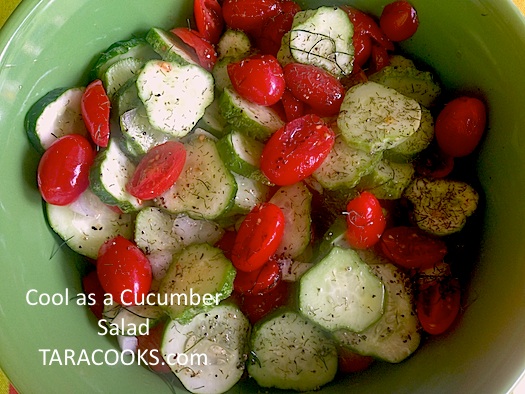
Cool Cucumber Salad

Looking for a quick, light, savory salad?  Try my Cool as a Cucumber Salad made with Lester Farm’s pickling cucumbers, a light dressing, and some garden fresh cherry tomatoes. This is a perfect cool down side for 4th of July picnic!

  • 3 cups sliced fresh cucumbers (can use pickling cucumbers, English cucumbers, or regular cucumbers)
  • 1 Vidalia onion sliced or diced
  • 1 cup cherry tomatoes, halved (or use a large home grown tomato)
  • Fresh or dried dill weed for garnish

Dressing:

  • 1/4 cup Rice Vinegar *
  • 2 Tablespoons Olive or Grape Seed Oil
  • 1 teaspoon course ground black pepper
  • 1 Tablespoon sugar (or use 1 packet Stevia for sugar free recipe)

Place the sliced cucumbers, onions, and tomatoes in a medium sized serving dish.  Make the dressing by adding the rice vinegar, oil, pepper, and sweetener to a pint size glass jar. Put the lid on jar and shake it to mix the dressing together. Pour dressing over the cucumber mixture and chill for about an hour.

*Using rice vinegar instead of apple cider or white vinegar is a good alternative for people who do not like the strong taste  of the latter two.  Of course apple cider or white vinegar can be used in place of the rice vinegar if the stronger, more acidic taste is preferred.

Filed in Gluten Free,Healthy Cooking,Side Dishes | Comments Off on Cool as a Cucumber Salad

Best Baby Back Roasted Rib Rub

Posted by on Monday, June 30th, 2014

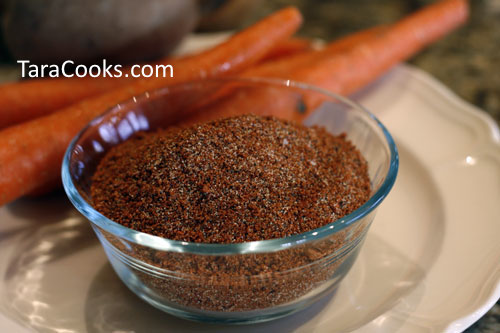
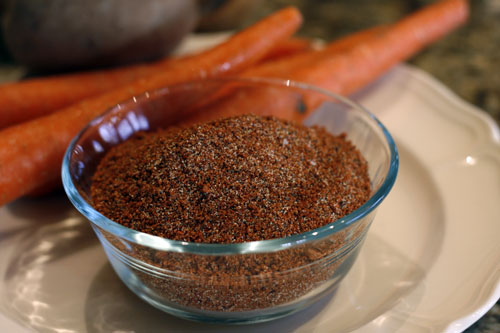
Best-Rib-Rub-Seasoning

Hello, Richard here. I’m usually behind the scenes here at Taracooks but when Tara recently had the opportunity to appear on the Better Nashville show on Channel 4 again, we teamed up to make a couple of recipes that are out-of-this-world good. One of them is Baby Back Ribs using Tara’s Best Roasted Rib Rub. Here’s the rub recipe.

  • 6 Tablespoons brown sugar
  • 6 Tablespoons paprika
  • 3 Tablespoons black pepper
  • 3 Tablespoons garlic powder
  • 2-3 Tablespoons instant coffee
  • 1 Tablespoon celery salt
  • Kosher Salt
  • Dijon Mustard

Mix together the brown sugar, paprika, pepper, garlic powder, instant coffee, and celery salt. Store rib rub in a shaker or zip lock bag until ready to use.

Best-Rib-Rub-Seasoning

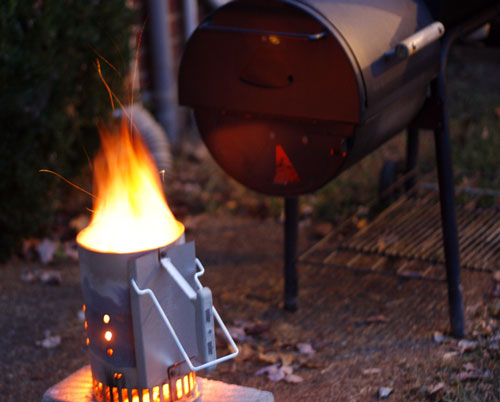
OK, we’ve got the rub prepared so let’s get down to cooking.  Now you can cook the ribs in the oven at 300 degrees for two hours.  But I prefer using a smoker grill.  First a few basics about the smoker grill. We are not going to grill over an open flame. We are going to slow cook the ribs allowing the heat and smoke from the firebox on one end of the grill to pass through to the other end and out the chimney. You’ll notice that I’m using a metal canister to start the charcoal. This gets the charcoal going faster than starting it in the firebox.

Charcoal-starting

Now if you work as a team, like we do, by the time one person has the smoker grill hot and ready to go, the other can have the ribs ready with the spice mix, salt and mustard.

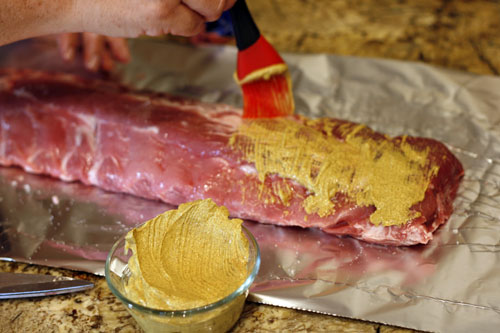
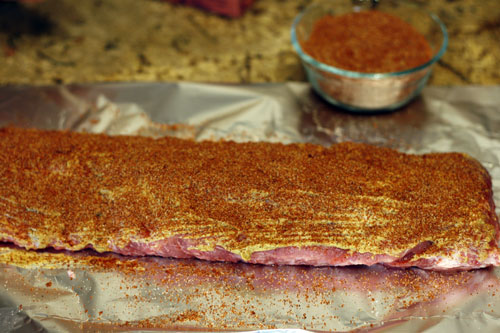
So while I’m getting things heated up outside, Tara is preparing the ribs in the kitchen. She starts with a sprinkle of salt, then brushes Dijon mustard on both sides and finally a generous dusting of the seasoning mix on both sides.

Ribs-with-Mustard

Ribs-with-Seasoning

The ribs are then wrapped in foil for cooking. This keeps them moist as they cook.

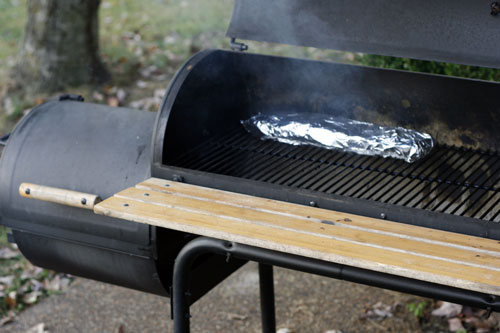
When your smoker grill reaches 300 degrees, your ready to put the ribs on.  But just before I do this, I add some presoaked and drained hickory chips to the firebox (about 3 cups).  This adds a wonderful flavor to the ribs and whatever else you have hidden under the hood of your grill.

Ribs-on-Grill-1

Allow 2 hours of cooking time and try to maintain 300 degrees. You may have to add hot charcoal, or open the vent on the firebox to increase the temperature. To decrease the temp you can close the firebox vent.

When you have about 30 minutes to go open the top of the foil being careful not to let the juice run out so that the smoke can do its magic on the meat.

Isn’t it great being a carnivore?

Stay tuned for another smoking’ good recipe coming soon. And be sure to watch (or TiVo) the Better Nashville show on Thursday, Sept. 17 at 1:00 PM Central time.

Printable Recipe

Best Baby Back Roasted Rib Rub

Download Adobe Reader

Filed in Pork | Comments Off on Best Baby Back Roasted Rib Rub

Southern Green Beans with New Potatoes from Lester Farms CSA Basket

Posted by on Friday, June 27th, 2014

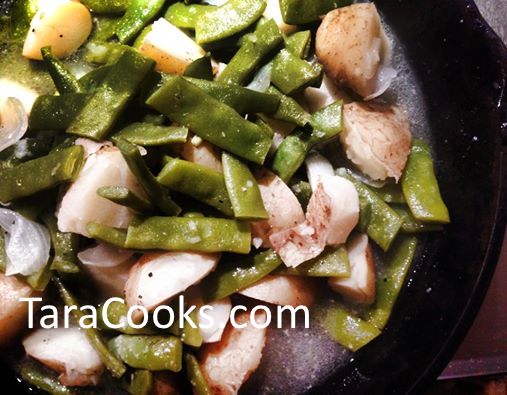
beans and new potatoes

One of the best things about the South’s muggy buggy summers is eating all those fresh garden veggies you can pick up at places like Lester Farm’s Produce, or even your back yard garden.  Last week there were some amazingly tasty fresh picked green beans and new potatoes in my Lester Farm’s CSA basket.  Prep time for this pot of down home goodness took no more than 10  minutes.  Here’s how:

In a large cast iron Dutch oven add:

  • 4 cups fresh prepared green beans (tips and strings removed, cut in half, then rinsed)
  • 8-10 small unpeeled new potatoes (scrubbed well, then quartered)
  • 1 small peeled sweet onion cut into quarters
  • 2 Tablespoons bacon drippings
  • 2 teaspoons sugar
  • salt and pepper to taste
  • Optional – 1 cup diced country ham
  • 2 quarts water

Add all the ingredients to a Dutch oven and cover. Bring mixture to a boil then simmer 30-40 minutes or until beans and potatoes are tender.  If adding country ham, salt may be omitted.  If mixture boils dry before beans and potatoes are tender, more water can be added 1 cup at a time.

Filed in Side Dishes | Comments Off on Southern Green Beans with New Potatoes from Lester Farms CSA Basket

Farm Fresh Eggs from Lester Farms!

Posted by on Tuesday, June 10th, 2014

Hey local fans.  Are you looking for some farm fresh cage free eggs?  Head over to Lester Farms Stand and get you a dozen or two.  Check out my recipe here on the blog for dressed eggs.  These are also perfect in a quiche or omlet.  eggs

Filed in Uncategorized | Comments Off on Farm Fresh Eggs from Lester Farms!

« Newer Entries - Older Entries »