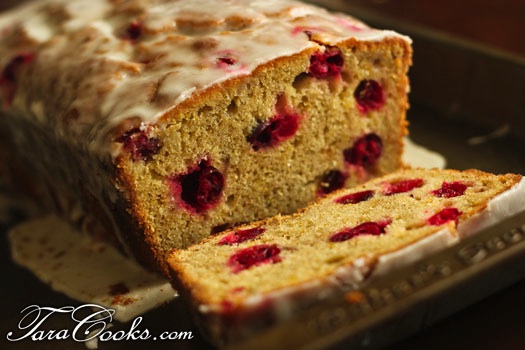
Orange Cranberry Bread-Gluten Free or Not

Posted by on Sunday, December 7th, 2014

Cranberry-Bread

You are going to have to try this recipe to believe how moist and tart and tangy and tantalizing the taste is.  And this bread is so festive and can be made into 2 regular size loaves or 6 mini loaves – either size suitable for gift giving at Christmas time.  Use Bob’s Gluten Free Baking Mix for a Gluten Free bread or just use plain flour if you prefer.  I think this recipe was originally in Sunset Magazine but I’ve adapted here just a bit by using fresh instead of dried cranberries and gluten free baking mix.

  • 3 sticks soft butter
  • 1 1/2 cups sugar
  • 4 eggs
  • 1 cup orange juice
  • 1 cup sour cream

  • 2 Tablespoons orange zest
  • 2 teaspoons vanilla extract
  • 4 cups flour (all purpose or Bob’s Gluten Free Baking Mix)
  • 1 Tablespoon baking powder
  • 1/2 teaspoon salt
  • 1 1/2 cups fresh cranberries
  • 1 cup chopped nuts (optional)
  • For the glaze:
  • 2 cups powdered sugar
  • 7-8 Tablespoons Grand Marnier or Orange Juice
  1. Preheat oven to 330°. Butter two 6-cup-capacity loaf pans (or, if making the mini loaves, butter six 2-cup-capacity pans). With an electric or standing mixer on medium speed, cream butter and sugar together in a large bowl until pale and fluffy, about 3 minutes. Add eggs one at a time, mixing well after each. Add orange juice, sour cream, orange zest, and vanilla; mix until blended. In a separate bowl, whisk together flour, baking powder, and salt. Add flour mixture and cranberries to wet ingredients and mix just until dry ingredients are absorbed; do not overmix.Pour batter into prepared loaf pans. Bake until a toothpick inserted in centers of breads comes out clean, 70 to 75 minutes for large loaves and 60 minutes for mini loaves. Meanwhile, in a small bowl, whisk together powdered sugar and 7 tbsp. Grand Marnier. Glaze should have consistency of thick maple syrup or corn syrup. If it is too thick, thin with an additional tbsp. of liqueur. Let loaves cool in pans for 10 minutes, then remove and transfer to a cooling rack set over a large baking sheet. With a thin skewer or long toothpick, poke deep holes in tops of loaves. Drizzle with Grand Marnier glaze so that it coats the top, runs down the sides, and seeps through the holes. Let loaves cool completely, then slice. Refrigerate or freeze leftover bread.

Filed in Breads, Doughs, and Crusts,Gluten Free | One response so far
Pumpkin Pie – Gluten, Dairy, and Sugar Free

Posted by on Wednesday, November 26th, 2014

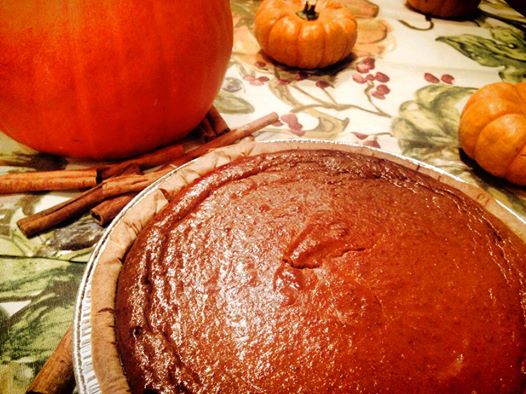
pumpkin pieI needed to create a gluten, dairy, and sugar free recipe recently for a family gathering.  This was my first attempt at pumpkin pie without sugar.  This pie is delicious – so delish I’m not sure your guests would ever know it is free of dairy and sugar and gluten.  I found organic gluten free ready made pie crust at my local Kroger grocery store.  But you could also make a crustless pie just as easily.  This pie got rave reviews with the dinner guests, and there wasn’t a single bite left over.

  • 1 15 oz can pumpkin puree
  • 3 eggs
  • 1/2 cup coconut or almond milk
  • 1/2 cup erythritol
  • 2 Tablespoons Maple syrup
  • 2 individual packets of Stevia
  • 2 individual packets of Monk Fruit sweetener
  • 2 teaspoons vanilla
  • 1 teaspoon cinnamon (or more if you prefer)
  • 1/2 teaspoon cloves
  • 1/4 teaspoon nutmeg
  • 1/4 teaspoon salt

In a large mixing bowl beat the pumpkin puree with the eggs until smooth and creamy.  Add the sweeteners, spices, and the coconut or almond milk.  Beat the mixture until smooth.  Have your favorite gluten free pie crust prepared and in a pie plate.  Pour the pie filling into the crust. Bake in a 350 degree preheated oven for 40-45 minutes.  Let pie cool before serving.

Chopped walnuts or pecans could also be sprinkled on top before baking.

Filed in Gluten Free,Pies and Cakes,Thanksgiving,Uncategorized | Comments Off on Pumpkin Pie – Gluten, Dairy, and Sugar Free

Old Fashioned Banana Pudding

Posted by on Monday, November 17th, 2014

southern banana pudding

I don’t know why I equate home made banana pudding with church gatherings, but I still do. I have pleasant memories of attending many a church social where somebody’s grandmother had made banana pudding from scratch.

I have always been fond of home made banana pudding. This is a southern tradition I hope never dies. Although we southern cooks have instant JELLO pudding available, NOTHING beats the taste of home made pudding whipped up from real ingredients. And guess what? Real banana pudding is MUCH easier than you think. I have a secret to share – I make mine in the microwave!

In large microwave safe glass bowl add and mix together:

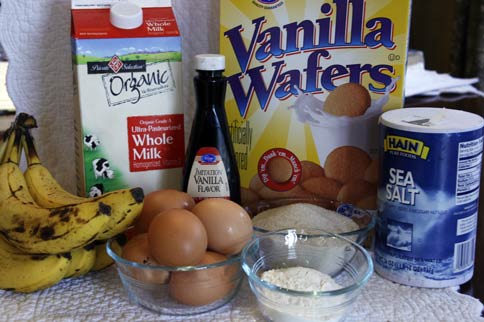
Banana-Pudding-Ingr

  • 1 ½ cups organic sugar
  • ¼ cup plain organic flour
  • ½ teaspoon salt

Add and stir with a wire whisk:

  • 4 cups organic whole milk

Microwave milk mixture for 2 minutes. Stir with wire whisk and microwave 2 more minutes.

While mixture is microwaving, separate 6 egg yolks from the egg whites. Save egg whites if you and your family prefer meringue topping on your banana pudding. Mix the eggs with a fork.

By the time the milk mixture has been in the microwave for 4 minutes, it should be warm. Remove about ½ cup of the warm milk mixture and add it to the beaten eggs. Mix well, then pour egg mixture into the bowl with the warm milk mixture. Whisk to blend and then return the mixture to the microwave. I continue microwaving and stirring 1 minute at a time until mixture has thickened almost to the consistency of pudding. This mixture will thicken a little more as it cools.

Add 1 TABLESPOON of vanilla extract and stir.

I like to use my trifle dish, but any 2-3 quart casserole dish will do just fine for the grand assembling of the banana pudding. Our kids like to take over here and layer the pudding with a 16oz package of vanilla wafers and 4 peeled sliced bananas. Organic vanilla wafers are available now in the organic section of most grocery stores.

(Some folks I know like to dip the banana slices in Sprite or ginger ale to keep them from turning brown. Personally- I don’t care for the citrus taste, but other folks may not like brown bananas. My thinking is that banana pudding typically doesn’t last long enough for the bananas to turn brown!)

Pour about 1/3 of the pudding mixture into the dish; add about ½ the banana slices and 1/3 of the vanilla wafers. Repeat this process using 1/3 pudding, ½ bananas and 1/3 wafers. Top with the remaining 1/3 pudding and vanilla wafers.

If you are a BIG fan of meringue, beat the eggs whites on high speed in a glass, grease free dish until soft peaks form. Keep beating and gradually pour ½ cup sugar. Spread over top of pudding. Bake meringue in a 350 degree oven for 8-10 minutes or until lightly browned.

Here at home, we like REAL whipped cream on ours. I whip up a PINT of whipping cream until soft peaks form and gradually add ½ cup POWDERED sugar. YUM!

On a final note, I have some members of this household who DESPISE bananas. If you have any anti-banana people and want to keep peace in the household, feel free to omit the bananas and add extra wafers. This is how we manage to keep everyone happy.

Printable Recipe

old-fashioned-banana-pudding

Download Adobe Reader

Filed in Desserts | Comments Off on Old Fashioned Banana Pudding

LOADED POTATO SOUP

Posted by on Monday, October 13th, 2014

Loaded Potato Soup
  • 12oz package bacon – cooked and crumbled, save 2 T bacon drippings
  • 2 medium sized sweet onions – diced
  • 2 stalks celery – diced
  • 2 32oz boxes vegetable or chicken broth
  • 2 chicken bullion cubes (I use NOT CHICKEN brand – gluten free, MSG free)
  • 6 medium potatoes – peeled and diced (about 2 pounds)
  • 1 stick butter
  • 3/4 cup flour (use cornstarch for gluten free recipe)
  • 4 cups whole milk – divided
  • 12 oz sour cream – 1 cup for soup, 1/2 cup for garnish
  • 3 cups shredded cheddar cheese – 2 cups for soup, 1 cup for topping
  • 1 cup green chopped onions – 1/2 cup for soup, 1/2 cup for garnish
  • salt and pepper to taste

Cook bacon strips in large skillet or in microwave. Reserve 2 Tablespoons of the drippings.  Crumble cooked bacon and set aside.

Sautee the diced onions and celery in the large skillet with the 2 Tablespoons of drippings and set aside.

In a large Dutch oven add the vegetable or chicken broth.  Bring broth to a boil, then add the diced potatoes.  Reduce heat to medium and let potatoes simmer 10-15 mintues, or until potatoes become tender.  Add chicken bullion cubes. While potatoes are simmering in broth,  place the stick of  butter in a saucepan.  Melt the butter in the saucepan over medium heat then add the flour (or cornstarch). Whisk the mixture quickly to blend the flour and butter, then gradually pour 2 cups whole milk into the butter/flour mixture and continue whisking over medium heat.  Mixture will begin to thicken.  Continue whisking until mixture is smooth but slightly thick.  Then add thicken mixture to the tender potatoes and broth.  Stir gently to mix the flour mixture with the potatoes and broth.  Then add the other 2 cups of milk to the dutch oven. Also add the sautéed onions and celery to the Dutch oven.  Add salt and pepper to taste.  Reduce heat to low and add 2 cups grated cheddar cheese.  Stir gently to melt and blend the cheese with the soup.  Add 1 cup sour cream, 1/2 cup diced onions, and 1/2 cup of the bacon.  Stir to blend all the ingredients and serve right away. Use remaining cheese, bacon, sour cream, and onions to garnish individual bowls of soup.

1 cup of diced ham could be used in place of the bacon.  Chopped chives could also be used for garnish.

Filed in Gluten Free,Soups and Salads | Comments Off on LOADED POTATO SOUP

Pam’s Soft Molasses Cookies

Posted by on Thursday, October 9th, 2014

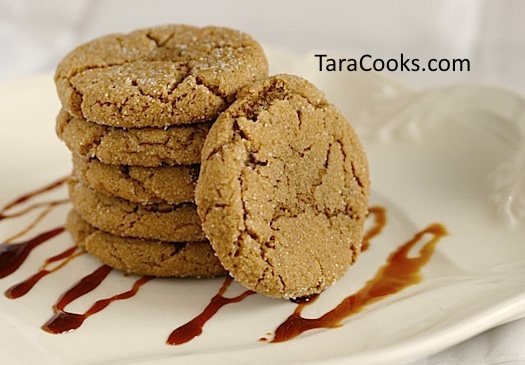
soft-molasses-cookiesHome schooling allows us to enjoy so many special experiences and meet a lot of fabulous people.  About 15 years ago, I met Pam at a home school retreat in Alabama.  She shared her Soft Molasses Cookies with me way back then and later mailed me her recipe.  Through the years we mailed each other Christmas cards and now we keep up with each other through Facebook.  And I’ve made countless batches of these cookies. Pam, I don’t think I’ve ever told you how much my Granddaddy loved your Soft Molasses Cookies.  Granddaddy has been gone a while now, but I found great  joy in baking them for him each October for his birthday.  So in honor of a dear friend Pam, and in honor of the sweetest Granddaddy that ever walked this earth, I give you the recipe for a special fall treat.

  • 1/2 cup soft butter
  • 1/2 cup vegetable shortening (I use organic)
  • 1 1/2 cups sugar
  • 1/2 cup molasses
  • 2 teaspoons vanilla
  • 2 eggs, lightly beaten
  • 4 cups plain flour
  • 2 1/4  teaspoons baking soda
  • 2 1/4 teaspoons ground ginger
  • 1 1/2 teaspoons ground cloves
  • 1 1/2 teaspoons ground cinnamon
  • Extra sugar for coating

In a large bowl, cream butter and shortening.  Add sugar and beat until light and fluffy.  Beat in molasses, eggs, and vanilla.  Set mixture aside.  In another large bowl combine the flour, baking soda, and spices.  Blend with a wire whisk.  Gradually mix flour mixture into creamed mixture until dough is blended and smooth.  Use a 1 oz cookie dough scoop to measure scoop dough then roll dough into a ball using hands.  Drop cookie dough ball into a bowl of sugar and thouroughly coat the dough ball with the sugar.  Continue forming balls of dough and coating them with sugar.  Place coated balls of cookie dough about 3″ apart on an ungreased cookie sheet.  Bake at 350 degrees for 11 minutes.  Remove cookies from oven.  I lightly press each cookie with a flat spatula to remove any excess air.  This keeps the cookies chewy and moist.  Store cookies in an airtight container.  Makes 3-4 dozen cookies

Filed in Uncategorized | 10 responses so far

Sour Cream Cornbread

Posted by on Thursday, September 11th, 2014

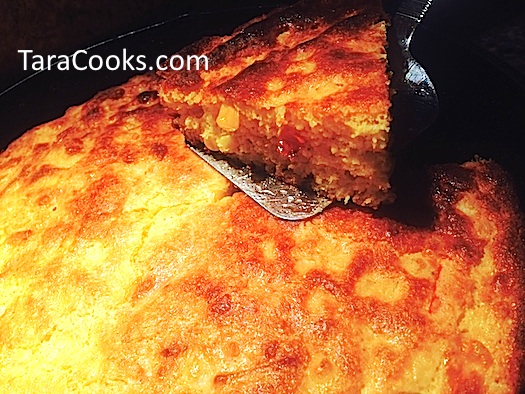
  • Sour Cream Cornbread

Here is another recipe passed down by my Mother-In-Law. It’s simple, quick, and easy.  Although I prefer to make this bread with fresh cut corn or frozen corn, the original recipe called for canned cream style corn.  Either way this bread always proves to be a crowd pleaser.

Here’s how:

  • 1/2 stick butter – melted
  • 1 cup sour cream
  • 2 eggs
  • 1 cup fresh cut corn (or 1 cup of canned creamed corn)
  • 1 cup self rising meal
  • 1/2 cup chopped sweet onion
  • 1/4 cup chopped jalapeño peppers (optional)
  • 1 cup shredded sharp cheddar cheese (optional)
  • 2 more Tablespoons melted butter

Melt butter in a 8″ iron skillet.  In a medium bowl add the sour cream and eggs and mix well.  Add the corn, meal, and chopped onion, and melted butter. Add peppers and cheese if desired.   Stir until blended and pour into iron skillet.  Bake 425 degrees for 20-30 minutes or until top is golden brown.

Add a couple of Teaspoons of melted butter to the skillet before pouring the batter in for an extra measure of butter taste and crisp crust.

Filed in Breads, Doughs, and Crusts | Comments Off on Sour Cream Cornbread

BOSTON BROWN BREAD

Posted by on Thursday, September 4th, 2014

Boston Brown Bread
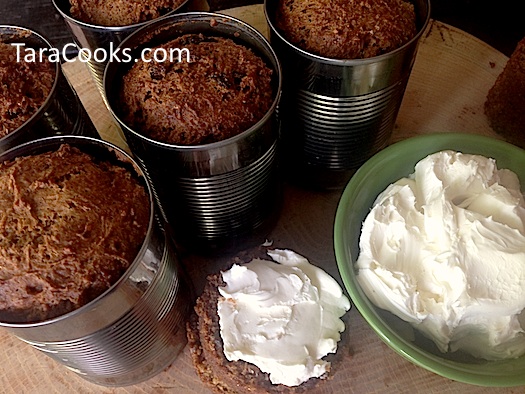
This recipe was handed down to me by my mother-in-law.  I recall her preparing this bread in soup cans to take along on family camp trips in their old FAN RV from the early ’70’s.  I have no idea who thought up the idea of baking bread in soup cans but this is a fantastic idea for transporting food for a camp trip.  The cans can be slightly heated over the campfire before removing and slicing the bread, or the bread can be served cold.  Either way, Boston Brown Bread turns out moist and filling and is perfect for camping, breakfast, party appetizer, or a snack.  Serve it with some cream cheese spread or just plain butter.
You will need approximately 7-8 12oz soup cans.  Completely cut off the lids and remove labels and glue from the cans.  The cans may then be cleaned in the dishwasher and stored for use later.
  • 2 cups Kellogg’s All Bran cereal
  • 1 cup raisins
  • 2 cups buttermilk
  • 2 Tablespoons molasses
  • 1 cup brown sugar
  • 2 cups flour
  • 2 teaspoons baking soda
  • 1 teaspoon salt
  • 1 cup chopped walnuts (optional) *

In a medium sized bowl mix the cereal, raisins and buttermilk.  Let mixture set for about 15-20 minutes. Then stir mixutre to blend.

Sift flour with baking soda and salt,  Then add the brown sugar and molasses along with the cereal/raisin/buttermilk mixture. Stir mixture to blend all the ingredients.  Batter will be slightly stiff.

Spray  soup cans with cooking spray and then spoon some of the batter into each can, filling cans about 2/3’s full.  Place all the filled cans on a baking sheet and carefully place all in a preheated 350 degree oven.  Let bread bake for approximately 35-40 minutes or until bread is browned and a toothpick inserted into the middle comes out clean.  Remove baking sheet with all the cans from the oven and let the cans cool completely before handling them.  Run a knife along the inside of the can, between the can lining and the bread to gently loosen the bread from the can before serving.  Slice loaf into 4-5 round pieces.  Serve with cream cheese spread or butter.

This bread can be removed from the cans, wrapped in Saran wrap and frozen for later use.

Cream Cheese Spread:

  • 8 oz package softened cream cheese
  • 1 cup sour cream or mayo
  • 1 cup chopped walnuts – optional

Mix the cream cheese, sour cream or mayo, and nuts together.  Spread over bread right before serving. Store spread in an airtight container in the refrigerator.

*The original recipe did not call for the chopped walnuts in the bread batter.  I like to add nuts to the bread and omit the nuts from the spread as the nuts tend to get a little soggy in the stored spread.

Filed in Appetizers,Breads, Doughs, and Crusts,Breakfast | Comments Off on BOSTON BROWN BREAD

RUM RAISIN ZUCCHINI NUT BREAD

Posted by on Friday, August 22nd, 2014

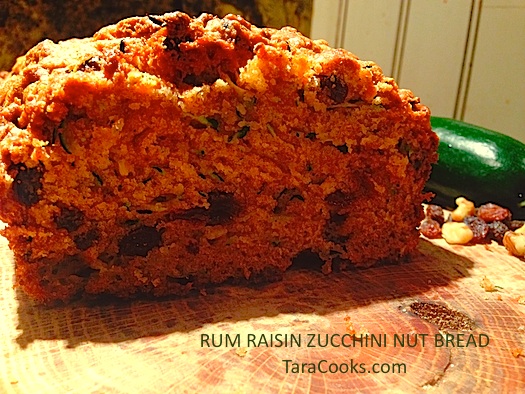
RUM RAISIN ZUCCHINI NUT BREAD
Here is a versatile recipe that is delightfully tasty made with all that garden fresh summer zucchini.  The rum soaked raisins up the moisture content.  The walnuts and cinnamon compliment the zucchini and raisins.  This recipe generously fills 2 loaf pans, making the perfect portions to keep and to share.  Local food friends can drop by Lester Farm’s produce stand and pick up some fresh summer zucchini for this recipe.
  • 3 cups plain flour
  • 1 1/2 cups sugar
  • 1 teaspoon baking powder
  • 1 teaspoon baking soda
  • 1 teaspoon salt
  • 1 teaspoon cinnamon
  • 3 cups grated zucchini
  • 1 cup chopped walnuts
  • 1 cup raisins
  • 1 cup rum
  • 1 cup oil
  • 3 eggs
  • 2 teaspoons vanilla

In a small mixing bowl, mix the raisins and rum together.  Let mixture set overnight in the refrigerator or microwave the mixture a couple of minutes to help the raisins absorb the rum.

In a large mixing bowl combine the flour, sugar, baking powder, baking soda, salt, cinnamon and nuts and zucchini. Whisk to blend and set aside.

In a small mixing bowl combine the oil, eggs, and vanilla. Use a wire whisk to blend well then set aside.

In an extra large mixing bowl dump the flour mixture, the raisin mixture,  the oil mixture and use a sturdy spoon to mix by hand.  Mixture will be very dense.  Spoon the mixture evenly into 2 greased loaf pans or 6 greased mini loaf pans.  Bake large loaves at 350 degrees for approximately an hour.  Bake mini loaves for approximately 30 minutes.  Bread should be fully cooked in the center – and no raw batter should be on an inserted toothpick once removed.

Optional bread spread:

  • 1 8 oz pack cream cheese – softened
  • 1 stick butter – softened
  • 1 cup powdered sugar
  • 1 teaspoon cinnamon

In a medium sized mixing bowl, combine cream cheese and butter.  Beat on high speed with an electric mixer until butter and cream cheese is light and fluffy.  Add the powdered sugar and cimmamon and blend well.  Serve over sliced zucchini bread.

Filed in Breads, Doughs, and Crusts | Comments Off on RUM RAISIN ZUCCHINI NUT BREAD

RATATOUILLE

Posted by on Monday, August 18th, 2014

ratatouille 2
  • 6 oz can tomato paste
  • ½ diced onion
  • 3-4 cloves minced garlic
  • ½ cup water
  • 2 T olive oil
  • 1 small eggplant cut into thin rounds
  • 1 zucchini cut into thin rounds
  • 1 yellow squash cut into thin rounds
  • 1 red bell pepper cut into thin round slices
  • 3 more Tablespoons olive oil
  • salt and pepper to taste
  • 1 teaspoon Italian seasoning
  • Parmesan cheese

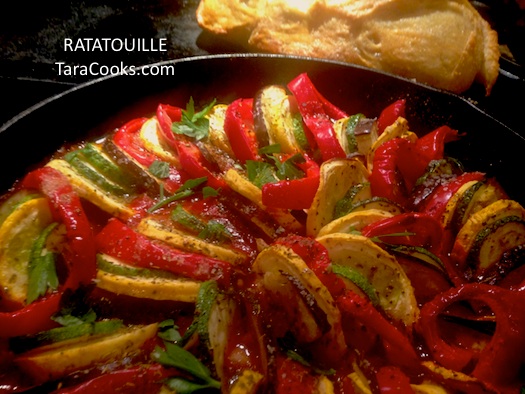
Preheat oven to 375. Spread tomato paste over the bottom of an 8” cast iron skillet.  Sprinkle on the onion and minced garlic.  Mix the 2 Tablespoons of olive oil with the water and pour over tomato paste and onions and garlic.  Next arrange the vegetables by starting at the outer edge or of the skillet and work inward in a circular pattern, beginning with a slice of eggplant, then yellow squash, followed by zucchini and red pepper.  Repeat this pattern until the skillet is filled with vegetables from the outside to the center.  Sprinkle vegetables with salt and pepper and Italian seasoning and drizzle 3 Tablespoons olive oil over vegetables.  Cover with a piece of parchment paper cut to fit in the skillet.  Bake Ratatouille for approximately 40 minutes or until vegetables are tender.  Remove the parchment paper and sprinkle some Parmesan cheese over the top of casserole before serving.

Filed in Italian,Main Dishes,Meatless Monday | Comments Off on RATATOUILLE

BACON PINEAPPLE BANANA PEPPER POPPERS

Posted by on Wednesday, August 6th, 2014

bacon poppersBacon. Peppers. Pineapple.  A simple combination of flavors form the perfect party appetizer.  YUM!
  • 8 sweet banana peppers
  • 1 8oz package softened cream cheese
  • 1 small can crushed pineapple – well drained
  • ½ teaspoon seasoned salt
  • ½ teaspoon garlic powder
  • 2 green onions – finely chopped
  • 8 pieces uncooked bacon

In a small bowl, combine the cream cheese, well-drained pineapple, seasoned salt, garlic powder and chopped green onions and mix well.  Wash peppers and dry each one with a paper towel.  Using a paring knife, make a careful cut from the tip of the pepper almost to the other end, stopping right below the stem.  Make a couple of slight perpendicular slits below the stem to slightly open the pepper.  Spoon enough cream cheese mixture into the pepper, and then carefully wrap the pepper with a piece of uncooked bacon.  Continue preparing each pepper with the cream cheese mixture, and wrap with bacon.  Place peppers an inch apart on a foil lined baking pan.  Bake peppers at 350 degrees for 20-30 minutes, or until bacon is thoroughly cooked.  Serve right away.

Filed in Appetizers | Comments Off on BACON PINEAPPLE BANANA PEPPER POPPERS

« Newer Entries - Older Entries »