Pavlova

Posted by on Saturday, March 21st, 2009


Hope recently participated in our home school group’s International Fair.  Each student gets to select a country to study and puts together a visual presentation of the chosen country.  Students get to dress up accordingly and also have prepare some authentic food to share from their featured country.  Since Hope’s cousin recently moved to Australia to serve as a missionary, Hope picked the Down Under this year.


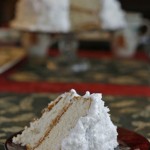
Hope and I researched several recipes together.  We finally decided on the Australian desert called Pavlova.  Pavlova is a layered desert with meringue, custard, cream, fresh fruit, and roasted macadamia nuts. We were pleased with the taste of this desert and several of our visiting “families” at the fair requested the recipe.


When the Russian danseuse Pavlova visited Australia and New Zealand in the 1920s, she enthralled her audiences with the grace and style of her dancing. At the time of her visits and for the next decade, cooks and chefs in both countries sought to honor her and the occasions of her visits with confections they created to capture her light and airy spirit and appearance. These ranged from trifle-like, gelatin-based creations to cakes and meringue-based confections in various forms. Some of these confections to honor her were called Pavlovas.


The original recipe called for home baked meringue and custard made “from scratch”, but we improvised and came up with a quick alternative. 


You will need:

  • 1 5oz tub of MISS MERINGUE vanilla meringues (We got ours at Kroger).  There are about 65 per tub.
  • 2 large packages INSTANT JELL-O vanilla pudding
  • 6 cups milk
  • 1 pint real whipping cream
  • ½ cup powdered sugar
  • 2 kiwi fruits – diced fine
  • 1 box fresh strawberries – diced fine  (Other favorite Aussie fruits are bananas, raspberries, and coconuts
  • Roasted macadamia nuts chopped fine


In large bowl, combine the JELL-O vanilla instant pudding with the 6 cups of milk.  Mix according to package directions.  Place in refrigerator while preparing cream.


In deep medium bowl, add the pint of whipping cream.  Beat on high until soft peaks begin to form.  Continue beating while adding the powdered sugar.  Refrigerate until ready to assemble desert.


In a medium bowl, place diced fruit.  Refrigerate until ready to assemble desert.


I assembled the desert right before serving.  I assumed the meringues would get soggy if this desert was assembled way ahead of serving time, but hey, some folks may prefer soggy meringue.  What’s neat about this desert is that you may add the layers to a trifle dish or even a 9×13 dish. 


  • Bottom layer – Meringues
  • Next layer – JELLO
  • Third layer – Whipped Cream!
  • Fourth layer – Chopped fruit
  • Optional layer – Roasted nuts


Repeat if using a trifle dish.


You can also vary the types of fruit too.  This makes a cool and tasty treat for the upcoming spring and summer.


Printable Recipe  pavlova


Download Adobe Reader

Filed in Pies and Cakes | Comments Off on Pavlova

It’s Plant’n Time!

Posted by on Wednesday, March 18th, 2009

I just love fresh vegetables.  Last summer Cousin Kelly and I made several trips to Kentucky.  We were on a quest for Peaches and Cream Corn, okra, tomatoes, peppers, and peaches.  We shucked and silked several hundred ears of corn to freeze.  We canned tomatoes.  I froze peppers, peaches, strawberries, and blueberries.  It has been a joy to reach for home canned tomatoes when making stews and sauces.  And I can hardly get by without my breakfast shake, made with fresh forzen fruits.  Yum-O!
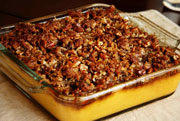
Richard and I are not expert gardeners in any shape, form, or fashion.  However, plans were made several weeks ago to put in a raised bed garden this year.  So we are diving headfirst into ameture gardening.  And we feel the need to be vulnerable and share our pending success or failure here in the blog world for all to see.

First of all, we talked with the garden guy at Lowe’s who emphatically recommended THE GARDEN PRIMER, 100% ORGANIC GARDENING.  You can get it here from Amazon for only $7.20 over half off! This book has all the info we could possibly need.  It is a complete guide and includes chapters on soil prep, building raised beds, and over 150 pages explaining how to plant and care for any vegetable we care to grow.

Today we got the raised bed framework built.  It helps if you have a retired neighbor with tractor(s) that need to be used.  When Mr. Turner saw a garden in the works, he showed up with his tractor and turned up the dirt in no time!


Some folks build a 10×10 bed.  Ours is more like 25×5.  Someone in town had torn down their raised beds and had left the lumber by the road for scavengers to remove.  Lucky for us! We got the wood for free!


I failed to take a final photo once the bed frame was finished.  It was pretty basic.  Dear Hubby connected the lengths by using several screws to join the long pieces.  Screws were placed into corner brackets that were placed on the insides of each corner. 

The next step is to fill the frame with organic soil, humus or peat moss, and natural fertilizer (manure).  As soon as we complete the next step, we shall share.  What about you? Would you like to try out your green thumb?

Filed in Gardening | 2 responses so far

Best and Worst Cook Ware for Leaching Metals into Food

Posted by on Saturday, March 14th, 2009

Growing up, Momma had a set of aluminum cookware with glass lids.  Every time she made mashed potatoes, she would use one of those aluminum pots to boil the potatoes.  What intrigued me then about the boiling potatoes was the gray skim that would float on top of the water around the inside of the pot.  Back then, the skim reminded me of the bathtub ring (which was my job to clean).  Now I know it was something worse than bathtub ring.  The aluminum from the pot was leaching into the water and bonding with the starch from the potatoes!  In those days, nobody understood that aluminum cookware could be hazardous to our health.  Today doctors and scientists are aware of the link between aluminum and Alzheimer ’s disease.

Personally, I never wanted to own aluminum or Teflon coated cookware.  I have a set of stainless steel cookware which is over 20 years old now and I need to replace it.  After doing some research on the safety of different types of cookware, I wanted to share the best information I found with all my followers here at Taracooks.com. Although I have known of recent concerns regarding aluminum and Teflon cookware, I did not know I should be concerned about my stainless steel pot and pans!

Dr. Mercola has information worth reading with scientific studies to back up the findings. He and his team have developed a safe set of cookware to purchase.  He advocates the new ceramic coated cookware and sells a set that is cast iron with the ceramic coating on the inside.  I am currently searching for similar cookware that is a little less expensive, is sold by the piece instead of a whole set, and matches my décor a little better than Mercola’s set.

Paula Deen makes a line of cast iron, porcelain lined products.  I’ve found some of them on Amazon.  Most of them come in burgundy. I like the pieces, but not the color.  I’m just not a mauve or burgundy kind of gal.

Here’s a pretty one from Amazon.

What I’d really like is the black cast iron cookware set that is porcelain on the inside.  Now that would just tickle my fancy and be safe to cook with too.

What about you?  What cookware do you use??


Filed in Healthy Cooking | One response so far

I Declare – Chocolate Éclair Cake

Posted by on Thursday, March 12th, 2009

Although it is SLEETING here now, we had a couple of warm sunny, spring days this week. Spring time brings about a change of menu at our house. The recent heat wave put us in the mood for this Chocolate Éclair Cake. When our boys were younger they called it Declare Cake – and the name has stuck with us ever since. There is something about Jell-o Pudding that always puts a smile on our kids’ faces.

This recipe is not an organic one, although I did use organic milk. Someday, I hope to revise it with home made pudding, real whipping cream, and organic graham crackers, and home made frosting. So make this recipe – then go cleanse!

The Starting Lineup:

  • 1 Box Honey Graham Crackers
  • 2 large boxes INSTANT JELL-O Vanilla Pudding
  • 6 Cups milk (whole or 2%)
  • 1 carton of Cool Whip (smaller size)
  • 1 can Chocolate Frosting

In a large mixing bowl add Vanilla Jell-o Pudding and 6 cups milk. Mix on low speed 3-4 minutes or until Jello begins to thicken. Fold in the carton of COOL WHIP. Pictured is the large COOL WHIP because that’s what Hubby got for me. The smaller carton would be adequate though.

Line the bottom of a deep 13×9 pan with a layer of graham crackers. Next pour half the pudding mixture over the layer of graham crackers. Pile on another layer of graham crackers, then the remaining pudding. Top with a final layer of grahams (yes, I used the whole box). Then gently spread the frosting over the top layer of graham crackers.

Refrigerate until ready to serve. Cut into squares before serving. The recipe makes about 12 generous portions.

Printable Recipe i-declare-eclair-cake

Download Adobe Reader

Filed in Pies and Cakes | One response so far

Pizza Party Part 3

Posted by on Thursday, March 5th, 2009

Here are two more great recipes for your Friday Night Pizza Party!


Bacon Cheeseburger Pizza


This pizza is definitely “man” food and all the HE people around here love it when I serve this one.  What more could teenage sons and husbands want than a combination of both pizza AND bacon cheeseburgers?


The sauce is one of my original recipes and is a bit unusual.  But don’t knock it until you try it though.


See previous post for Friday Night Pizza Crust  and make 1 crust. 


Preheat oven to 450 degrees.


In a medium bowl combine to make sauce and set aside:

  • 1 cup real Hellman’s Mayo
  • 1/3 cup yellow mustard
  • ¼ cup dill pickle relish (sweet pickle if you prefer)

 In a medium skillet brown over medium heat:

  • ½ pound ground round or ground chuck
  • 2 Tablespoons Worcestershire Sauce or Dale’s Steak Sauce
  • Salt and Pepper to Taste

 Cook and crumble 4-6 strips of bacon


Remaining ingredients are:

  • 1 ½ cups shredded cheddar cheese
  • 1 ½ cups mozzarella cheese
  • 1 cup shredded lettuce
  • Onion slices
  • Tomato slices

 Prepare pizza crust, sauce, ground beef, and bacon. Spread sauce evenly over crust. 


Sprinkle half the cheeses over sauce.  Add browned beef mixture and crumbled bacon.  Add remaining cheese. 


Bake pizza at 450 degrees 5-10 minutes or until cheese is golden brown.  Remove pizza from oven.  Top with fresh lettuce, onions, and tomatoes.  Serve while warm.


 Printable Recipe  bacon-cheeseburger-pizza

 Download Adobe Reader


White Chicken Pizza  


If you like Spaghetti Alfredo, or Alfredo Chicken, you will love this pizza!


You will need: 


Optional Toppings:

  • 1 cup canned artichoke hearts, sliced and drained
  • 1 cup sliced mushrooms
  • Fresh spinach leaves

Prepare 1 Friday Night Pizza Crust


Prepare The Best Alfredo Sauce Ever


To prepare chicken:

Cover chicken breasts with Italian dressing.  Bake chicken in 425 degree oven for about 30 minutes – or until chicken is done.  Remove from oven.  Cut chicken into bite size chunks or strips.


To assemble pizza, spread the partially baked pizza crust with a generous helping of The Best Alfredo Sauce Ever.  Sprinkle half the mozzarella cheese over Alfredo sauce.  Next, add the chicken over the cheese. 


Finish garnishing  your pizza your favorite remaining toppings.  Finish the pizza with the remaining mozzarella cheese.  Give pizza a generous shake of Parmesan or Romano cheese.  Add fresh ground pepper.  Bake pizza at 450 degrees for 5-10 minutes, or until cheese is a light golden brown.


Printable Recipe white-chicken-pizza


 Download Adobe Reader


Filed in Breads, Doughs, and Crusts,Main Dishes | Comments Off on Pizza Party Part 3

Friday Night Pizza Party, Part 2

Posted by on Wednesday, March 4th, 2009

In the previous post, I mentioned that many families are looking for economical ways have fun together. One way our family copes with these tough economic times is by having pizza night and playing board games. Ethan and his friends recently played poker until 3am here at our house. We all enjoy LIFE, CLUE, MONOPOLY and WIG OUT! One of our favorite past times is to watch THE ANDY GRIFFITH SHOW, while eating pizza and playing THE ANDY GRIFFITH GAME.

When you read over these pizza recipes featured here at TaraCooks, you may be hesitant to invest the time into making your own crust, preparing the meats, sauces, grating cheese, and chopping the toppings. Just remember the purpose of pizza night is not just the pizza itself, rather it is to enjoy the process as a family.

So decide what you want on your pizza, and get everyone involved in the prep work. Kids love to spread sauce, sprinkle cheese, and spread other toppings. Give each child a fraction of the pizza to personalize – then let them eat that portion. Most men love meat toppings and enjoy cooking, smelling, and sampling the pizza meats.

Here we’ve documented the pizza process as we worked together to create something delicious. Tonight we are having a half pepperoni, half cheese, with a tad of mushroom pizza.

Ethan spreads on our secret family pizza sauce. (Last summer I went wild canning Italian Sauce and plan to feature that process this summer.)

Hope spreads the cheese with ease.

Micah embellishes the pizza with pepperoni.

I like mushrooms on my portion.

The family gets silly as the prep is done.

In the oven it goes!

Ya’ll come and eat!

Printable Version  friday-night-pizza-party-part-2

 Download Adobe Reader

Filed in Main Dishes | One response so far

Pizza Crust for Friday Night Pizza Party

Posted by on Tuesday, March 3rd, 2009

Times are hard for just about everyone I know right now. People everywhere are staying home more, and eating out less. I read in Sunday’s paper that the sale of board games is up, way up, over previous years. I would imagine most folks like us are looking for economical ways to have fun. So let’s dust off that Monopoly game and have a Friday Night Pizza Party real soon OK?

This recipe will make 1 crust for a 12-15” pizza. Since we have 2 teenage sons, and since teenagers travel in hungry herds, and since we usually adopt extra boys over the weekend – I make a minimum of 2 crusts for pizza night. My record was 4 crusts.

You will need:

  • 1 envelope active dry yeast
  • 1 Tablespoon organic sugar
  • 1 ¼ cups warm filtered water (105-115 degrees)
  • 3 ¼ cups organic bread flour,
  • 2 teaspoons sea salt
  • 1-2 Tablespoons olive oil
  • Yellow Cornmeal

In a small bowl combine the yeast, sugar, and water. Wisk ingredients and let set for 5 minutes. In the bowl of a food processor, or heavy duty mixer add flour and salt. Pulse or mix to combine. With mixer or food processor running, slowly add liquid mixture and oil. Continue mixing until all is well combined and forms a ball. (Sometimes, I have to add a couple Tablespoons of extra water).

On a lightly floured surface, turn dough out and knead for 5 minutes (I’m not faithful to dough kneading. Remember, I’m in a hurry. I am just being honest). Place kneaded dough in a lightly greased large bowl. Cover, and let rise in a warm place (85 degrees). I like to turn on the light in my oven and let the dough rise there. Let dough rise for 1 hour, or until it has doubled in size.

Preheat oven to 450 degrees.

Sprinkle pizza stone evenly with cornmeal. Place dough round on top of stone and roll into a circle. If you prefer thick edges, fold over the edges about an inch. Prick dough with a fork.

I like to partially bake my crust before adding the sauce or toppings. I bake the crust for 5-10 minutes; until it is golden brown on top, then I flip the crust over before adding the sauce and toppings. We like the crust crunchy on both sides. I love my baking stone, but often the underside of whatever I’m cooking doesn’t get as brown or done as the top side.

After adding the sauce and toppings, I cook the pizza another 5-7 minutes, or until the cheese has turned a light golden brown.
Stay tuned tomorrow for my secret Bacon Cheeseburger Pizza. We will also feature White Chicken Pizza before Friday.

Tips for mixing yeast dough:

Don’t be afraid of yeast dough. The key to perfect crust is having the water temperature between 105-115 degrees. I use my candy thermometer to make sure the water is in the right temperature range. The water must be warm enough to activate the yeast and produce that wonderful chemical reaction. However, if the water is too hot, the temperature can kill the yeast, and the dough will fail to rise. Someday, I am going to purchase a real kitchen thermometer, but for now, my $2 Walmart candy thermometer does just fine.

A heavy duty mixer with a dough hook is a plus, but not imperative to pizza crust success. A wooden spoon, bi-ceps, and determination can produce great results too.

I have used regular and rapid rise yeast. I prefer the rapid rise yeast, because I work best under pressure and do everything last minute – which means I’m always in a hurry.

Sprinkling the pizza stone with cornmeal makes the crust crispy and gives it a punch of flavor.

Try adding different dried herbs to the dough like oregano, basil, dill weed, red pepper flakes, or even a dash of chili powder.

Download & Print  pizza-crust

 Download Adobe Reader


Filed in Breads, Doughs, and Crusts | 2 responses so far

Mom’s Southern Buttermilk Biscuits, Oh My!

Posted by on Friday, February 20th, 2009

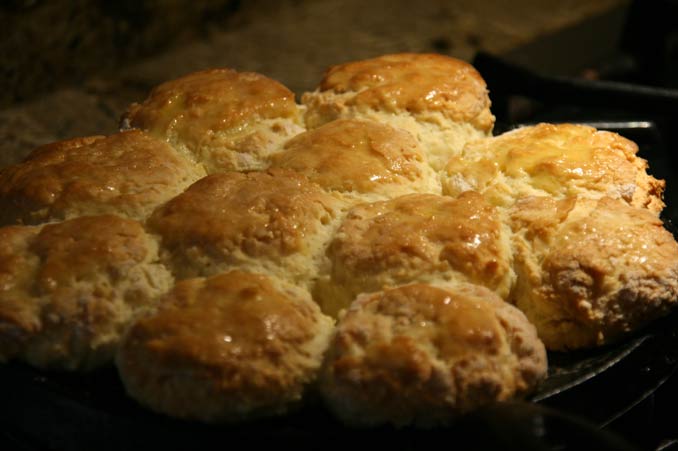
Biscuits
Although My mother passed away nearly 15 years ago, there are many things I miss about her. She was a quiet and gentle spirit, yet strong and capable. If I could have another day with her, I’d beg her to make me a batch of buttermilk biscuits. I have fond memories of her beautiful hands covered in flour, lovingly kneading biscuit dough at the kitchen counter. Her biscuits were absolutely the BEST biscuits I’ve ever tasted in my life.

Although she never used a recipe, or wrote down her method, this recipe is the closest I can come to Mom’s Buttermilk Biscuits.

  • 2 cups Lily White Unbleached Self-Rising Flour
  • 5 Tablespoons soft butter or organic vegetable shortening
  • 1 cup buttermilk

In a deep bowl add flour and butter or shortening. Cut butter or shortening into flour. Add buttermilk and stir into a ball. (I like to wipe my counter with a damp cloth then spread an 18” piece of wax paper over the damp counter. The dampness holds the wax paper in place while you work with the dough. Cleanup is a synch!) Dust wax paper with flour. Turn dough onto floured surface. Knead lightly. Roll out dough into ½ inch thickness. Choose your favorite size biscuit cutter and dip the cutter in flour before making each cut. Place biscuits on a generously greased baking sheet or iron skillet. Bake at 425 degrees for 12-15 minutes, or until biscuits are golden brown. Remove biscuits from oven and brush with melted butter immediately. Serve HOT with more butter, honey, molasses, jam, jelly, or just by themselves.

Printable Recipe

 moms-southern-buttermilk-biscuits

Download Adobe Reader


Filed in Breads, Doughs, and Crusts | Comments Off on Mom’s Southern Buttermilk Biscuits, Oh My!

Mango Salsa

Posted by on Wednesday, January 28th, 2009

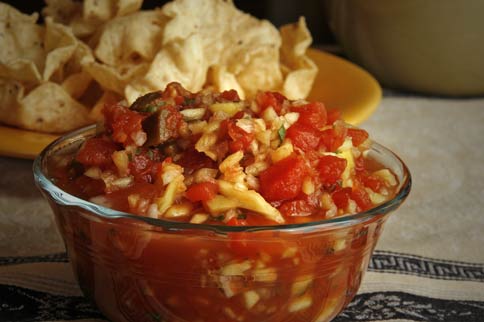
Mango-Salsa

My wonderful friend Karen introduced me to her Mango Salsa. I’d never heard of Mango Salsa and I must say – I’ve been missing out. I serve this along side the Chicken Quesadillas or on tacos or as a dip with corn chips. Yum!

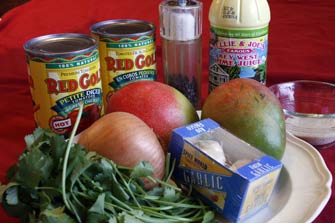
  • 2 15oz cans Del Monte Petite Diced Tomatoes with Mild Green Chilies
  • 2 ripe mangos, peeled and diced
  • ½ cup chopped red onion
  • Juice from 1 lime
  • Zest from 1 lime
  • 1 clove chopped garlic
  • 2 Tablespoons chopped fresh cilantro
  • ¼ cup sugar or Splenda

MangoSalsaIngr

Mix all ingredients together in large bowl. Serve with corn chips, tacos, chili, or quesadillas. Refrigerate salsa in an airtight container.

Download and Print mango-salsa

Filed in Appetizers | 2 responses so far

Quesadillas

Posted by on Tuesday, January 27th, 2009

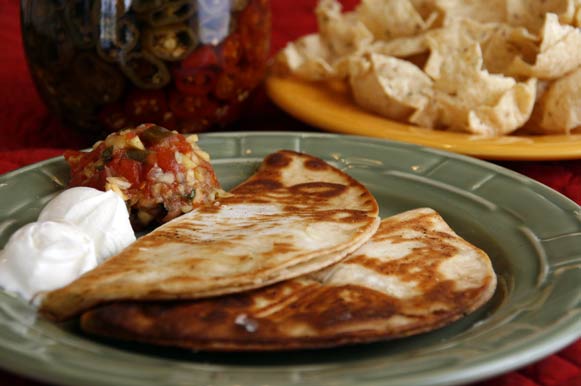
Quesadillas

Here’s another quick, tasty recipe that pleases and satisfies. They are perfect for many celebrations. We will be serving these Sunday during the Super bowl!

You will need:

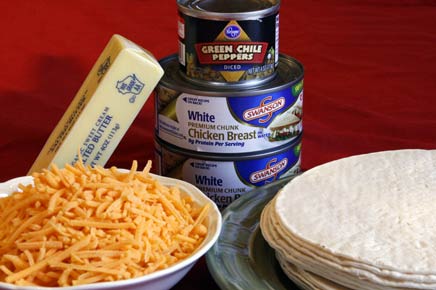
  • 1 package 6” white flour tortillas
  • 2 cups shredded cheddar cheese
  • 2 cans chicken breast meat (12.5oz can) drained
  • 1 can diced green chilies (drained)
  • Butter

QuesadillasIngr

To Assemble quesadillas:
Empty the chicken into a large mixing bowl. Use a fork to flake apart the chicken chunks. Add the diced green chilies and the shredded cheddar cheese. Mix well. Spread about ¼ cup of this mixture over half of a flour tortilla. Fold the other half over meat/cheese mixture to form a half moon shaped quesadilla. Continue building quesadillas until all the meat/cheese mixture has been used.

To fry quesadillas:
In large 12” skillet, melt 1 Tablespoon butter over medium heat. Vegetable oil may also be used to fry the quesadillas. Place 2 half moon quesadillas into melted butter. Take care not to burn tortillas. Flip quesadillas when they are golden brown on bottom side and brown the other side. Remove from skillet. Melt another Tablespoon of butter and continue flipping, browning, and melting until all quesadillas have been cooked.

Use a pizza cutter to evenly cut quesadilla into 4 triangles. Serve right away with your favorite toppings such as sour cream, more shredded cheese, salsa, and guacamole. Eat, lick fingers, repeat, and enjoy!

Printable Recipe

quesadillas

Filed in Chicken,Main Dishes,Super Bowl | One response so far

« Newer Entries - Older Entries »