Posted by Tara on Saturday, July 30th, 2011
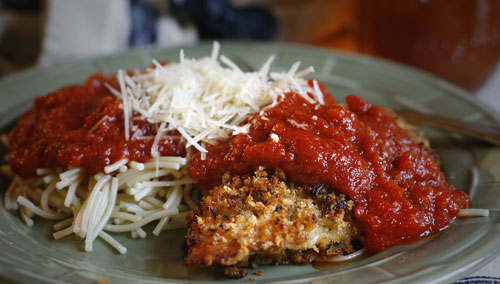
This recipe is in honor of my sweet niece Abby Kate who is convinced those of us who love the Italian dish, Chicken Parmesan are actually eating Chicken Farmer John! Poor Farmer John. It’s a shame he couldn’t have been a little more courageous.
This recipe is not fried, but prepared easily with a modest amount of melted butter and Panko bread crumbs. The chicken is baked, then ladled with 20 Minute Marinara Sauce then served with noodles and fresh grated parmesan cheese. YUMM!
- 4-5 boneless skinless chicken breasts – rinsed and patted dry
- 1 1/2 cups Panko bread crumbs
- 6 Tablespoons real butter – melted
- 1 Tablespoon dried Italian spice blend
- 1 teasoon garlic salt
- 1 teaspoon pepper
In a medium size bowl, combine the melted butter and Panko bread crumbs. Toss with a fork until crumbs are well coated. Then add the Italian spice blend, garlic salt, and pepper and blend well. Spray a 9×13 glass dish with cooking spray. Arrange chicken breasts in dish and press about half the bread crumb mixture onto top sides of chicken pieces. Then carefully turn chicken pieces over and press the remaining bread crumbs onto uncoated sides of chicken. Place uncovered dish in a preheated 425 degree oven. Cooking time will vary depending upon the thickness of the chicken breasts. Approximate cooking time is 30-40 minutes, until chicken is fully cooked and coating is a golden brown.
Serve with Marinara sauce and fresh grated Parmesan cheese. Our family also enjoys this dish with Alfredo sauce too!
Here’s a photo of Aunt Tara with her niece and nephew.

 Share on Facebook
Filed in Italian,Main Dishes | One response so far
Posted by Tara on Thursday, July 21st, 2011
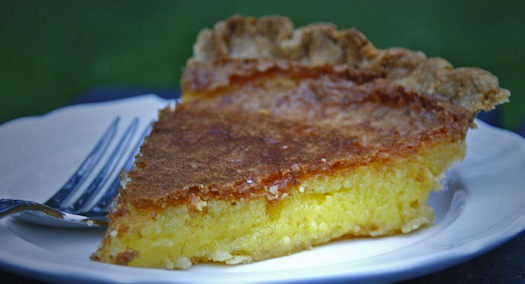
Here’s one of my favorite Southern classics that my Mom used to make for Sunday dinner. My Mom always said that if you are going to make one pie, you might as well go ahead and make two pies! She was right you know. Don’t you think the world would be a better place if there were more pie to share?? Here’s the recipe for a single pie, but it can be easily doubled.
- 1 1/4 cup sugar
- 3/4 stick real butter softened
- 3 eggs slightly beaten
- 1 Tablespoon white vinegar
- 1 Tablespoon corn meal
- 1 Tablespoon milk
- 1 teaspoon vanilla
In a large bowl, combine the sugar and butter until mixture is light and fluffy. Then add the eggs and mix well. Next add the vinegar, milk, meal, and vanilla and blend well. Pour into a deep dish pie crust. Bake at 350 degrees for approximately 50-55 minutes. Pie should be golden brown on top and mostly solid in the middle when done. Cool before cutting. Excellent served slightly warm with a scoop of vanilla ice cream.
 Share on Facebook
Tags: chess pie, old fashioned, pie, southern
Filed in Desserts | 5 responses so far
Posted by Tara on Monday, July 11th, 2011
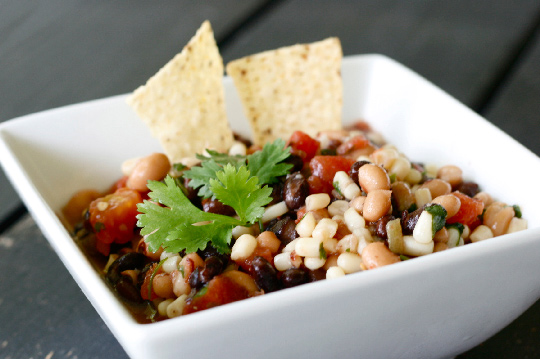
The first time I ever had Texas Caviar was on a camp trip to the lake. My friend Tracy made this and shared not only the dish, but also the recipe. And I am so glad she did. If you can open cans, squirt dressing, and chop cilantro – you can have a winning recipe in no time. Thanks Tracy for your friendship, fun times, and sharing your food!
- 1 can black eyed peas, rinsed and drained
- 1 can black beans, rinsed and drained
- 1 can shoe peg corn, drained
- 1 can diced tomatoes, drained
- 1 can rotel tomatoes
- 1/2 bottle Kraft Zesty Italian Dressing
- 1 medium sweet onion, chopped
- 1/2 cup chopped fresh cilantro
- 1 large bag tortilla chips for dipping
In a medium sized bowl, dump the beans, peas, corn, tomatoes, rotel, dressing, onions, and cilantro. Toss ingredients to coat well with dressing. Refrigerate a couple of hours before serving. Serve with tortilla chips.
 Share on Facebook
Tags: bean dip
Filed in Appetizers | 2 responses so far
Posted by Tara on Thursday, June 30th, 2011
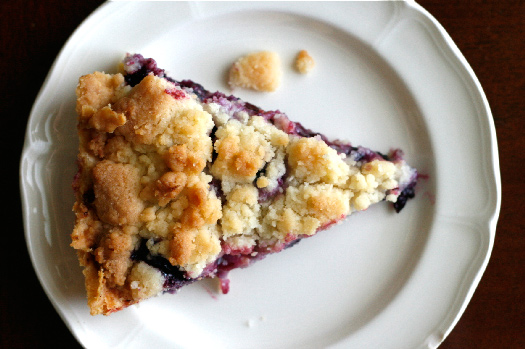 Each year I freeze oodles of blueberries for my fruit loving son Micah. Aldi had blueberries for cheaper than I could pick them. And over the past 2 weeks, I’ve frozen about 72 pints of blueberries. Those pretty berries are neatly stacked in the garage freezer, just waiting to be reincarnated as blueberry pancakes, blueberry muffins, blueberry protein shakes, or blueberry pie.
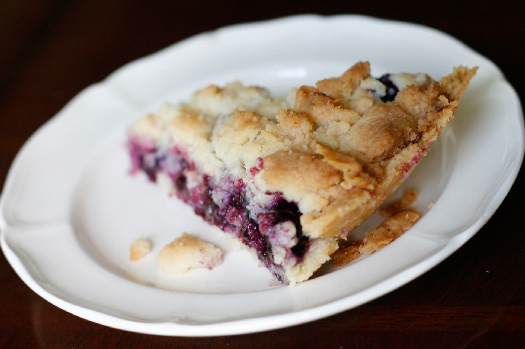
Tonight the pie plates had their turn hosting the blueberries in a Blueberry Crumb Pie which Micah assembled himself. He actually made his crust from scratch, and substituted blueberries and a little lemon juice in place of the apples in our Best Apple Crumb Pie Ever recipe. Here’s how to make yours:
- 1 deep dish pie crust (from scratch or ready made) placed in a deep dish pie plate
For the pie filling:
- 2 cups fresh or frozen blueberries
- 1/2 cup sugar
- 3 Tablespoons plain flour
- 3-4 Tablespoons soft butter
- 2 Tablespoons lemon juice
- 1/2 teaspoon lemon zest
For the crumb topping mix together in a medium bowl and set aside:
- 3/4 cup plain flour
- 1/2 cup sugar
- 1/3 cup real butter softened
In a medium bowl, add the 3 Tablespoons of plain flour and 1/2 cup sugar. Mix well, then add the blueberries and toss to coat them with the sugar mixture. Sprinkle the lemon juice and lemon zest over blueberries and toss again. Pour blueberry mixture into the pie crust. Dot with 3-4 Tablespoons butter. Top with crumb topping and place pie in preheated, 400 degree oven. Cook 45-55 minutes until pie is bubbly and topping is golden brown. Serve warm with vanilla ice cream.
 Share on Facebook
Tags: blueberreis, blueberry, blueberry pie, crumb pie, old fashioned, southern
Filed in Desserts,Pies and Cakes | 5 responses so far
Posted by Tara on Monday, June 13th, 2011
![06 07 11_8253_edited-1[1] 06 07 11_8253_edited-1[1]](http://taracooks.com/wp-content/uploads/2011/06/06-07-11_8253_edited-11.jpg)
I’ve been away from my kitchen and from blogging for over a week now. June 3rd, our family joined a team of 25 people from our congregation and headed to San Marcos, Honduras to work at Mission Lazarus. We had a medical team that set up a make shift clinic in the town of Los Colorados and treated 100 patients a day. A crew of teenage guys and men spent countless hours mixing concrete and pouring a floor for the church building in Los Colorados. I was blessed to work with a team of ladies along side our daughter and teach the children in two different villages and help paint a school room in one of the villages. Our team also delivered food to nearly 100 families in the area and inventoried/weighed 3 tons of red beans. Although Honduras is one of the poorest countries in the Western world, God is very much present and at work there. Visit www.missionlazarus.org to find our more.
The days were long and hot and full of hard work. However, it was a blessing to be able to retreat at the end of a hard day to the posada at Mission Lazarus. The posada is a retreat on top of a mountain. We had comfortable cabins with water and electricity. And each night the cooks at the mission would prepare appetizers and dinner for us. Most meals included re fried red beans and rice following appetizers of chips and salsa or chips and bean dip. Nobody wanted to miss out on the appetizers and the salsa was incredible. I am so thankful Meredith (one of the Americans who lives at the mission and supervises the work at 3 clinics) was able to translate the salsa recipe straight from the mouth of the cook so I could blog here about it. My family can’t wait for me to make this salsa as much as we can’t wait to return to Honduras next year. Here’s it is:
- 3 pounds tomatoes finely minced (removed seeds and watery portions first)
- 4 sweet onions finely minced
- 4-5 jalapeno peppers finely minced (seeds removed) or more to suit your taste.
- 1/2 cup finely chopped cilantro
- Apple Cider Vinegar (the cook didn’t give an exact amount, so I’m going with 1/4 cup for starters)
- salt to taste
Mix all the chopped ingredients, salt, and vinegar together in a large dish about 2-3 hours prior to serving. I am pretty sure the salsa was not refrigerated during this 2-3 hour period because it was served at room temperature. And there was no need to refrigerate any leftovers because there weren’t any! However, our food standards are different here in the US and I will certainly be refrigerating this salsa while the flavors marry since fresh onions are excellent breeding mediums for bacteria.
 Share on Facebook
Tags: Honduran, Honduras, Mission Lazarus, Salsa
Filed in Appetizers | 7 responses so far
Posted by Tara on Wednesday, June 1st, 2011

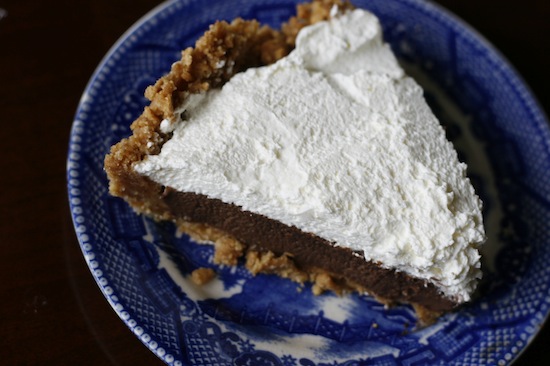
It’s ironic that I’m listening to Lauren Alaina’s Like My Mother Does while remembering how my Mom made her Chocolate Icebox Pie and blogging about it. This pie is hands down my absolute favorite dessert my Mom ever made in our home. And I am so thankful that I can carry on the tradition and make this treat, “like my mother did.” Although my Mom’s passing was untimely, a piece of her lives on through me. And I’d like to think I’m not only a better person but also a better cook because of my Mom.
Although Mom would whip the filling up in an aluminum pan on the stove top, I use the microwave to cook the filling a minute at a time. It’s quick, it’s easy and so much tastier than Jello pudding.
For the crust:
- 2 cups graham cracker crumbs
- 1/4 cup sugar
- 1 stick melted butter
Pour graham cracker crumbs into a deep dish pie pan. Add the sugar and mix well. Pour melted butter over cracker crumbs and mix together until crumbs are evenly coated with the butter. Use the bottom of a glass or the back of a large spoon to gently press crackers into place on bottom and sides of pie pan. Set pie crust aside until filling is prepared.
For the filling:
- 1 cup sugar
- 1/2 cup cocoa powder
- 2 Tablespoons plain flour
- 2 beaten eggs
- 1 12 oz can evaporated milk
- 2 Teaspoons real butter -melted
- 2 teaspoons vanilla
- 1/4 teaspoon salt
Topping:
- 1 pint of whipping cream (whipped)
In a large microwave safe mixing bowl, add sugar, cocoa, and flour. Stir with a wire whisk until well blended. In a small mixing bowl, combine the beaten eggs with half of the evaporated milk and whisk to blend well. Add the remaining half can of evaporated milk to the sugar/flour/cocoa mixture and blend well. Next add the egg mixture to the sugar/flour/cocoa mixture. Add the melted butter and salt. Whisk until mixture is smooth and well blended. Place mixture in microwave and cook a minute at a time, stirring after each minute, until mixture begins to thicken and coats a metal spoon well. Then combine the vanilla and pour filling over graham cracker crust. Allow filling to cool on counter top for about 15 minutes before transferring pie to refrigerator. Allow pie to cool completely and set before serving (about 2 hours). Top pie with real whipping cream right before serving.
 Share on Facebook
Tags: chocolate pie, icebox, old fashioned, southern
Filed in Desserts,Pies and Cakes | 9 responses so far
Posted by Tara on Tuesday, May 24th, 2011
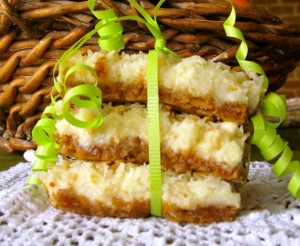
Growing up, one of my favorite treats Mom would make for me was those Magic Cookie Bars. Remember those bars made with graham cracker crust, a layer of Eagle Brand milk all topped with butterscotch and chocolate baking chips, nuts, and coconut? The ingredients would melt into a gooey sweetness that beckonded a tall glass of cold milk.
Here’s a new twist on an old favorite – Key Lime Magic Bars! They are magic because the buttery graham cracker crust and layer of Eagle Brand milk form a sweet tangy marriage with Key lime juice and white chocolate chips. And they promise to perform a disappearing act right before your eyes.!
- 2 cups graham cracker crumbs
- 1 stick melted butter
- 2 Tablespoons sugar
- 1 can sweetened condensed milk
- 1/2 cup fresh or bottled Key lime juice
- 1 cup white chocolate chips
- 1/2 cup coconut (not frozen)
- zest of one lime
For the crust, combine graham cracker crumbs, melted butter and sugar in a 9×9 baking dish. Mix well and press down to form a crust.
In a medium bowl, combine condensed milk, lime juice, and lime zest. Pour mixture over crust. Top condensed milk layer with white chocolate chips and coconut. Bake at 350 degrees for 20-25 minutes. Cool bars before cutting into squares.
This recipe could easily be doubled and baked in a 9×13 pan.
 Share on Facebook
Filed in Uncategorized | 5 responses so far
Posted by Tara on Monday, May 9th, 2011
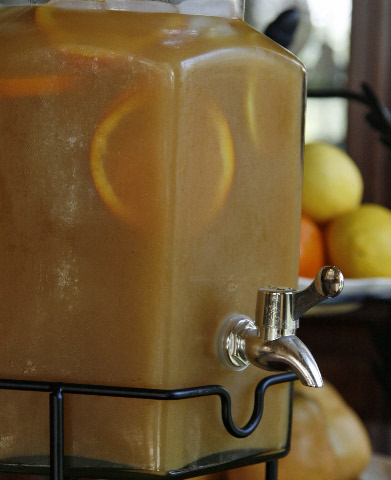
I simply cannot recall a meal at either of my grandmothers’ tables, or my family table, or my mother-in-law’s table where sweet tea was not served. I don’t think I ever heard of unsweet tea until I was nearly grown. And in the hot months of summer, my mother-in-law would occassionally serve Southern Fruit Tea as a refreshing twist on traditional sweet tea. Here’s my close recreation of that tangy summer time treat. Make this for you next BBQ or family gathering and savor the sweetness. It’s perfect for some front porch sittin’ and thinkin’.
2 quarts brewed sweet tea (Add 4 family size tea bags to 1 quart near boiling water and steep for 15 minutes. Remove tea bags and add 3/4 cup sugar to warm tea water. Stir to dissolve sugar and add another quart of water to make 2 quarts brewed sweet tea).
1 12 oz can frozen orange juice concentrate- thawed
1 12 oz can frozen lemonade concentrate – thawed
1 48 oz can pineapple juice – chilled
In a gallon pitcher add the 2 quarts of brewed sweet tea, and the thawed orange juice and lemonade concentrate. Stir gently until well blended then add the pineapple juice. Add enough water to make a gallon. Serve in a pretty beverage dispenser with orange and lemon slices for garnish.
Refrigerate unused tea and stir before serving
 Share on Facebook
Filed in Uncategorized | 4 responses so far
Posted by Tara on Wednesday, May 4th, 2011
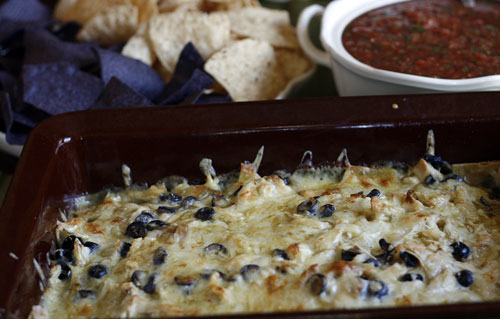
Looking for a quick and easy dish for Cinco De Mayo? Thanks to Nicole from the Franklin Altman Eye Care in Mt. Juliet for not only sharing her dish with my hubby when he was by to get an eye checkup, but also thanks for sharing the RECIPE with me. Chicken Chilaquilas are made with deli-style rotisserie chicken and can be assembled in a snap for Cinco De Mayo. And there is just enough time while this dish bakes to whip up some Guacamole and Restaurant Style Salsa!
- 1 cooked Rotisserie chicken shredded
- 1 medium onion chopped
- 8-10 soft corn tortillas largely diced
- 16 oz shredded Mexican blend cheese or Monterey Jack cheese
- 1 regular size can of sliced Black Olives (optional)
- 2 cans of Green Enchilada Sauce
In a casserole dish layer tortillas, chicken, onions and enchilada sauce and continue until you have used all the ingredients. Top off the casserole with the last of the sauce and cheese and top with the black olives.
Bake at 350 degrees for 30-40 minutes covered with foil then bake another 15 minutes without foil.
Printable Recipe
Download Adobe Reader
 Share on Facebook
Tags: Chicken, chilaquilas
Filed in Chicken | 5 responses so far
Posted by Tara on Monday, April 25th, 2011
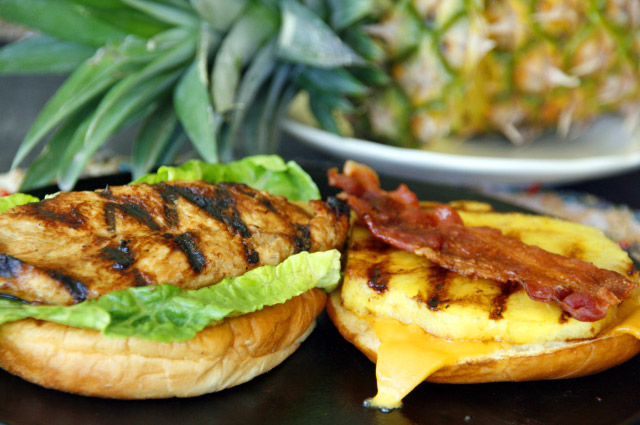
Our family is thrilled that spring has sprung here in Tennessee and we can finally file away those winter soup recipes. The grass is green, the cows are mooing, and it is time to fire up the grill. Here’s my latest creation, Hawaiian Chicken Sandwiches. The chicken is marinated in a home made teriyaki base (free of MSG, salt, and other chemicals) and grilled to perfection. Those tangy fillets can be served on a King’s Hawaiian bun or over a bed of greens. Either way Hawaiian Chicken is a healthy winner.
- 4 slices fresh pineapple
- 4 thinly sliced chicken breasts
- 1 4 pack King’s Hawaiian sandwich buns
- 4 sliced cooked bacon
- 4 slices sharp cheddar cheese
- 4 large green leafy lettuce leaves
- Teriyaki Marinade:
- 1/4 cup grape seed oil
- 1/4 cup fresh lemon or lime juice
- 1/4 cup Bragg’s liquid aminos
- 1/4 cup pineapple juice
- 1 teaspoon dry mustard
- 1 teaspoon ground ginger
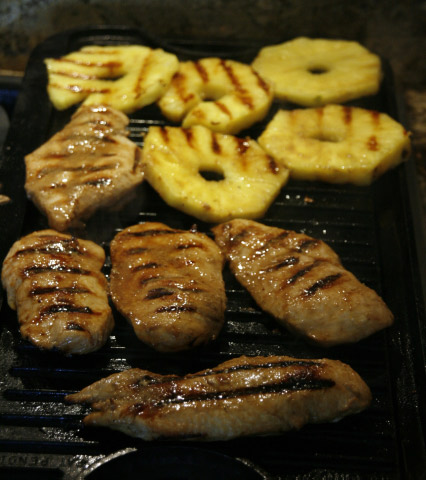
In a gallon Zip-Lock bag, mix together the Teriyaki Marinade. Set aside 1/4 cup for basting. Then add chicken breasts to marinade and close bag. Place bag in refrigerator and marinade for at least an hour. While chicken marinates, preheat gas grill, or fire up the charcoal grill or preheat a lightly greased iron griddle on medium high heat. Fry bacon strips and set aside. Place chicken on preheated grill or griddle and cook for 3-5 minutes on each side. Then repeat process if chicken is not thoroughly cooked (Cut a slit in the thickest part of chicken to test for doneness. All white, no pink please). Use the 1/4 marinade mixture which was set aside earlier to baste chicken breasts before turning. Add fresh pineapple to grill, baste with marinade, and grill 1-2 minutes on each side. Serve chicken on Hawaiian buns with lettuce, cooked bacon, cheddar cheese, and grilled pineapple. Take a bite, lick your lips, and repeat!
 Share on Facebook
Tags: Chicken, hawaiian, sandwich, teriyaki
Filed in Main Dishes | 3 responses so far


![06 07 11_8253_edited-1[1] 06 07 11_8253_edited-1[1]](http://taracooks.com/wp-content/uploads/2011/06/06-07-11_8253_edited-11.jpg)


