Posted by Tara on Saturday, August 8th, 2009
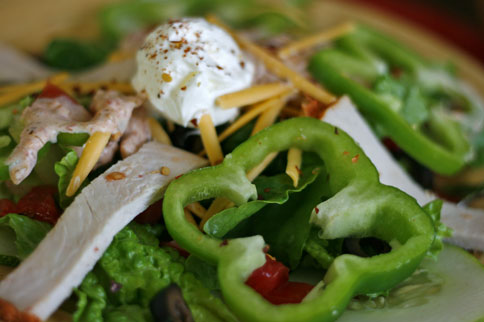
Here’s an easy summer time meal that leaves us satisfied without that heavy feeling. It has a thick slice of Boar’s Head Salsalita Turkey from the deli. The Salsalita turkey has a kick of south of the border spice- which we love. You can vary this salad with your favorite greens and veggies. Here’s how I built our generous salad for two:
- ¼ pound thick sliced Boar’s Head Salsalita Turkey – cubed or cut into strips
- 8-10 Romaine Lettuce Leaves – washed and torn
- 4-8 Green Pepper Slices
- 4-8 Cucumber Slices
- 1 Diced Tomato (this one was fresh picked from the gardenJ)
- Black Olives
- Shredded Sharp Cheddar Cheese (about 1/8 cup per salad plate)
- Dollop of Sour Cream
- Salsalita Dressing (Click Here)
- Corn Chips
- Red Hot Pepper Flakes (optional)
- Dash of Chili Powder
This would be tasty with some drained canned corn, or a few rinsed black beans. Chopped green onions or chives would add a nice flavor. What about some diced avocado or a spoon of guacamole? A little lime juice or zest would give added flavor punch too. The possibilities are endless!
Printable Recipe
Download Adobe Reader
 Share on Facebook
Tags: salad
Filed in Low Cal / Low Carb | 2 responses so far
Posted by Tara on Saturday, August 8th, 2009
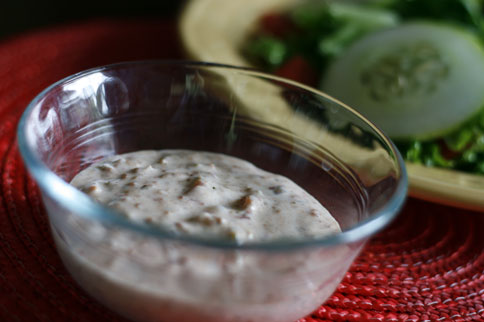
One of my favorite dressings is not one I can purchase at the grocery. But it is so very easy and is delicious over certain salads or served as a veggie dip. Here’s all you have to do:
Mix equal parts Ranch Dressing (I had O’Charley’s) and Salsa (I used our recently canned salsa) together right before serving. I used ¼ cup of each and it made a generous portion for dear hubby and me to share.
 Share on Facebook
Tags: dressing, ranch, Salsa
Filed in Miscellaneous | One response so far
Posted by Tara on Tuesday, August 4th, 2009
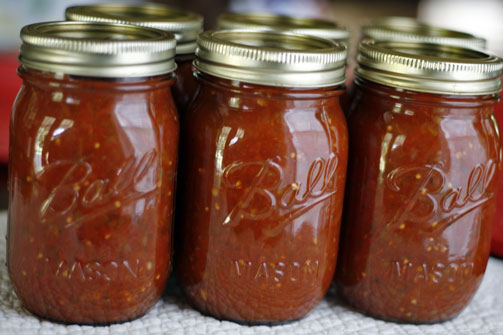
This is a recipe I got from a good friend whose family resides in Utah. So it is an authentic western dish. Salsa is a versatile condiment and a staple for cooking around here. We love it and have found many ways to use salsa. I’ve made western dressing by adding equal portions of salsa with ranch dressing. This dressing is delicious served over a salad with western items such as lime chicken, greens, black beans, and corn chips. I’ve made western omelets and garnished each with a spoon of salsa. I’ve also served many a group of hungry teenagers mounds of chips and bowls of salsa. And one of my favorite ways to taste salsa is to marinate chicken breast in it before baking.
Prepare about 15-17 pint jars, lids, and rings. I sterilize my jars on the SANITIZE /HEAT DRY cycle of my dishwasher – keeping the door closed until ready to use. I place the lids and jars in a pan of steaming water (about 180 degrees) to sterilize – leaving them in the hot water until ready to seal the jars.
The night before canning, make Mixture #1:
Mixture#1:
- 2 gallons tomatoes, skinned and whole (I used Roma tomatoes)
- 2 cups chopped onions
- 2 cups chopped celery
- 1 cup chopped bell pepper
- ¼ cup Morton’s canning/pickling salt
Bring water to a boil in a large pan. Throw in tomatoes for a minute and then put tomatoes in a sink of cold water. This will make the skins peel easily. Leave tomatoes whole and put in large pot. Add other ingredients from Mixture #1. Put lid on and marinate overnight. This mixture does not have to be refrigerated while it marinates.
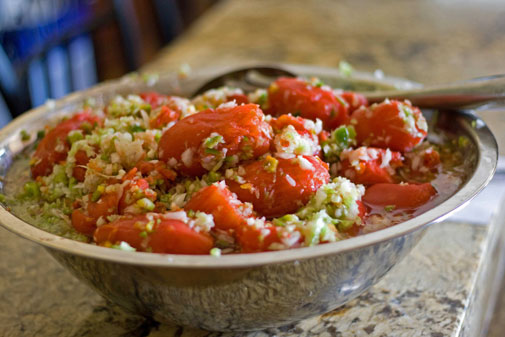
Mixture #2:
- 2 4oz cans chopped green chilies
- 1 cup sugar
- 1 cup white vinegar (or half vinegar and half lime juice)
- 1 TABLESPOON mustard seed
- 1 ½ TABLESPOONS cilantro (I used the kind in the tube)
- 1 TABLESPOON cumin
- 6 fresh chopped jalapenos (more or less to suit taste- remove seeds to reduce the heat)
- 2 yellow wax (Hungarian banana) peppers chopped
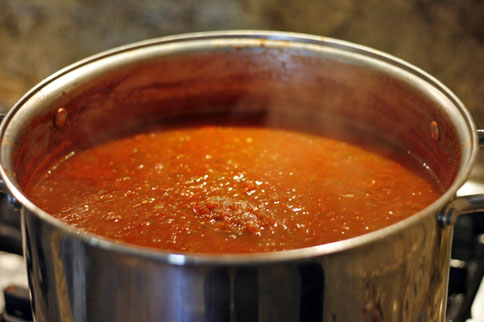
Blend all of Mixture #2. Drain Mixture #1 well and chop in food processor. Pour both Mixture #1 and Mixture #2 in large kettle or pot. Bring to a boil. I let my mixture bubble for 15-20 mintues, and stirred frequently. However, the recipe instructed only a minute of boiling. I think the extra boiling time produces more flavor.
Fill jars leaving ½” headspace. Place jars in a ready water bath canner and process jars for about 30 minutes. (A ready water bath canner would have enough nearly boiling water to cover all the jars about an inch when placed in the canner. The water should be heated enough to keep a low rolling boil as jars process). Recipe yields about 15-17 pints, but varies with size and variety of tomatoes.
For a tangier salsa, in my second batch I used half vinegar and half lime juice and added some additional cilantro.
Printable Recipe
Download Adobe Reader
 Share on Facebook
Tags: Salsa
Filed in Appetizers,Canning | 3 responses so far
Posted by Tara on Friday, July 31st, 2009
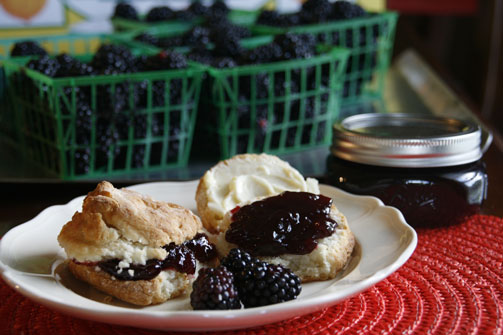
There are some foods that Mom can make better than anyone else. I’ve never had a biscuit that came close to rivaling my Mom’s home made ones. I’ve never had fried chicken that was better than hers either. And I’ve yet to meet anyone who went to all the trouble to pick, seed, and can home made black berry jelly – other than Mom. So it is no surprise that the thought of blackberry jelly brings back happy memories and puts a smile on my face. We ALWAYS had blackberry jelly in the pantry growing up. And hardly a week ever went by that my lips and blackberry jelly weren’t together in harmony with Mom’s home made biscuits.
I’ve wanted to give blackberry jelly a try for a few years now. This year, I decided to put on my big girl panties and just GO FOR IT! I’ll admit that I didn’t brave the wild, the chiggers, and the July heat and humidity to go pick my own. I cheated by purchasing the tame blackberries from the Mennonites.
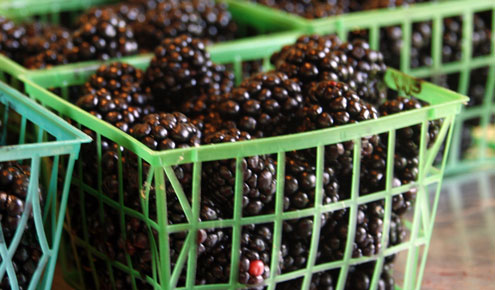
But the berries and I came to understand each other, and I was so pleased how the jelly turned out. I don’t necessarily expect anyone to rush out and pick berries to make jelly, but I am recording the process here for posterity’s sake. I hope Mom will be proud of me for passing along this tasty tradition to future generations. I give you Myrna’s Blackberry Jelly:
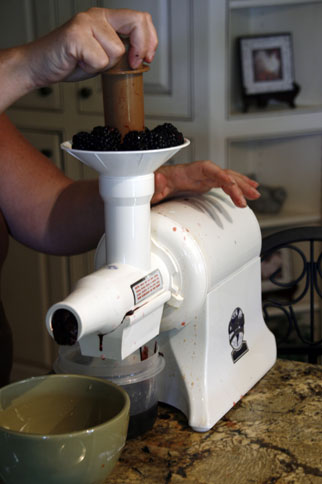
Probably the hardest step in the blackberry jelly process is removing the seeds from the berries. Mom used to gently boil the berries with just a little water, and then strain the juice through a large strainer. This step could also be done using cheesecloth. However, I was able to shortcut this step by running the whole berries through our juicer. I had 4 containers of berries and the whole process only took a couple of minutes. I also doubled the recipe below.
The recipe:
- 3 ¾ cups blackberry juice
- 2 Tablespoons lemon juice
- ½ teaspoon butter
- 1 box SURE JELL
- 5 cups sugar – measure and set aside to add to boiling juice
Prepare lids rings and jars according to manufacturer’s instructions. I like to sterilize my jars in the dishwasher on SANITIZE/HIGH TEMP cycle. I place the rings and lids in a steaming pot of water for a few minutes, and leave them in the hot water until ready to seal the jars.
Next, prepare fruit juice by removing the seeds as mentioned above. Measure the EXACT amount of juice liquid in an 8 quart pot. Up to ½ cup water may be added to the juice to reach the exact amount of liquid. Add SURE-JEL, lemon juice and butter. Bring mixture to a full rolling boil (a boil that doesn’t stop when stirred) oh high heat, stirring constantly. When mixture reaches a full rolling boil, quickly add sugar and continue stirring constantly for one minute. Remove from heat. Skim off any foam.
Ladle jelly mixture quickly into prepared jars to within 1/8 inch from jar top. Wipe jar and threads. Cover with lid and ring. Screw bands tightly. Place jars on elevated rack in a ready water canner (a ready water canner has steaming water in it– enough to cover jars by 1-2 inches when rack is lowered. More boiling water may be added if needed). Lower rack and cover canner, and bring water to a gentle boil. Process the jelly for 5 minutes. Higher altitudes require different processing times. Remove jars and place upright on a towel to cool completely. After jars cool, check seals by pressing middle of lid with finger. If lid springs back, jar is not properly sealed and refrigeration is required. Let jelly stand at room temperature for 24 hours. Store unopened jelly in a cool, dry, dark place for up to a year. Refrigerate opened jelly for up to 3 weeks.
Printable Recipe
Download Adobe Reader
 Share on Facebook
Filed in Canning | 12 responses so far
Posted by Tara on Monday, July 27th, 2009
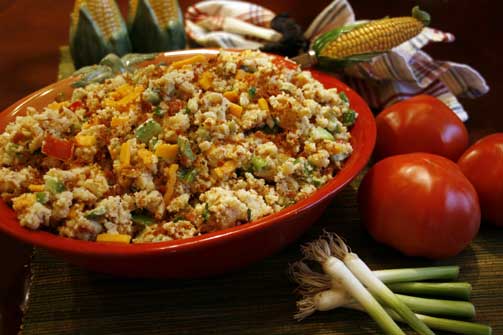
Growing up here in the south, our family would have a couple of meatless meals a week during the hot summer months. Often our meals consisted of cornbread along side a bowl of pinto beans, garden fresh tomatoes, cucumbers, and fried corn. So it is no surprise that I am a huge cornbread fan. But I was very surprised last winter when Lynda requested I do a post on cornbread salad. Honestly – I’d never heard of cornbread salad, and I’d surely never, ever tasted it.
I thought I would have to try numerous recipes before I found one that was a hit here in our home. But sometimes, you hit a home run your first time at bat. Such was the case tonight when I tried Tonya’s Cornbread Salad. WOW, is all I can say! Cornbread salad, where have you been all my life?
The kids LOVED this recipe and so did dear hubby. This salad could easily be a complete meal – just take a look at the ingredients. I’ve been told that the salad is even better the next day – IF there’s any left. Seriously – this is a must try for all cornbread lovers out there!
The Cornbread
Mix together in large mixing bowl:
- 2 cups self-rising cornmeal
- 1 egg
- 1 1/3 cup Milk
- 1/4 C Crisco oil
- ½ cup sour cream
Pour into a greased 9×13 baking pan. Bake cornbread at 425 degrees for 20-30 minutes or until cornbread is golden brown. Remove from oven and let cool. Break cornbread into small pieces and set aside.
The Salad
In another bowl add:
- 1 cup chopped seeded tomatoes
- 1 cup chopped green onions
- 1 cup chopped sweet pickles
- 1 cup chopped bell pepper
- 1 can drained shoe peg corn
- 1 cup real bacon chopped into small pieces – divided (save half for topping)
Toss this with the crumbled, cooled cornbread
The Dressing
In a medium sized bowl mix:
- 1 cup Hellman’s mayo
- ½ cup O’Charley’s Honey Mustard Dressing
- 1 Tablespoon sugar
Stir dressing into cornbread mixture then add:
1 c. shredded cheddar cheese
Pour into serving dish and garnish with remaining bacon.
Printable Recipe
Download Adobe Reader
 Share on Facebook
Filed in Breads, Doughs, and Crusts,Side Dishes | 5 responses so far
Posted by Tara on Saturday, July 25th, 2009
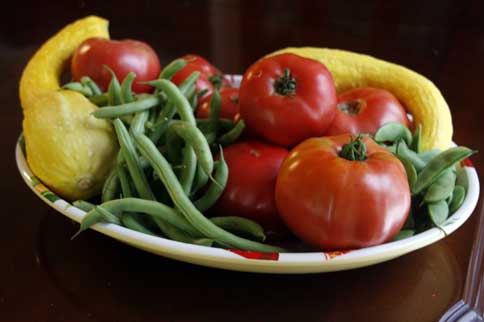
I am amazed at the quantity of veggies our small raised bed garden has produced so far. We’ve had more squash to pick than we can eat and share. The zucchini grew before our eyes and we let some of it get too big to use. The tomato vines are hanging heavy with ripening tomatoes. We’ve also picked a mess or two of Lima and green beans. We have enjoyed a few cucumbers and the cantaloupe vines are full of softball sized melons.
In spite of our garden harvest – I’ve made 3 trips so far to KY for more produce. I got a whole case of roma tomatoes for $8 and have made some yummy salsa. I’ll be sharing the authentic western recipe for the salsa in an upcoming post here at Taracooks. I know that 12 pints of salsa won’t last us until next summer, so I am hopeful to make another trip north next week for more tomatoes and more salsa.
I also purchased nearly 12 dozen ears of Peaches-and-Cream Corn, and the family helped me shuck, cut, and freeze it all. The corn is cheaper now than the week I purchased it at around $3 a dozen ears. If I can make a little more room in the extra freezer – then I can freeze some more corn. Everyone needs more corn right?
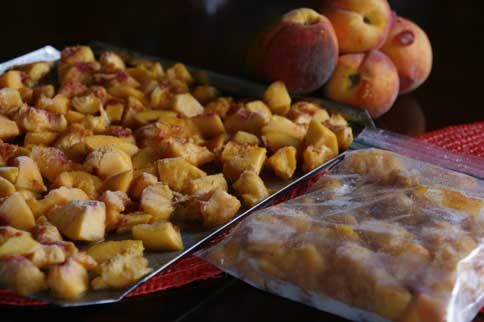
Of course I couldn’t resist buying a case of peaches. We froze several bags for breakfast shakes and cobblers and canned several jars of preserves.
I was also so excited to make Blackberry JELLY – without the seeds – from some KY tame blackberries. I used my juicer to extract the juice from the seeds and it took only a couple of minutes to juice 4 quarts of berries. Since this was one of the most cherished items my mother ever made, I am so pleased to have figured out how to duplicate her jelly. I also plan to share that recipe here real soon.
My fingernails are tarnished with fruit stains, and the kitchen floor is just a sticky mess from all that corn cutting. The kitchen has been a total disaster for a couple of weeks now while mounds of laundry go unattended in the wash room – which lies right across the hall from the kitchen. There are at least a couple more prime weeks of harvesting, canning, and freezing before me. Then summer will seem mostly gone – and it’s back to home schooling and regular cooking.
‘Till then, stay tuned to Taracooks for more posts on picking and canning and freezing.
 Share on Facebook
Filed in Canning,Gardening | 4 responses so far
Posted by Tara on Tuesday, July 21st, 2009
I’m SO excited because the southern peaches are finally ripe for harvest. The blueberries are ready to pick, and it is time to really get serious about preserving and canning all the wonderful fruits God made for us to enjoy. Only in the past couple of years have I been courageous enough to attempt canning and freezing. I encourage all of you wanna be canners out there to round up some jars and lids, buy some sugar and SURE JELL, stop by your local farmers market and GET BUSY! In the dead of winter – you will thank yourself when you can go to your pantry and retrieve a jar of peach or cherry preserves.
I was able to find Georgia Peaches at Publix for 88cents a pound recently. I’m also heading out to KY to Mennonite country for more. Here’s my first batch of peach preservers I’ve ever made.
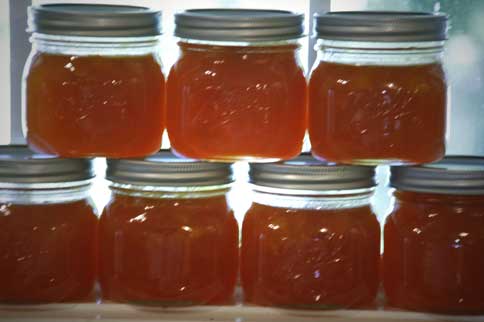
Now I’m addicted. There’s nothing better on a hot steaming buttered biscuit than home made peach preserves. What a treat!
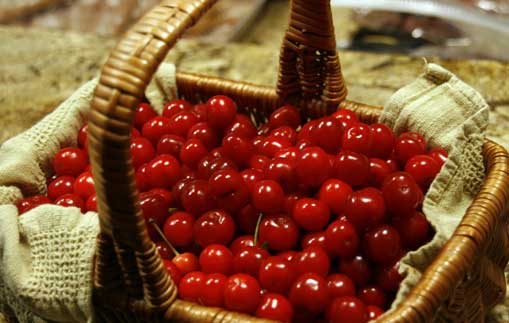
My mother built the house next to us. She was such a fantastic gardener. When the house was complete, she immediately set out a variety of fruit trees in the back yard. Although Mom has been gone 15 years, the cherry tree was loaded with blossoms, then later, cherries this year. I called our neighbor and kindly asked him if he’d like me to make him some cherry preserves from the cherries on his tree. We made a family event of cherry pickin’ this year.
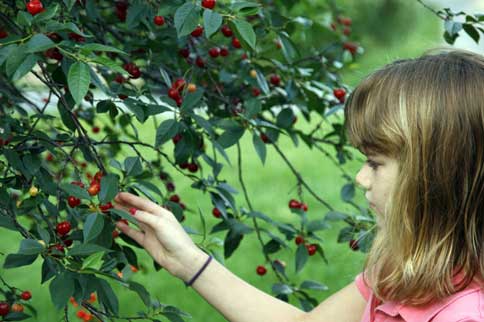
And Hope and I had a blast pitting 2 gallons of cherries and making cherry preserves. I just love these cute little half-pint Elite Ball jars. You can order them online if Wal-mart is out of stock.
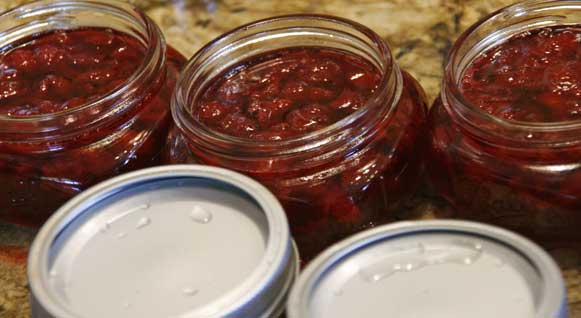
I don’t have a secret recipe for preserving. I simply followed the SURE JELL instructions for cooked jam/preserves. I have copied and pasted those instructions from the SURE JELL web-site below. You can also visit their site www.surejell.com for all the tips and related recipes from KRAFT.
Who’s with me? Come on and give canning a try. It’s pretty easy and a lot of fun to can with the family.
- Bring boiling-water canner, half-fill with water, to simmer.
- Wash jars and screw band inserts in hot soapy water; rinse with warm water. Pour boiling water over flat lids in saucepan off the heat. Let stand in hot water until ready to use.
- Prepare fruit as directed in the following chart below. For berries, crush 1 cup at a time with a potato masher for best results. If using a food processor, pulse to very fine chop. DO NOT PUREE. Jam should have bits of fruit.
- Measure exact amount of prepared fruit (or juice) into a 6 – 8 quart saucepot. Stir in lemon juice and water (if required) as indicated in the chart.
- Measure exact amount of sugar into a separate bowl. (Reducing sugars or using sugar substitutes will result in set failure unless you use SURE-JELL FOR LESS OR NO SUGAR NEEDED RECIPES for no or low sugar jams and jellies.)
- Stir 1 box SURE-JELL PREMIUM FRUIT PECTIN into fruit or juice in saucepot. Add ½ teaspoon butter or margarine to reduce foaming, if desired.
- Bring mixture to full rolling boil. (a boil that doesn’t stop bubbling when stirred) on high heat, stirring constantly.
- Stir in sugar quickly. Return to full rolling and boil exactly 1 minute, stirring constantly. Remove from heat, Skim off any foam.
- Ladle quickly into prepared jars, filling to within 1/8 inch tops. Wipe jar rims and threads. Cover with two-piece lids. Screw bands tightly. Place jars on elevated canner rack. Lower rack into canner. Water must cover jars by 1 to 2 inches; add boiling water if needed. Cover; bring to gentle boil. Process jams 10 minutes. Adjust processing time according to altitude chart. Remove jars and place upright on a towel to cool completely. After jars cool, check seals by pressing middle of lid with finger. (If lid springs back, lid is not sealed and refrigeration is necessary.)
- Let stand at room temperature 24 hours (or time indicated on recipe). Store unopened jams in a cool, dry, dark place up to 1 year. Refrigerate open jams up to 3 weeks.
SURE-JELL Cooked Jam Recipes
| Fruit to Buy (Fully Ripe) |
How to Prepare Fruit |
Ingredients |
Makes (About) |
Apricot
3 ½ lbs. apricots
2 lemons
(May take 2 weeks to set) |
Discard pits (do not peel) and finely chop apricots. |
5 cups finely chopped apricots.
¼ cup fresh lemon juice.
7 cups sugar. |
9 cups |
Blackberry,
Boysenberry,
Dewberry,
Loganberry,
Red or Black Raspberry
or Youngberry
4 pt. berries |
Crush berries. Sieve ½ of the pulp to remove some seeds if desired. |
5 cups crushed berries.
7 cups sugar. |
9 cups |
Black Raspberry
4 pt. black raspberries |
Crush black raspberries. Sieve ½ of pulp to remove some seeds, if desired. |
5 cups crushed black raspberries.
6 ½ cups sugar. |
8 cups |
Blueberry
3 pt. blueberries |
Discard stems and crush blueberries. |
4 cups crushed blueberries.
4 cups sugar. |
6 cups |
Cherry (sour)
3 lbs. sour cherries |
Discard stems, pit and finely chop cherries. |
4 cups finely chopped cherries.
4 3/4 cups sugar. |
6 cups |
Hot Pepper Relish
2 medium green peppers
3 medium red peppers
10 large jalapeño peppers |
Protect hands with rubber gloves while preparing jalapeño peppers. Stem and halve all peppers; discard seeds. Finely chop peppers. |
4 cups prepared peppers.
1 cup cider vinegar.
5 cups sugar. |
6 cups |
Orange Marmalade
4 oranges
2 lemons
(May take 2 weeks to set) |
Remove only colored part of peel from oranges and lemons with vegetable peeler; chop and set aside. Peel and discard white part of peel from fruit. Chop fruit, reserving juice; set aside. Place peels, 2 ½ cups water and 1/8 teaspoon baking soda in saucepan. Bring to boil. Reduce heat; cover and simmer 20 minutes, stirring occasionally. Add fruit and juice; simmer 10 minutes |
4 cups cooked fruit.
5 1/2 cups sugar. |
7 cups |
Peach
3 lbs. peaches
1 lemon |
Peel, pit and finely chop peaches. |
4 cups finely chopped peaches.
2 Tbsp. fresh lemon juice.
5 ½ cups sugar. |
7 cups |
Pear
3 lbs. pear
1 lemon |
Peel, pit and finely chop pears |
4 cups finely chopped pears.
2 Tbsp. fresh lemon juice.
5 cups sugar. |
6 cups |
Plum
4 lbs. plums |
Discard pits (do not peel) and finely chop plums. Place plums and ½ cup water in saucepan. Bring to boil. Reduce heat; cover and simmer 5 minutes. |
6 cups cooked plums.
8 cups sugar. |
10 cups |
Strawberry
4 pt. strawberries |
Discard stems and crush strawberries. |
5 cups crushed strawberries.
7 cups sugar. |
8 cups |
Triple berry
3 pt. strawberries
1 ½ pt. raspberries
1 pt. blackberries |
Stem and crush strawberries. Crush raspberries. Crush blackberries. |
2 ½ cups crushed strawberries.
1 ½ cups crushed raspberries.
1 cup crushed blackberries.
7 cups sugar. |
8 cups |
Printable Recipe
Download Adobe Reader
 Share on Facebook
Filed in Canning | 8 responses so far
Posted by Tara on Wednesday, July 15th, 2009
I’m LOVIN’ having a garden and all the fresh veggies we are harvesting now. Last night I made PIONEER WOMAN’s SPRINGY SHELLS along with my ITALIAN HERB CRUSTED CHICKEN. Here’s what dinner looked like before my ravenous pack descended upon the food and devoured it.
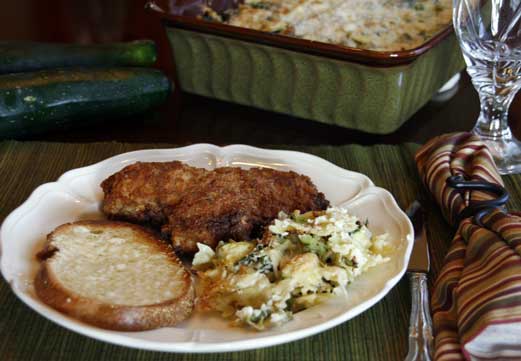
Below is PIONEER WOMAN’S recipe for the SPRINGY SHELLS. This is my first time to make this recipe and even the he folk around here loved it. There are so many yummy nutritious veggies – zucchini, tender asparagus, peas, broccoli, and even green onions. You can use any variety of pasta. My carton of ricotta was only 15 oz, but I went with what I had and next time I surely would use the larger carton.
- 16 ounces medium pasta shells (or other short pasta)
- 1 pound asparagus, cut into 1 1/2-inch pieces (avoid tough parts)
- 1/2 pound broccoli, cut into small florettes
- 1/2 pound zucchini (about 1 medium zucchini), diced
- 1/2 cup frozen peas
- 3 green onions, sliced (white and light green parts)
- 3 cloves garlic, minced
- 4 tablespoons butter
- 2 tablespoons olive oil
- 20 to 22 ounces whole milk ricotta cheese
- 2 eggs
- 1/2 teaspoon salt
- freshly ground black pepper
- 1 1/2 cup Parmesan cheese, grated
- Extra olive oil, for drizzling
Cook pasta until extremely al dente—with still quite a bit of bite.
Melt butter with the olive oil over medium-low to medium heat, then add in the garlic.
Add the asparagus to the pan and cook for five minutes. Sprinkle in a little salt. Add the broccoli and cook for one minute, then add the zucchini and cook for one or two more minutes. Add the frozen peas and onions, stir together, then turn off the heat. Set aside.
In a separate bowl, mix the ricotta, eggs, salt, and pepper until well combined.
To assemble, butter a 9 x 13-inch baking dish. Add half the pasta, then spread 1/3 of the ricotta mixture over the surface. Sprinkle 1/3 of the Parmesan over the ricotta, then 1/2 of the vegetables. Repeat with the rest of the pasta, the rest of the ricotta, and another 1/3 of the Parmesan. End with the rest of the vegetables and the rest of the Parmesan.
Drizzle with a couple of tablespoons olive oil, then bake for 25 minutes on 350 degrees or until nice and hot.
Serve with extra Parmesan cheese!
ITALIAN HERB CRUSTED CHICKEN
- 4-6 boneless skinless fresh chicken breasts
- 2 cups buttermilk
In a large mixing bowl soak chicken breasts in buttermilk at least 20 minutes. While chicken is soaking in buttermilk mix together in a flat dish or pie pan:
- 1 sleeve Ritz crackers – crushed into crumbs
- 1 ½ cups plain flour
- 2 Tablespoons Italian Herb Seasoning
- 2 teaspoons onion powder
- 2 teaspoons onion salt
Using tongs (I can’t stand touching raw chicken UCK!) remove 1 piece of chicken from buttermilk – letting excess buttermilk drain off chicken. Place chicken breast into herb mixture, turning to coat both sides of chicken. Transfer battered chicken to a paper towel or paper plate. Continue breading remaining chicken.
To fry chicken pour vegetable oil into a 12” skillet – enough oil to fill the skillet ½”-3/4” deep. Turn heat to medium high, but not high enough to burn the oil while chicken cooks (about 375 degrees). I have also fried my chicken in my deep fryer – since I have more control over the temperature of the oil. Fry chicken a couple of minutes, then flip chicken over. Repeat this process a couple more times. Plump chicken breast may require longer cooking times between flips. WE DON’T WANT ANY PINK IN THE MIDDLE OF OUR CHICKEN PIECES. However, we don’t want to burn the breading on the chicken either. I usually test the thickest chicken piece by cutting into it after removing it from the oil. Usually, 6 minutes of frying over medium high heat will cook most thicknesses and cuts of chicken breasts or tenders.
Printable Recipe
Download Adobe Reader
 Share on Facebook
Filed in Casseroles,Chicken | One response so far
Posted by Tara on Saturday, July 11th, 2009
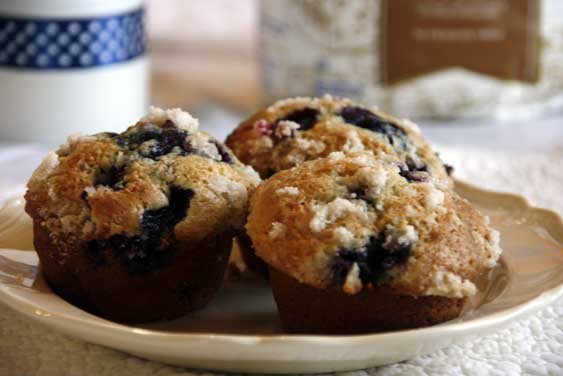
I think my friend Karen should work up her own segment of Taracooks. Everything she cooks is wonderful and she brought me these muffins the same day she shared her banana bread. No wonder my pants are snug! She won a blue ribbon at the fair for these muffins and the recipe should be in the first Wilson County Best of the Fair Cookbooks. For those of us who missed out on the cookbook – I give you THE RECIPE.
In a mixing bowl beat 4 eggs.
Gradually add 2 cups sugar.
While beating slowly pour in 1 cup vegetable oil.
Add 1 teaspoon vanilla.
In another bowl combine these dry ingredients:
- 4 cups plain unbleached flour ( Karen uses King Arthur)
- 1 teaspoon salt
- 1 teaspoon baking soda
- 2 teaspoons baking powder
Add the dry ingredients alternately with 2 cups sour cream to the egg mixture.
Gently fold in 2 cups fresh blueberries, or frozen blueberries which have been washed and patted dry.
Sprinkle tops with vanilla sugar.
Bake 400 degrees for 20 minutes. Place a 1 cup Pyrex measuring cup filled with water on bottom rack in center of oven. This prevents muffins from getting crusty hard on top.
Cool muffins on wire rack. Recipe makes 24 regular sized muffins.
When Chelsie and I had our baking day together, she had a great variation for these muffins. She suggested a lemon glaze for the top. We combined the juice of a lemon, the zest of a lemon and ½ cup sugar. We brushed the tops of the muffins right after removing them from the oven with this glaze. They were incredible!
Printable Recipe
Download Adobe Reader
 Share on Facebook
Filed in Breads, Doughs, and Crusts | Comments Off on Blue Ribbon Blueberry Muffins
Posted by Tara on Friday, July 3rd, 2009
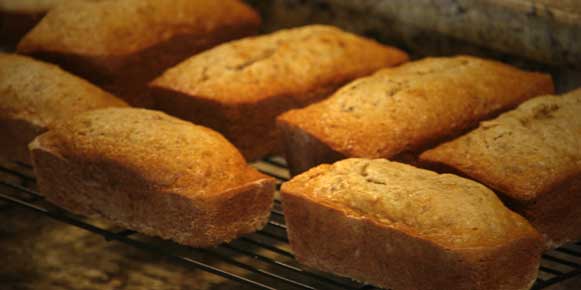
In a previous post, I made organic wheat free banana bread – which is pretty good, in my opinion. However, when Karen brought me some of her home made banana bread – I instantly knew it was the best I’d ever tasted. I was so glad she was willing to share her recipe with Taracooks. We think the secret ingredient is the Kretschemer’s Honey Crunch Wheat Germ. The only place in our town where we can find this ingredient is at Publix.
Combine in large mixing bowl:
- 1 cup brown sugar
- 1 cup white sugar
- ½ cup Kretschmer’s Honey Crunch Wheat Germ
- 3 cups unbleached all purpose flour (Karen uses King Arthur)
- 2 teaspoons soda
- ½ teaspoon baking powder
- 1 teaspoon salt
- 1 cup walnut bits or pecan pieces
Add:
- 1 cup vegetable oil
- 3 eggs
- 2 cups mashed bananas (over ripe ones are great for breads)
- 1 Tablespoon vanilla
Blend by hand until well mixed.
Pour into greased/floured loaf pans.
Bake 350 degrees – Mini loaves 40 minutes, regular loaves 1 hour 5 minutes. (My experience with banana bread is that the timing all depends on the pans and the oven. I just cook mine until a toothpick inserted in the center comes out clean – being careful not to overbake.)
Optional glaze for drizzling over top:
- ½ cup powdered sugar
- ¼ teaspoon vanilla
- 1-2 teaspoons milk
Blend together with spoon and fill into a sandwich bag. Snip corner of bag and pipe onto cooled loaves.
Printable Recipe
Download Adobe Reader
 Share on Facebook
Filed in Breads, Doughs, and Crusts | Comments Off on Karen’s Best Banana Bread


