Posted by Tara on Thursday, January 7th, 2010

Why did the chicken cross the road? To get a bowl of soup!
My daughter has made this soup a couple of times. I think the Ramen noodles make it fun for kids of all ages. It’s quick and easy and tasty too.
Only one can of chicken made it into the photo, but we love meat around here so I used 2 cans. Also, you can buy the chicken flavored Ramen noodles and use the seasoning packet in place of the NOT CHICK’N bullion cubes. To avoid MSG, I toss the seasoning packets in the garbage, and substitute the NOT CHICK’N.

Ingredients:
- 1 small onion – diced
- 2 medium carrots – diced
- 2 celery stalks – diced
- 1 clove garlic – diced fine
- 2 12.5oz cans of canned chicken breast
- 2 packs of Ramen noodles broken into pieces
- 2 NOT CHICK’N bullion cubes
- 24 oz chicken broth
- 1 cup water
- Salt and Pepper to Taste

In large pot, bring chicken broth and water to a boil. Add onions, carrots, celery, garlic, and bullion cubes. Reduce heat to a low boil and continue boiling until carrots are tender (about 15 minutes). Add canned chicken, and Ramen noodle pieces. Simmer 5 minutes or until noodles are tender. Add salt and pepper to suit your own taste buds. Makes 6 generous bowls.
Download Adobe Reader
 Share on Facebook
Tags: chicken noodle, chicken soup
Filed in Soups and Salads | 2 responses so far
Posted by Tara on Tuesday, January 5th, 2010

This is one of my FAVORITE winter soups – adapted from PIONEER WOMAN. Once you try this soup – you’ll never go back to Campbell’s again. I keep the ingredients on hand at all times during the winter. If we ever do get snowed in, we’re ready! Make this soup, put on your comfy pants, curl up by the fire, and read a book. It’s just too easy to make and it tastes so good.
Sherried Cream of Tomato Soup
- 6 tablespoons melted butter
- 1 medium onion, diced
- 1 46-ounce bottle or can tomato juice or V-8 juice
- 2 14 ounce cans petite diced tomatoes
- 2-3 chicken bullion cubes (I use NO CHICK’N)
- Pinch of salt
- Black Pepper
- 1 cup cooking sherry
- 1 1/2 cups heavy cream – yes heavy cream
- chopped fresh parsley (optional)
- chopped fresh basil (optional)
In soup pot, sauté diced onions in butter until translucent. Add canned tomatoes. Add tomato juice, NO CHICK’N bullion cubes, pinch of salt and black pepper then stir to dissolve bullion cubes. Bring to a near boil, and then turn off heat. Add in sherry and cream and stir. Garnish with chopped herbs if desired. Serve warm with French bread.
Share on Facebook
Tags: Sherried Tomato Soup, soup
Filed in Soups and Salads | Comments Off on Sherried Cream of Tomato Soup
Posted by Tara on Saturday, December 26th, 2009

Asian Salad is pictured above with kabobs, rice and fruit. I fixed this when we went to the beach last spring. I used to take this salad to our Sunday Potluck Lunches at church. I could chop the greens and place in a Zip-Lock bag the night before. I would mix up the dressing and store it in a glass jar. Then I would brown the crunchy items, let them cool, and put them in a Zip-Lock bag. The salad is easy to transport, then right before serving these three unique mixes can be tossed together quickly and poured into a pretty serving dish.
The GREENS:
Mix together-
- 1 large head of NAPA cabbage, chopped or shredded
- 5 diced green onions
- 1 small green pepper chopped and diced
The CRUNCH:
- 1 stick real butter – no substitutions
- 2 packages Oriental flavor Ramen noodles – broken into small pieces (set aside seasoning packets
- ½ cup sesame seeds
- 1 cup sliced or slivered almonds
Melt butter in large skillet over medium heat. Add noodles, nuts, and sesame seeds. Stir constantly to sauté these ingredients in the butter. When noodles are light golden brown, remove skillet from heat. Tear off 3-4 paper towels and spread crunchy mixture over paper towels to drain and cool.
The DRESSING:
- ½ cup apple cider vinegar (I’ve substituted white vinegar in a pinch)
- ½ cup brown sugar
- ¼ cup smooth peanut butter
- 2 Oriental Ramen noodle Seasoning Packets (I avoid MSG, toss the packets and add 2 Tablespoons of Soy Sauce instead)
Mix all ingredients in a blender or with a mixer until creamy and smooth.
20 minutes before serving, mix the GREENS, the CRUNCH, and DRESSING together and toss lightly.
Variation: Add some diced baked chicken for a complete meal.
Printable Recipe
Share on Facebook
Tags: Asian Salad
Filed in Soups and Salads | Comments Off on Asian Salad
Posted by Tara on Thursday, December 24th, 2009

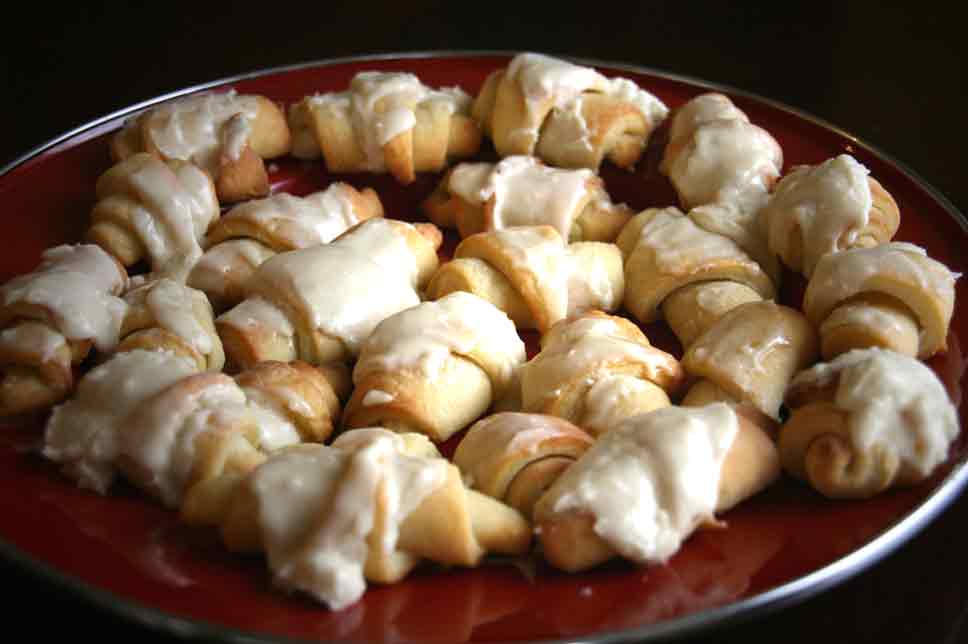
This is a family favorite of ours. When my dad was terminally sick with cancer, many people brought food to our house. Here in the south, that’s all we know to do in such cases – cook and pray. Anyway, our neighbor, Nancy Jones made a basket of these croissants and brought them over, warm from the oven. That was over 2 decades ago, but they have become a Christmas tradition at our house.
Although these are a specialty, the dough can be made a day or two ahead of schedule, and remain in the fridge until Christmas morning. It really takes very little time to roll into a circle and cut the wedges.

In large mixing bowl cream:
Add:
Work dough into smooth ball. Divide dough, making 2 smaller balls. Tear off 2 sheets of wax paper – about 18” long will work nicely. Now toss a handful of flour in the middle of each sheet and place a ball of dough onto each wax paper sheet. Gently wrap each ball of dough in the wax paper. Refrigerate overnight, or for up to 48 hours.
To Bake – Preheat oven to 350 degrees.
Remove wrapped dough balls from fridge and unwrap. Wipe counter with a damp paper towel. Leave dough on wax paper and place the paper and dough onto damp countertop. (The damp counter will hold the wax paper in place while you roll out the dough). Roll each ball into a thin circle (about the size of a 12” pizza). Dust rolling pin and or surface of dough with a little flour if you need it. Then I use a pizza cutter to create my wedges by cutting a circle in half. Next I cut each half in half again, making fourths. Then I cut each fourth into 3 equal pieces. There should be 12 wedges per circle when you are finished cutting. If you ever worked at Dominos – this fraction circle drill will be a breeze! Roll each wedge from wide end.

Place on ungreased cookie sheet. Bake for 30-40 minutes until golden brown. Drizzle icing over wedges while hot, before removing from cookie sheet. Transfer wedges to a pretty serving dish and serve while still warm.
Icing
In large mixing bowl beat on low speed:
Share on Facebook
Filed in Christmas,Holidays | Comments Off on Breakfast Croissants
Posted by Tara on Monday, December 21st, 2009

If you don’t have time to make Better Cinnamon Rolls, this recipe is the next best thing to serve on Christmas morning. I got this recipe a long time ago from my dear friend Betsy. Hi Betsy! Be sure you get all the ingredients when you make that last grocery store run. Sometimes the Cook N Serve Butterscotch Jello Pudding is hard to find close to Christmas.
- 1 pkg. frozen dough balls (15 count)
- 1 pkg, butterscotch pudding, NOT instant
- 1 stick real butter
- ¾ cup brown sugar
- cinnamon
- 1 cup chopped pecans
On Christmas Eve:
Butter a bundt pan
- Layer One: Sprinkle cinnamon in bottom of pan
- Layer Two: Add chopped pecans
- Layer Three: Add Dough Balls
- Layer Four: Sprinkle dry pudding mix over dough
- Layer Five: Melt butter and sugar. Pour over top.

Let prepared dough set out all night uncovered. Christmas morning bake 20-25 minutes at 350 degrees. Remove from oven, placing a plate or round serving platter on top of bundt pan. Flip pan to release sticky buns. Caution – it’s hot and sticky. Serve while warm. Faint and repeat.
Share on Facebook
Tags: butterscotch, sticky buns
Filed in Breads, Doughs, and Crusts,Christmas,Holidays | One response so far
Posted by Tara on Saturday, December 19th, 2009

For most of my growing up years, I was an only child. I remember being so very bored at home, and wanting someone to play with. I cherished the times during summer breaks when my cousin Kelly and I would spend a week at Grandmother’s house. We would giggle and laugh for hours. I also recall what a picky little eater Kelly was. Granddaddy would prop Kelly on his lap and proceed to spoon feed her mouthfuls of peanut butter straight from the jar. It was no surprise to me when I recently discovered Kelly making her own peanut butter and raving about it.
I thought this would be something neat to post and share. So I went “on the road” to photograph this process. I couldn’t believe how quick and easy it was to make peanut butter. If you can locate organic peanuts and ingredients, you will have a superior peanut butter to spread.
-
1 pound dry roasted unsalted peanuts (organic if possible)
-
1 teaspoon sea salt
-
1 ¾ Tablespoon organic sugar
-
1 Tablespoon Extra Virgin Olive Oil

Pour all ingredients into food processor. Blend for 5 minutes, or until smooth.

Scrape down sides of food processor bowl half way through the blending process.

Store peanut butter in airtight container in refrigerator.
Kelly and I still giggle and laugh a lot when we are together. She’s the best!
Download Adobe Reader
Share on Facebook
Tags: organic, Organic Peanut Butter
Filed in Healthy Cooking | Comments Off on Cousin Kelly’s Organic Peanut Butter
Posted by Tara on Friday, December 18th, 2009

Mother-In-Law’s Boiled Custard
What’s the difference between egg nog and boiled custard?? I’ve often thought of egg nog as a northern drink, and of boiled custard being the southern choice. I’ve been told that egg nog is the “spirited” drink. After researching this topic I’ve found that both these holiday drinks are frequently spiked.
Here’s what Yahoo Answers has to say about the difference between egg nog and boiled custard- for what it’s worth:
Traditionally egg nog is raw and not cooked at all! Custard also has a thicker consistency and the eggs have been tempered and slightly cooked. Traditional egg nog is very fluffy due to the beaten egg whites and the folding of cream. So to sum it up-the differences are texture and one is not cooked and the other is. Plus one will get you drunk faster.
I’d also like to set the record straight – my mother-in-law never spiked her boiled custard! Also, I don’t really care for boiled custard at all. I have bad memories of bad custard days of my youth – custard too thick to choke down, full of lumps and bumps. However, if I’d been started young on my mother-in-law’s custard – I think I could have been won over to this southern tradition. Hers is the best I’ve ever tasted – not too sweet, not too thick, and never, ever lumpy. Finally the taste of orange tickles the tongue, complimenting the sweetness. Are you ready to make some real stuff??
You will need:
- 1 quart of whole milk
- ½ cup sugar
- 3 eggs
- Salt
- Rind of one orange
- 1 teaspoon vanilla
- Double boiler
- Whipped cream
-
Nutmeg or Cinnamon
In large bowl combine milk and sugar, whisking to blend.
In small bowl, beat 3 eggs until fluffy. Strain beaten eggs in a mesh strainer, set aside.
Heat water in bottom pan to a double boiler until it begins to boil. Then put the milk and sugar mixture into the top pan of the double boiler. Stir frequently until milk mixture is pretty warm – but not boiling. Then add the strained eggs to the heated milk and sugar. Add the rind of one orange. Continue stirring until mixture begins to thicken slightly or about 5 minutes. The original recipe indicates the custard is officially custard, “when mixture coats a silver spoon.” Remove custard from heat and let cool to room temperature. Add a dash of salt and vanilla to the boiled custard. Remove the orange rind. When boiled custard has cooled, place in refrigerator. Serve cold custard in a pretty chilled glass. Garnish with whipped cream, and nutmeg or cinnamon.
Share on Facebook
Tags: boiled custard, eggnog
Filed in Christmas,Holidays | One response so far
Posted by Tara on Wednesday, December 16th, 2009

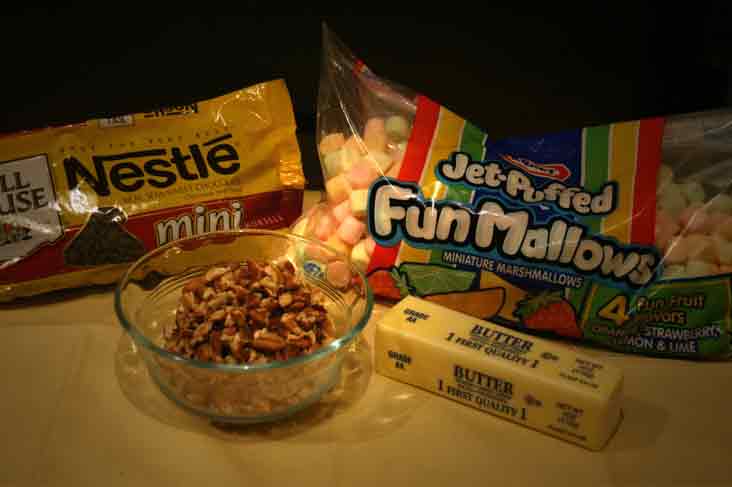
I’d never heard of Cathedral Windows as a food, until I started dating the guy who’d later become my husband. His mother would make these every Christmas. They are so easy and incredibly tasty. Like many of my favorites, these can be made ahead of time and refrigerated until ready to serve.

In large microwave safe mixing bowl add:
Microwave a minute at a time, stirring after each minute. Continue microwaving and stirring until mixture is melted and well blended. My microwave is pretty powerful, and it only takes about 1 minute, 30 seconds in mine for all to be melted. Be careful not to burn these ingredients. Nothing smells worse than butter and chocolate burnt in the microwave.
Then add:
Gently fold marshmallows and nuts into melted mixture.
Tear off 4 pieces of wax paper, about 18” in length.
Spoon mixture onto wax paper, creating a 12” strip that is about 1 ½ “ in diameter.
Roll up the wax paper and gently form/press mixture into a log shape.
Repeat this process, creating about 3 or 4 more 12” logs. 
Place all the rolls of mixture into refrigerator for 3-4 hours, or up to 2 weeks. Remove rolls and slice into ¼” slices. Place on a pretty dish and serve right away. Keep away from heat or extreme temperatures.
Yummy
Share on Facebook
Filed in Christmas,Cookies, Candies, and Squares,Holidays | Comments Off on Christmas Cathedral Windows
Posted by Tara on Tuesday, December 15th, 2009
Peanut Crock Pot Candy Clusters
When you’ve had a taste of this delectable confection you won’t believe how simple it is. You’ll be amazed how it always comes out & never fails.
1 – One pound jar of Lightly Salted Dry Roasted Peanuts
1 – One pound jar of Unsalted Dry Roasted Peanuts
1 – 12 oz. Pack Semi-Sweet Chocolate Chips
1 – 12 oz. Pack Reese’s Peanut Butter Chips
1 – One pound pack of White Chocolate Bark
1-package KRAFT Caramel BITS
Directions: Pour peanuts into large Crock-pot; add chips and white chocolate bark. Cover and turn on low setting. Now, go polish your car, or read a book. Come back in an hour or so. Stir with a large spoon; coating all the peanuts. Turn off heat before adding caramel bits and stir slightly to mix bits. Use a cookie dough scoop (2 oz) to form individual clusters on wax paper. Work quickly before mixture begins to harden.
This is a generous recipe and you will have a gracious plenty. I had about 80 clusters and bagged 10-12 clusters in clear plastic gift bags, then tied them with pretty ribbon. They can also be stored in Zip-Lock bags or plastic containers, but don’t expect it to last very long because each morsel is filled with a wonderful taste of chocolate and is chocked full of peanuts. Enjoy!
Share on Facebook
Tags: candy, clusters, peanut
Filed in Christmas,Cookies, Candies, and Squares,Holidays | 3 responses so far
Posted by Tara on Monday, December 14th, 2009

Here’s another recipe from my mother-in-law. I don’t think I’ve had any other treats similar to these. They are fantastic and easy to make. Although Cheese Dreams compliment many soups and chili when served in place of crackers, they are delicious by themselves. They make terrific gifts too, when wrapped in clear bags and tied with a pretty bow.
You will need:
- 2 sticks soft butter
- 2 cups shredded sharp cheddar cheese
- 2 cup Rice Crispy Cereal
- 2 cups plain flour
- 1 Tablespoon Paprika
- Cayenne Pepper (optional) enough to please your tastebuds!
In a large bowl, cream soft butter with mixer. Add cheese and blend again. Add the flour, Rice Crispy cereal, paprika, and cayenne pepper. Mix until all is well blended. Use a tablespoon or a cookie dough scoop to form 2” balls. Place balls 2 inches apart on ungreased cookie sheet. Use a fork to flatten and press a criss-cross pattern into Cheese Dream. Bake 350 degrees for 15 minutes. Cool Cheese Dreams and store in an airtight container. Makes approximatey 30 dreams.
Printable Recipe
Download Adobe Reader
Share on Facebook
Tags: Cheese Dreams
Filed in Appetizers | 3 responses so far


