Posted by Tara on Tuesday, April 20th, 2010
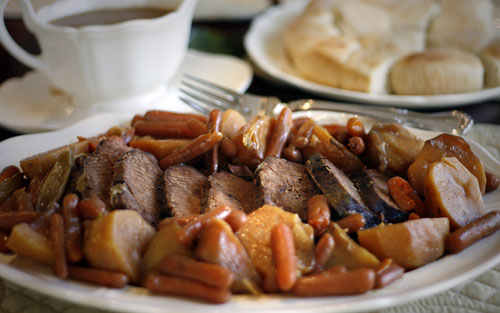
Some things are just too easy, like Sunday Dinner Pot Roast. I can’t think of an easier “company’s comin’” meal than pot roast. As my family sat around the table Sunday, there was little conversation while they devoured beef and potatoes. I remember someone saying, “Mmm, I just LOVE beef!” The prep time for this tasty Sunday tradition is 10 minutes tops which hardly seems fair for such a hearty, tasty end result.
You can use any cut of roast beef, but I have the best results with a rump roast. There is less fat in this cut, it slices nicely, and always pleases. I like to purchase a large one and use the whole roast if company is coming, or cut it in half to make 2 meals for just us. All the ingredients go into a crock pot on Saturday night -right before bedtime and cook all night long.
-
1 large rump roast beef (more taters if company is coming)
- 4-5 medium potatoes, peeled and halved the whole carrot sticks)2-3 cups baby carrots (or peel and scrape
-
1 large onion peeled and quartered
-
2 celery sticks, cut into 4” pieces
-
1 can cream of celery soup
Place baby carrots evenly across the bottom of crock pot.

Next place the roast beef on top of carrots in the middle of the crock pot. Add potatoes, filling in the area between crock pot and the roast beef. Add celery sticks and onion quarters.
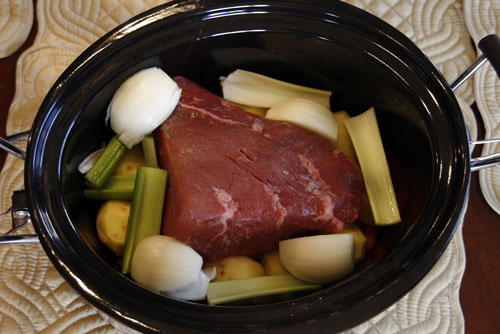
Pour a can of cream of celery soup over roast beef. Then sprinkle salt and pepper on top of soup and roast beef. Cover and turn on crock pot.
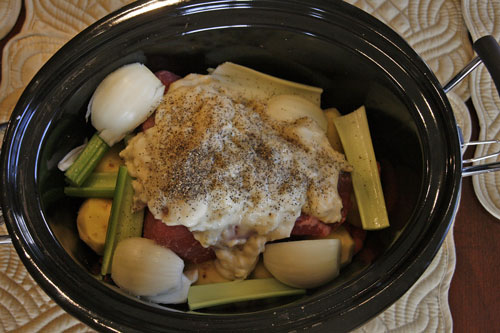
Cook roast and veggies overnight. I cook mine on high over night (about 8 hours) and reduce heat to warm the next morning (about 4 hours). However crock pot temperatures may vary and 12 hours on low heat may be adequate. The roast needs to cook long enough to become tender. If a roast seems tough, it just needs to cook some more.
On a final note, I never add water to my crock pot roast. The soup and juices from the beef make perfect gravy for my family. However, it wouldn’t hurt to add a cup or two of water if your family prefers more of a broth than gravy. Salt and pepper to taste
Printable Recipe
Download Adobe Reader
 Share on Facebook
Tags: crock pot, pot roast, roast beef, southern
Filed in Beef | One response so far
Posted by Tara on Thursday, April 15th, 2010
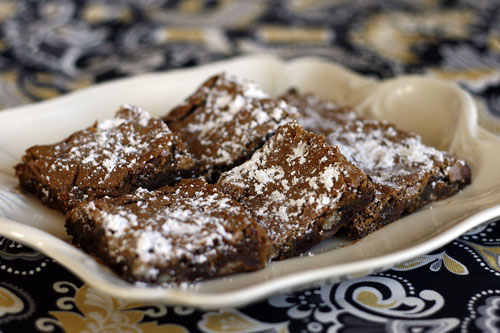
If you are looking for a basic “from scratch” recipe that is tasty and quick, then try Bertha’s Butterscotch Brownies. This recipe was handed down to me by my mother-in-law from her mother – Bertha McFarland Palmer. The subdivision in which we live was once part of the McFarland farm. Standing at the kitchen sink washing dishes, I have a serene view of the remaining farm from my kitchen window, complete with cows and even a donkey.
The original recipe calls for nuts, which can be omitted if you are not a nutty fan. I like to sprinkle the cooked brownies with powdered sugar before cutting them into squares. Or sometimes I like to add both nuts and semi-sweet chocolate chips and serve these topped with caramel sauce and vanilla bean ice cream. Any way you serve them, they are a hit!

- 1 stick butter – melted
- 2 cups dark brown sugar
- 2 eggs – beaten
- 2 teaspoons vanilla
- 1 cup all purpose flour
- 2 teaspoons baking powder
- 1 teaspoon salt
- 1 cup chopped pecans – optional
- 1 cup semi-sweet chocolate chips – optional
- Powdered sugar for dusting
Sift together the flour, baking powder and salt (I never do this) and set aside.
In large bowl add the butter and microwave until melted. Then add the brown sugar and mix well. Add the beaten eggs and vanilla to the brown sugar and butter mixture. Blend well then add the dry ingredients to the wet ingredients and stir to blend. Add nuts and/or chocolate chips if desired.
Pour batter into a lightly greased 9×13 pan. Bake at 350 degrees for 25 minutes. When brownies cool sprinkle with powdered sugar and cut into squares. If I plan to serve these with caramel topping and ice cream, I don’t sprinkle the cooked brownies with powdered sugar.
Printable Recipe
Download Adobe Reader
 Share on Facebook
Tags: blondies, Brownies, butterscotch, southern
Filed in Cookies, Candies, and Squares,Desserts | 2 responses so far
Posted by Tara on Wednesday, April 14th, 2010
It’s time to talk dirty again. Due to the L O N G winter, we are running a little later preparing our raised bed garden this spring. Do you have your garden ready? Most local garden centers here in Middle TN suggest planting around April 15th to avoid any frost. So let’s get those taxes done and get our beds ready. Plantin’ time is almost here! Here’s our recap from last year’s prep work.
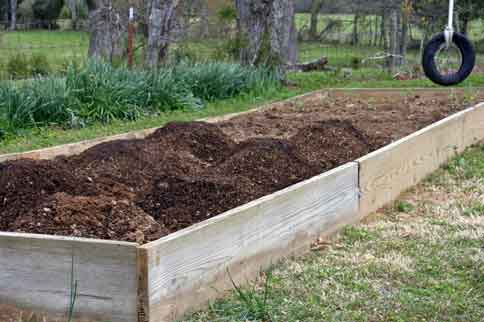
Hey all you wanna be gardeners (like us) out there! Do you have your raised bed frame built yet? Then it is time to talk DIRT. Last weekend, we shopped for dirt – how EXCITING! We wanted all the larger rocks, roots, and twigs removed so we purchased 2 truck bed loads of sifted topsoil. It was a beautiful day and the kids were pretty eager to help move the dirt from the truck bed to the raised bed. Notice how much richer the topsoil appears than the dirt in our yard.
Then Sunday after church we spent some time in Lowe’s pondering how we could spice up our dirt to yield the most abundant haul of crops this year. We may be beginners, but we can still dream big right? If you purchased the Organic Gardening book, you need to read the chapter on DIRT. There is a lot to know about dirt.
Happy vegetables need a soil that is not too sandy, without a lot of clay, and with the perfect PH. The topsoil we purchased needed to be enriched somehow. Humus is a terrific soil additive and it is made from once living things, which have died, and have decomposed. Peat moss is a popular humus substance. Seasoned manure (I can’t believe I just typed that on a cooking web-site) is another choice soil enhancer. After much debate, we finally settled on an organic mix which contained humus, manure, and soil. We chose the organic because -well, we want an organic garden. We purchased 12 bags of Miracle Grow Organic Choice Garden Soil. It costs a bit more than buying separate ingredients. But all the gardeners we have talked with rave about the results from this mixutre.
We spread the mixture over our topsoil, then used a hoe and shovel to mix the topsoil with the Miracle Grow Organic Choice. Now the raised bed is ready and waiting for seeds, and sunshine, and April showers!
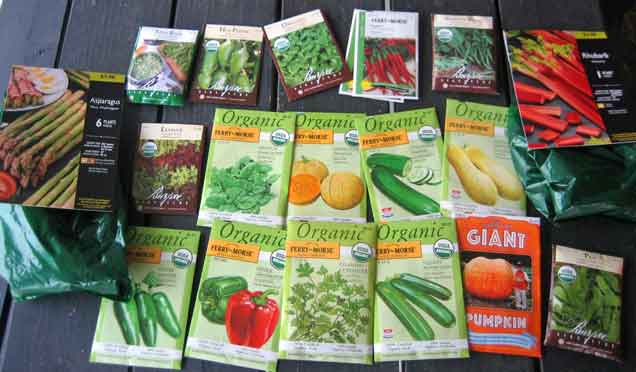
We have been purchasing organic seeds for all the veggies we are craving. We’ve got sqauash, zucchini, cucumbers, tomatoes (plants), green beans, lima beans, green pepper, jalapeno pepper, red hot peppers, pumpkin, asparagus, herbs, and rhubarb. Now I gotta go read the 150+ page chapter on how to plant and care for each one of these babies. Stay tuned for more gardening action!
 Share on Facebook
Tags: Gardening, organic
Filed in Gardening | One response so far
Posted by Tara on Friday, April 2nd, 2010

Here is another one of our Easter traditions we enjoy at our house and wanted to share – Pastel Chocolate Mint Cream Cookies. The kids have helped me make these many times for Easters past. The recipe is quick and easy, made from scratch with basic ingredients, plus the mint creams. Thanks to Betsy, one of my high school gal pals, for sharing this recipe with me years ago.
- 2 ½ cups all purpose flour
- 1 teaspoon baking soda
- 1 1/3 cups packed dark brown sugar
- 1 ½ sticks real butter
- 2 Tablespoons water
- 12 oz package semi-sweet chocolate pieces
- 2 eggs beaten
- 1 pound pastel mint cream kisses
Stir flour and baking soda together and set aside. In a large bowl, add brown sugar, butter, water, and semi-sweet pieces. Microwave a minute at a time, stirring after each minute, until mixture is smooth and melted. Let mixture cool slightly. Then add the beaten eggs and the flour mixture. Combine to form a soft dough. Then cover bowl and chill for 1-2 hours. Shape into 1” balls. Place balls 2 inches apart on an ungreased cookie sheet. Bake in 350 degree preheated oven for 8 minutes. Remove pan and immediately top each cookie with a mint. Return to oven for another 2 minutes. Remove cookies from oven and swirl the melted mints with a knife to “frost” cookies. Remove and cool till mints are firm.
Printable Recipe
Download Adobe Reader
 Share on Facebook
Tags: chocolate, cookies, mint cream cookies, mint creams
Filed in Cookies, Candies, and Squares | 7 responses so far
Posted by Tara on Monday, March 29th, 2010
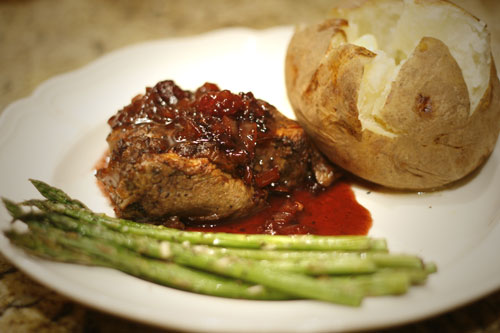
I wish my Dad were still living. I’d make him this dish for Father’s Day. Nothing beats Filet Mignon for taste and tenderness. Although tenderloin is served here only on special occasions due to cost, it is the leanest cut of beef. Glad there’s a positive trade off!
Who would have guessed that beef and blackberries would be so complimentary? Here’s a recipe I’ve adapted from the Deen Brothers.
- 4 6oz Filet Mignon (Beef Tenderloin)
- Salt
- Fresh ground black pepper
- 2 Tablespoons olive oil
- ½ cup red wine or cooking sherry
- ¼ cup finely chopped shallots or sweet onion
- 1 cup beef broth
- 3 tablespoons Myrna’s Blackberry Preserves
- 2 Tablespoons real butter
- Fresh blackberries for garnish
Pat the steaks dry with paper towels and generously season with salt and pepper. In a heavy iron skillet, heat the olive oil over medium-high heat. Sear the steaks in the hot oil for 3 minutes per side for medium rare. Transfer steaks to a serving plate , cover with foil, and let stand while preparing the glaze. (I enjoy a well done steak. I ran my steak under the broiler unit for 3-4 more minutes, then covered it with foil for a while.)
Using the same skillet, sauté the shallots for a minute. Add the red wine, scraping up any browned shallots off the bottom of the skillet. Let wine boil until reduced by half. Add broth and blackberry preserves. Return to a boil and reduce by half. The sauce should coat the back of a spoon. Whisk in the butter and season sauce with more salt and pepper to taste.
To serve, drizzle the sauce over the steaks and garnish with a few fresh berries.
Printable Recipe
Download Adobe Reader
 Share on Facebook
Tags: Beef Tenderloin, blackberry glaze
Filed in Beef | One response so far
Posted by Tara on Tuesday, March 23rd, 2010
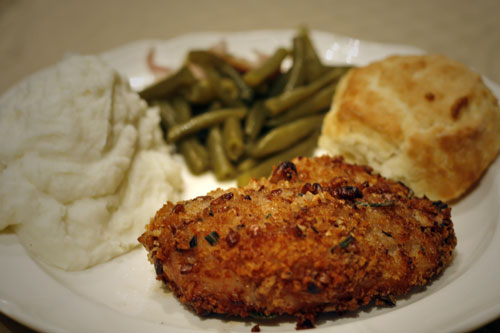
Next time whole pork tenderloin is on sale, pick up one or two or three. Have the butcher cut them into 1” thick slices and you’ve got some less expensive boneless pork chops to country fry, BBQ, or in this case, oven fry.
• 3 egg whites
• 1 Tablespoon cornstarch
• 1 ½ cups Panko (Japanese) bread crumbs
• ¾ cup pecans – chopped fine
• 1 teaspoon salt
• ¾ teaspoon sage
• ¾ teaspoon crushed rosemary
• 4-6 1 inch thick boneless pork loin chops
• ¼ cup olive oil
• ¼ stick real butter
In a shallow dish, whisk together egg whites and cornstarch until well blended and smooth.
In another shallow dish, combine bread crumbs, pecans, salt, rosemary, and sage. Dip pork chops in egg white mixture to coat both sides of pork chop. Dredge pork chop in bread crumb mixture, and press crumbs gently to pork chop. Coat all pork chops and place on paper towels until ready to fry.
Add olive oil and butter to an oven proof skillet and heat over medium heat. I like to use a 10” iron skillet. Add pork chops and cook for 3-4 minutes on each side. Drain any excess grease before transferring skillet to 400 degree preheated oven. Cook 15-20 minutes or until chops are tender to fork and breading is golden brown.
Printable Recipe
Download Adobe Reader
 Share on Facebook
Tags: oven fried pork chop
Filed in Pork | Comments Off on Oven Fried Pork Chops
Posted by Tara on Thursday, March 18th, 2010
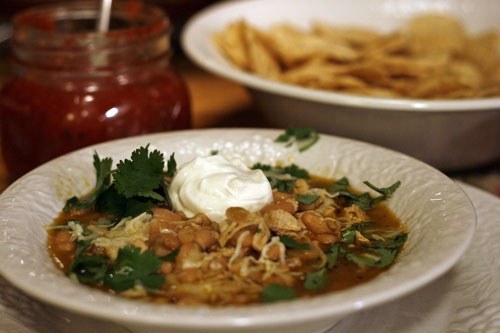
Here’s another fabulous recipe from The Pioneer Woman. Since I’m still chilled to the bone and winter won’t leave Tennessee, I give you another warming soup. This is one of the best white chili recipes I’ve ever tasted.
• 4 large chicken breasts with ribs and skins or small chicken cut up (or 3 Cups Cooked Chicken)
• 1 whole Medium Onion, Diced
• 4 cloves Garlic, Minced
• 2 whole Cans Green Chilies, Chopped
• 1 pound Dried Great Northern Beans, Rinsed
• 8 cups Chicken Broth
• 1 whole Jalapeno, Sliced
• 1-½ Tablespoon Ground Cumin
• ½ teaspoons Paprika
• ½ teaspoons Cayenne Pepper
• Salt To Taste
• White Pepper, To Taste
• 1 cup Whole Milk
• 2 Tablespoons Masa (corn Flour) OR Cornmeal
• Grated Monterey Jack, To Taste
• Sour Cream For Garnish
• Cilantro For Garnish
Cover chicken and cook for 20 to 30 minutes or until done. Remove meat from bones. Set aside.
In a dutch oven over medium-high heat, saute onions and garlic for 2 minutes. Add chopped green chilies, then rinsed beans. Pour chicken broth into the pan. Add sliced jalapenos. Season with salt, pepper, and cumin. Place lid on pot and reduce heat to low.
Cook for 2 hours or until beans are done. Halfway through the cooking process, add 3 cups of cooked chicken.
When beans are tender, mix milk with masa (or cornmeal) and pour into the chili. Cook for an additional ten minutes to thicken. Check seasoning and adjust, adding cayenne pepper and paprika if desired. Add some Monterey Jack cheese to the pot and stir to melt.
Serve chili in a bowl. Garnish with cilantro, sour cream, extra cheese—even pico de gallo and guacamole, if you have some on hand. Roll up warm corn tortillas and serve on the side of the bowl.
Printable Recipe
Download Adobe Reader
 Share on Facebook
Tags: white chicken chili
Filed in Chicken,Soups and Salads | 4 responses so far
Posted by Tara on Thursday, March 11th, 2010
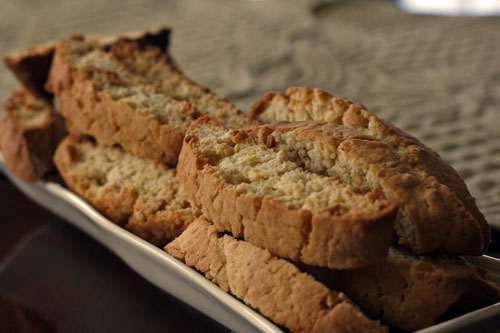
I enjoy meeting other moms who share my passion for cooking. Our family is part of a fantastic home school group that meets every Friday. We have a “Mom’s Corner” where special food is left prepared for all Mom’s. We can sample different dishes each week, visit with each other briefly, and even leave prayer requests for our families. I knew I’d found a kindred spirit when I tasted Tina’s home made Biscotti. I’d never had Biscotti before – and Tina’s was fantastic! This recipe makes a generous amount. This will be one of those holiday gifts from the heart recipes I will be calling upon in December. But don’t wait until December to bake your own Biscotti. Tina makes it easy for us to bake Biscotti anytime!
- 2 sticks unsalted butter
- 2/3 cup vegetable oil
- 1/3 cup milk
- 5 eggs
- 3 ¼ cups sugar
- ¾ teaspoon Anise extract
- 2 Tablespooons pure vanilla
- ½ cup Grand Marnier liqueur
- 7 cups plain flour
- 7 teaspoons baking powder
- 2 cups chopped almonds, toasted
- 1 teaspoon salt.
Melt butter, add oil and milk. Set aside.
Beat eggs. Add sugar, Anise, vanilla, and liqueur. Add to butter mixture.
Mix dry ingredients, add nuts. Then proceed to add dry mix to egg mixture.
Refrigerate dough 30 minutes.
Roll dough out on floured board about 14 inches long by 2 inches wide and about ½ in thick. There will be enough do to make several 14x2x1/2 inch rectangles.
Place shaped dough onto cookie sheet and bake at 350 degrees for 20 minutes.
Remove Biscotti and let it cool a few minutes, then slice Biscotti at an angle into ½” thick slices. Put Biscotti back in the oven and toast to a golden brown or about 10 minutes. These cookies are supposed to be very crisp. Store in airtight container.
Printable Recipe
Download Adobe Reader
 Share on Facebook
Tags: biscotti
Filed in Cookies, Candies, and Squares,Desserts | Comments Off on Biscotti
Posted by Tara on Wednesday, March 3rd, 2010
If anyone has yet to visit Pioneer Woman’s Tasty Kitchen Food Blog (www.thepioneerwoman.com) – you’ve been missing out! I joined Tasty Kitchen last summer and have submitted some of my favorite recipes. I’m known as Taracooks over at Tasty Kitchen too. I have made some cooking friends there and have tried some “tasty” recipes. I was also so excited when Tasty Kitchen featured Taracook’s Red Velvet Whoopie Pies and Chocolate Melting Cake on the home page around Valentine’s Day.
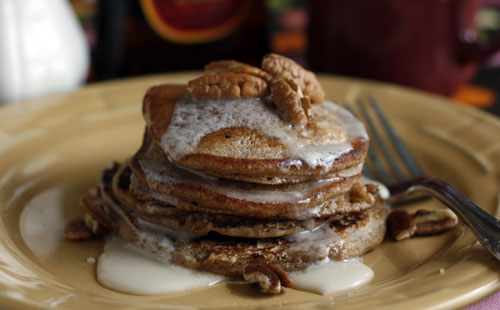
Prior to Valentine’s Day Tasty Kitchen member Sappeylissy posted her recipe for Cinnamon Bun Pancakes. They were favored by many other Tasty Kitchen members and I recently whipped up a batch one Saturday morning. I substituted the whole wheat flour and added pecans to please my man. They were delicious. I made a thin powdered sugar icing to pour over the pancakes. I also mixed some soft butter with real maple syrup. I can’t tell you which way was better to top off the pancakes. You will have to make these and try both toppings for yourself. Let’s just say – there was a lot of lip smackin’ going on here.
- 1-½ cup All-purpose Flour (I used Whole Wheat)
- 3 Tablespoons White Sugar
- ½ teaspoons Salt
- 4 teaspoons Baking Powder
- 1 Tablespoon Cinnamon
- 2 whole Eggs Beaten
- 1 cup Milk
- 2 Tablespoons Corn Syrup
- ¼ cups Butter, Melted
- 1 Tablespoon Vanilla
- Chopped pecans – optional
In medium bowl, combine flour, sugar, salt, baking powder and cinnamon with a whisk. Whisk well to make sure everything is combined.
In separate large bowl, beat together eggs, milk, corn syrup, butter and vanilla. Stir in flour mixture.
Heat a lightly oiled griddle or frying pan over medium/low heat. Pour about 1/4 cup batter onto griddle. Brown on both sides. Sprinkle pecans over uncooked side of pancakes before flipping.
Serve warm with icing drizzled over the top.
Printable Recipe
Download Adobe Reader
 Share on Facebook
Tags: cinnamon bun pancakes
Filed in Breakfast | 2 responses so far
Posted by Tara on Monday, February 22nd, 2010
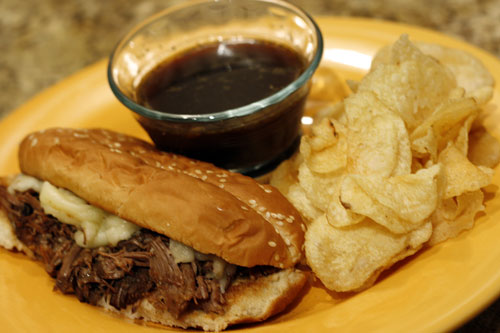
I recently tried Pioneer Woman’s Drip Beef Sandwich. It was a hit here in ‘Possum Town and one I will be repeating frequently. I have modified the recipe slightly. Pioneer Woman said I could. Not really, but I know she wouldn’t mind me tweaking it and sharing with you. It’s EASY and LIP SMACKIN’ good. So pick up a roast when they are ON SALE and make this for lunch or dinner, or your next party.
- 1 2-3 pound roast (I like rump or bottom round, but chuck works well too)
- ½ jar Pepperoncinis and ½ the juice ( I bought a 16oz jar)
- 2 cans Campbells Beef Consume
- 1 soup can of water
- 3-4 Tablespoons Italian Seasoning/herbs
- 3-4 Tablespoons Peppercorns
Trim any excess fat off roast before placing it in a crock pot. Add pepperoncinis, beef consume, water, Italian seasoning, and peppercorns. Place lid on crock pot. Simmer all day or overnight on high. When roast is done and tender, remove it from crock pot and shred the beef with a fork.
To serve sandwiches:
Open hoagie buns and spread insides with butter. Broil buns in oven until they turn golden brown. Remove buns from oven and top one half or side with shredded beef. Top the other side with shredded Italian Cheese blend (mozzarella, provolone, Romano, parmesan). Return buns to oven and continue broiling until cheese is melted and slightly golden brown.

Remove sandwiches from oven then close the hoagie to complete the sandwich. Serve with the cooked pepperoncinis. Use broth from crock pot to as a sandwich dip.
Printable Recipe
Italian Roast Beef Dip Sandwich
 Share on Facebook
Tags: beef sandwich, Italian, roast beef sandwich
Filed in Beef,Main Dishes,Super Bowl | One response so far


