Cheesy Broccoli Potato Soup

Posted by on Sunday, January 1st, 2012

Broccoli-Cheese-Soup[1]Cheesy Broccoli Potato Soup is a hearty crowd pleaser. I recently prepared this soup for a teacher luncheon and it got rave reviews.  Kids love it, girlfriends love it, and it’s hearty enough to satisfy the males in my life in spite of the fact that it is a meatless soup.   It’s perfect to serve on a snow day.  And it is comforting to serve it to a family memeber suffering from a cold.  It can also be frozen and it reheats well in the microwave.  And sometimes, I’ve even served it over baked potatoes as a tasty topping.  What more could one ask from a soup?

  • 1 large sweet yellow onion – peeled and diced
  • 3-4 stalks celery – chopped fine
  • 3 Tablespoons olive oil
  • 6 cups water
  • 6 chicken bullion cubes
  • 6 medium potatoes – peeled and diced
  • 1 head broccoli florets or 1 bag frozen broccoli florets
  • 1 can cream of chicken soup
  • 1 can cream of mushroom soup
  • 1 can cream of celery soup
  • 1 pound Velveeta cheese – cubed
  • Salt and Pepper to taste
  • Shredded Cheddar Cheese for garnish

Sauté onions and celery over medium heat in large stock pot.  Add the 6 cups water and heat until water begins to boil.  Add bullion cubes, diced potatoes, and broccoli florets.  Reduce heat to a low boil and cook for 1-15 minutes or until potatoes are tender.  Add the cans of soup and stir until well blended.  Reduce heat to low then add the Velveeta cheese cubes.  Stir frequently until cheese melts then serve right away.   Add salt and pepper to suit your own taste.  Garnish with shredded cheddar cheese.

Printable Recipe

Cheesy Broccoli Potato Soup

Download Adobe Reader

Filed in Soups and Salads | 7 responses so far

Western Black Eyed Peas

Posted by on Friday, December 30th, 2011

Black-Eyed-Peas-cornbread

Although I’m a southern gal, this is my favorite way to eat black eyed peas.  You could also add a cup of country ham pieces if you are partial to the west and the south!  Happy New Year!

For this meal, I started with one pound package of black eyed peas and cooked them according to “quick soak package directions.”  After rinsing the peas and sorting out any residual material, add the pound of peas to 8 cups of hot water in a large pot. Bring peas and water to a rapid boil and let boil for 2 minutes. Cover peas and remove from heat.  Let peas set for one hour.  Then drain and rinse peas.  Then follow this recipe below to make Western Black Eyed Peas.

To a large pot add:

1 pound rinsed black eyed peas which have been “quick soaked” and have set for an hour

8 cups water or chicken broth

Let peas and water or broth simmer for about 1 1/2 hours.

While black eyed peas simmer, chop 1 onion and 3-4 cloves of garlic. Sautee onions and garlic in 2 Tablespoons bacon drippings.  After black eyed peas have simmered for about 1 1/2 hours, add the sauteed onions and garlic to pot along with a can of Rotel tomatoes.  Season with salt and pepper to taste. Let peas simmer another 20-30 minutes.  Our family likes 1 teaspoon cumin added to the mix as well.  Serve with sliced tomatoes, fried corn, and of course some home made corn bread!

Filed in Meatless Monday,Soups and Salads | 2 responses so far

Chocolate Ganache

Posted by on Thursday, December 29th, 2011

ganache

Here’s another quick and easy New Year’s Eve party pleaser!  Melt chocolate chips and mix with cream.  Makes a delectable dip for you favorite party treats.

Chocolate Ganache

  • 3/4 cup real whipping cream
  • 8 oz semi sweet chocolate chips

In a medium saucepan, bring whipping cream to a boil.  Remove from heat and add chocolate. Stir until blended.

Serve chocolate ganache with an assortment of dippers, such as fresh strawberries, pretzel sticks, pound cake chunks, marshmallows, apple slices, or other fresh fruit.  Great for parties!  Leftover ganache can be stored in an airtight container, then zapped in the microwave for a few seconds before serving.

Filed in Appetizers | Comments Off on Chocolate Ganache

Pineapple Cheese Ball

Posted by on Wednesday, December 28th, 2011

cheeseball

Are you looking for a New Year’s Eve appetizer?  Here’s one of our family’s favorites – Pineapple Cheese Ball.  It’s tasty served with Wheat Thins or Ritz crackers or even pretzels.  And better yet, this one is quick and easy to whip up!

Pineapple Cheese Ball

  • 2- 8oz packages cream cheese (room temperature)
  • 1- 8oz can crushed pineapple, drained
  • ½ cup chopped green pepper
  • 2 Tablespoons finely grated onion
  • 1 teaspoon Lowry’s seasoned salt
  • 1 ½ cups chopped pecans

In a large mixing bowl whip cream cheese until smooth.

Add the drained pineapple, chopped green pepper, grated onion.  Mix until blended.  Then add the seasoned salt.

Form 1 large, or 2 smaller balls with this mixture. (I like to wrap the mixture in wax paper to form a ball). Then roll the cream cheese ball in the chopped pecans to evenly coat.  Wrap completed cheese ball(s) in wax paper and refrigerate until firm (2-4 hours).  Serve with Wheat Thins.  We rarely have any of this cheese ball left over.  However, it is best when consumed within a day or two.

Filed in Appetizers,Holidays | Comments Off on Pineapple Cheese Ball

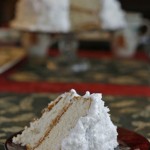
My Mamma’s Old Fashioned Southern Coconut Cake

Posted by on Monday, December 19th, 2011

Coconut-Cake3

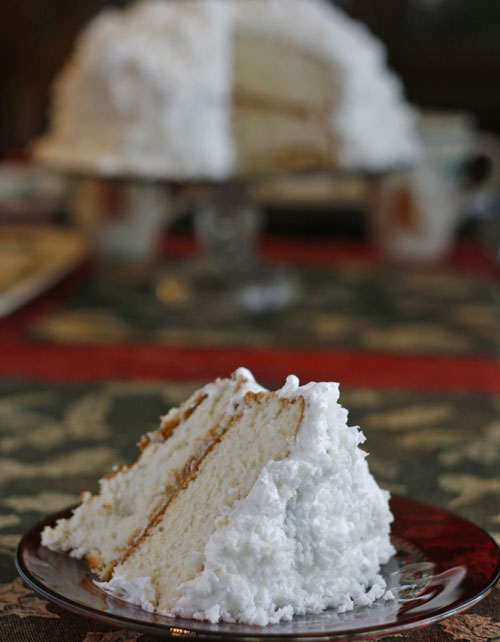
Growing up I took a lot for granted. I believed my parents existed for the sole purpose of fulfilling the needs and wants my little brother and me. I never really gave much thought to the notion that my parents might actually love each other or that they might also place a higher priority on their marriage relationship than on their relationship with me. You see, the passing of first my Dad, then my Mamma were both untimely. There are many aspects of their lives that interest me and I wish I could inquire in person with the uncountable questions I now have. If they were both alive today, I would have them give me an account of how they met, why they fell in love with each other, and what kept them together through so many tough times. Now when I reflect back on my childhood, I realize my Mamma’s Coconut Cake was a labor of her love for Dad.

Every Christmas Mamma would purchase a couple of REAL coconuts. She would bring those coconuts home, get out Daddy’s hammer and a nail, and then make holes in the coconut “eyes” so she could drain and save the coconut milk. Then she would carefully chisel away the coconut shell. Has anyone else ever tried to do this? It is a painstaking task to say the least. Next she would need to trim off the softer part of the coconut shell from the meat. Then Mamma would get out her grater and grate each piece of coconut by hand. Then she had to make the cake, boil and beat the frosting, pour coconut milk over each cake layer, assemble the cake, and let it set in the fridge at least a couple of days before Christmas. Whew, just thinking about her cake making process makes me tired!

One year Mamma didn’t have enough room in the fridge to store the cake. We were in the midst of a cold snap here in the south, so she set the cake in the garage on top of the dryer, and rested one of those Tupperware cake taker tops over the cake. There the sacred cake rested, while the moistness magic happened until Christmas day. I will never forget seeing my Mom on the verge of tears Christmas Eve morning. My cat, which had taken up residence in the garage during the cold snap, found the coconut cake and had a Christmas feast, destroying it.

Momma could have cussed and cried, sulked and screamed, or threw up her hands and had a pity party. But she was determined for Dad to have his favorite Christmas treat. So she got her purse, hopped in the car, and headed out to the grocery for 2 more coconuts. She went through the whole coconut cake baking process AGAIN! I didn’t understand why she went to all that fuss many years ago, but now I realize it was because she loved my Dad so much and aimed to please him with her coconut cake. Thanks Mamma for the lesson on love and determination.

Making coconut cake for me is a little easier because I can buy canned coconut milk and fresh frozen coconut. I also cheat a little and use a white cake mix! And this year I am carrying on Mamma’s tradition of love with my own version of her sacred coconut cake.

  • 2 White Cake Mixes + 6 egg whites, 4 Tablespoons oil, and  2 2/3 cups water
  • 1 can coconut milk
  • 2 6oz packages Birds Eye Fresh Frozen Coconut
  • Home Made Coconut Icing:
  • 1 1/2 cups Sugar
  • 1/2 teaspoon Cream of Tarter
  • 1/4 teaspoon salt
  • 5 large egg whites
  • 1/2 cup hot water
  • 1 teaspoon vanilla extract

In an extra large  bowl add the cake mixes, eggs, oil and water.  Mix batter with electric mixer for length of time directed on package.  Grease and flour 3 9″ round cake pans.  Fill each cake pan 2/3 full with cake batter.  Make cupcakes with any remaining batter, or just discard it.  Bake cakes according to package directions.  Remove cakes from oven when done.  Use a straw to poke holes in warm cake layers.  Pour some of the coconut milk (about 1/3 cup) over each layer.  Let cake cool completly.

While cake cools, make the icing.  Add the sugar, water, salt, and cream of tarter to a medium size sauce pan. Clip a candy thermometer on the side of the pan, and turn the heat to medium.  Stir constantly until sugar is dissolved and mixture is almost clear.  Cook without stirring until temperature reaches a soft ball stage of 240 degrees. Turn off heat and set mixture aside while beating egg whites.

In a large bowl beat egg whites until soft peaks form.  Slowly add the syrup mixture to the egg mixture while continuing to beat the egg mixture.  Add the vanilla extract and continue beating until stiff peaks form and frosting is thick enough to spread.

Turn first cake layer onto a pretty cake plate.  Spread frosting over top, then sprinkle some of the fresh frozen coconut over first layer.  Repeat this process with remaining layers, completely covering the sides and top of cake with frosting and coconut.  Refrigerate 1-2 days before serving for best results.  Keep refrigerated.

Merry Christmas Everyone!

Filed in Christmas,Desserts,Holidays,Pies and Cakes,Uncategorized | 11 responses so far

Cookie Cutter Cookies

Posted by on Thursday, December 15th, 2011

cookie

Here’s a delicious cookie recipe that is perfect for using those cookie cutters you’ve collected over the years.  I love this recipe because it does not have to be chilled and the dough does not spread out and distort the cut out shapes like the popular tube dough tends to do.  So grab the kids and head to the kitchen for some Holiday baking and memory making!

  • 2 sticks soft salted butter (no substitutions)
  • 1 cup sugar
  • 2 teaspoons vanilla
  • 1 large egg
  • 3 cups flour
  • 2 teaspoons baking powder

Cream butter and sugar on high speed until light and fluffy.  Add vanilla and egg.  Beat 2 minutes on high speed.  Mix flour and baking powder together, then add flour mixture to butter/sugar mixture a cup at a time, beating after each addition.

Divide dough into halves and form a ball with each half.  Turn dough onto a floured surface. Roll each ball of dough into a 12″ diameter circle, about 1/8″ in thickness.  Dip cookie cutters in flour and cut out cookies.  Place cookies on ungreased cookie sheet, leaving a couple inches of space around each cookie.  Sprinkle any cookie trims on cookies before baking.  Bake at 400 degrees for 5-6 minutes, or until cookies are only slightly browned.   Remove cookies from oven and let them completely cool.  Decorate cookies with colored butter cream frosting.  Watch them disappear quickly!

Butter cream frosting:

  • 4 cups powdered sugar
  • 2 sticks soft butter
  • 2 teaspoons vanilla
  • 2-3 Tablespoons heavy cream or milk
  • food coloring

Cream butter and powdered sugar together with a mixer.  Add vanilla and milk.  Mix on high speed until frosting is light and fluffy.  Add food coloring if desired.  To make evergreen trees, use a grass cake decorating tip.

Printable Recipe

Cookie Cutter Cookies

Filed in Cookies, Candies, and Squares | 4 responses so far

Old Fashioned Gingerbread

Posted by on Thursday, December 8th, 2011

gingerbread

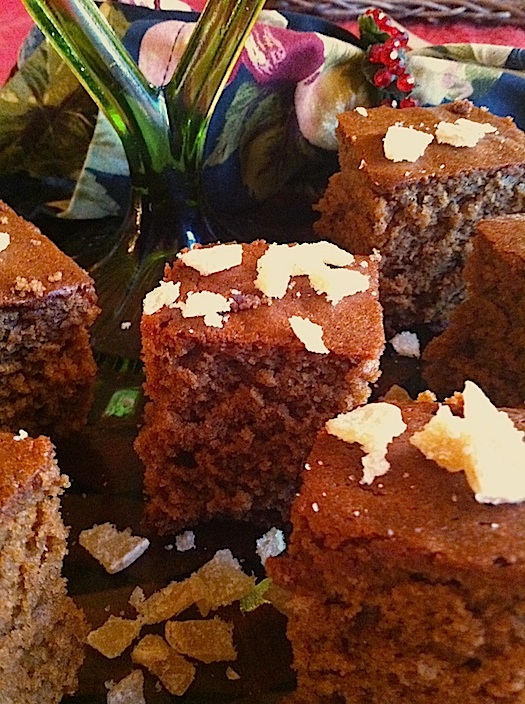
I just LOVE Old Fashioned Gingerbread. It is a perfect Christmas treat, easy to make, and can be baked in loaves and given as gifts. This recipe is adapted from Miss Daisy’s Original Homecoming Cookbook. Miss Daisy says it came from a first edition cookbook dated 1796. I’ve revised it a little by increasing the sugar and adding vanilla. It’s perfect served with my Salted Caramel Fondue. I’ve baked 4 batches of this bread today for the debut of a new community event called Blue Christmas White Diamonds. This event is a fund raiser for McClain Christian Academy here in our home town. If you’re in the neighborhood tomorrow night, come on out and taste a sample!

  • 2 3/4 cups all purpose flour
  • 1 teaspoon salt
  • 1 teaspoon baking soda
  • 1 teaspoon cinnamon (I like a little more)
  • 2 teaspoons ground ginger (I used the roasted ginger)
  • 1 stick soft butter
  • 3/4 cup sugar
  • 2 eggs
  • 2 teaspoons vanilla extract
  • 1 cup molasses
  • 1 cup buttermilk

In a large bowl, sift together the flour, salt, soda, cinnamon, and ginger. Set aside.  In another large bowl, beat the softened butter until light and fluffy. Gradually add the sugar and continue beating with a mixer.  Then add the eggs one at a time, beating after each addition.  Add the molasses and beat some more.  Then alternately add the flour mixture and the buttermilk and mix until smooth after each addition.  Pour batter into a greased and floured 9×13 pan.  Bake at 350 degrees 35-40 minutes or until bread tests done with a toothpick.  Serve with some salted caramel fondue or whipped cream and fresh sliced bananas or lemon sauce. YUM!

This bread can also be baked in loaf pans or miniature loaf pans but you will need to increase the baking time for the regular loaf pans and decrease baking time for the mini loaves.

Filed in Breads, Doughs, and Crusts,Christmas | 3 responses so far

Eggnog Cookies

Posted by on Sunday, December 4th, 2011

egg-nog-cookie1

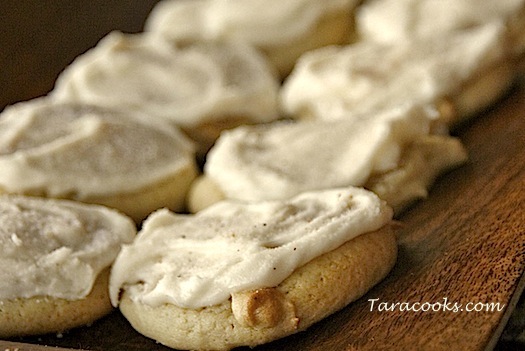
I’m not crazy about eggnog, BUT I think this might be my favorite way to consume it.  These cookies turned out so soft and sweet with a hint of nutmeg.  Real eggnog goes into the cookie dough and the icing for a perfect holiday treat.  I needed a plate of Christmas goodies to take to my daughter’s dance recital. I made a batch the night before and they were mostly gone the next morning. SO I doubled this recipe the second time around! Thanks to www.mommyskitchen.net for the inspiration! I’ve adapted it slightly here.

1 stick soft butter

1 cup sugar

1 egg

1 teaspoon vanilla extract

1/2 teaspoon rum flavor

1/4 teaspoon nutmeg

2 1/2 cups plain flour

1/2 teaspoon baking soda

1/2 teaspoon salt

1 cup eggnog (original recipe says use 1/2 to 1 cup of egg nog depending on the dough)

Combine butter and sugar and beat with mixer until light and fluffy.  Add the egg, vanilla, and rum flavor.  Beat until well mixed.  Combine the nutmeg, flour, soda, and salt in a medium bowl.  Add it alternately with the egg nog to the butter sugar mixture.

Next the original reicpe says to:

“Start by adding a 1/2 cup of eggnog and if you feel that the dough is too thick you can up to 1 cup.

Drop by rounded tablespoonfuls 2 in. apart onto greased baking sheets. I used my small cookie scoop for this. Flatten down the cookie dough just a bit and bake at 375 degrees F for 10-12 minutes or until edges are lightly browned. Watch them closely they may not take the full 10 minutes, depending on your oven.

The cookies are done when they are golden brown around the edges but still light in color on top. Test the cookies with a toothpick to make sure they are done. Let the cookies cool on the baking sheet for 5 minutes then remove to a cooling rack, cool completely and frost.”

I used the full cup of egg nog both times I made these BUT the dough was not stiff enough to form balls, just right for using a dough scoop.  And I found that if I allowed the cookies to brown around the edges for the full cooking time, they were more cake like in consistency.  We like our cookies very moist so the preferred cooking time was under 10 minutes in my convection bake oven.

Makes approximately 3 dozen cookies.

For the Eggnog Frosting:

3 Tablespoons softened butter

3 1/2 cups powdered sugar

1/4 cup eggnog

1 teaspoon vanilla extract

1/2 teaspoon rum flavoring

dash of nutmeg

To make the frosting, blend soft butter and powdered sugar together in a large bowl.  Add the vanilla extract and rum flavor.  Then add the eggnog and blend with a mixer until icing is light and fluffy.  Add the nutmeg and mix well.  Frost cooled cookies.  Then mix 4 tablespoons sugar, 1/2 teaspoons cinnamon and 1/4 teaspoon nutmeg together. Sprinkle mixture over top of icing. Store cookies in an airtight container for up to 3 days.


Filed in Christmas,Cookies, Candies, and Squares | 5 responses so far

Happy Anniversary to Taracooks.com! And a GIVEAWAY!

Posted by on Monday, November 28th, 2011

WOW I can hardly believe TaraCooks.com has an upcoming anniversary to celebrate!  3 years ago this week, my hubby launched this cooking site.  Since then we’ve worked up nearly 300 posts, had a little write up in the local newspaper, and appeared as a guest cook on Better Nashville a few times when they needed a “filler.”  I have also enjoyed holding some canning classes in our kitchen as well as teaching a cooking class to elementary students for a couple of years.  The blog has been a lot of work, but even more fun.  Finally it means SO much to me to hear your positive comments about one of our recipes you’ve cooked up for your own family.  After all, one of the main reasons I wanted to start this blog was to encourage more families to cook together as a way to reconnect.

I hope to keep posting tasty Southern reicpes and to increase my following.  When the time is right, my heart’s desire is to have my favorite recipes published in a real cookbook.  Meanwhile, we want to say THANK YOU to all those who have supported us and cheered us on, and tried our recipes by rewarding a lucky follower with a $50 AMAZON GIFT CARD!

holiday_globe_11_us-thumb._V167225797_

Here’s how to enter the contest.  If you have not yet LIKED the Taracooks.com Facebook page, hit the link to Facebook in the left side bar on this page.  The link should take you directly to Taracooks.com on Facebook.  Next help us spread the word about our giveaway by referring your friends to our Facebook page. And here’s the most important part of the contest.  Be sure to have your friends post a comment on the Taracooks.com Facebook wall indicating that YOU referred them!  The person who refers the most Facebook followers between now and Sunday night December 4th at midnight (CST) will be declared the Winner!  Good Luck!


Filed in Uncategorized | 9 responses so far

How to Brine a Turkey -Best Turkey EVER!

Posted by on Monday, November 21st, 2011

How to Brine a Turkey

This is our third year to brine a turkey and we decided to make a video to share with you about the process.  Hope you enjoy it.

This is an easy way to prepare your turkey for that Thanksgiving feast.  The fruits and herbs which go into the brine give the turkey a savory flavor that is out of this world!  Kroger has fresh turkeys now, so pick up one as soon as possible, before they sell OUT!

In large stock pot add: turkey-brine-2

  • 2 gallons water (I filtered mine)
  • Zest of one orange + slices of remaining orange
  • Zest of one lemon + slices of remaining lemon
  • 1 package fresh rosemary (from Kroger produce section)
  • 1 package fresh thyme (from Kroger produce section)
  • 1 cup apple cider vinegar
  • 1 apple cut and diced
  • 1 ½ – 2 cups of salt
  • Toss in a few peppercorns if you have them
  • 4-5 bay leaves

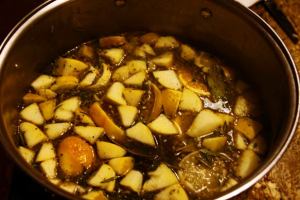
Combine all ingredients in a large pot and bring to a boil. Turn off heat immediately, cover, and allow mixture to come to room temperature. Cool mixture in the fridge until you’re ready to brine (I’m always in a hurry and added some ice to the brine).

To brine the turkey, remove turkey from wrapper, remove gross bags, and rinse thoroughly under cool water. Place the turkey into a plastic brining bag OR a very large pot. Pour cool brine mixture over the top, adding extra cold water if you need more to cover. Seal bag or cover pot and allow turkey to brine in refrigerator for 8-24 hours before roasting.

Before roasting, remove turkey from brine and rinse thoroughly under cold water. Pat dry. Discard brine.

When you brine your turkey, the drippings are quite salty. For this reason, it is VERY important that you use a no-sodium (or low-sodium) chicken broth when you make the turkey gravy.

Many frozen turkeys are injected with a sodium solution—it’s best NOT to brine these turkeys! Brine fresh turkeys for best results!

Coming to TARACOOKS.com tomorrow – HOW TO ROAST A TURKEY, and SOUTHERN CORNBREAD DRESSING!

Filed in Christmas,Holidays,Main Dishes,Thanksgiving | 3 responses so far

« Newer Entries - Older Entries »