Posted by Tara on Saturday, April 28th, 2012
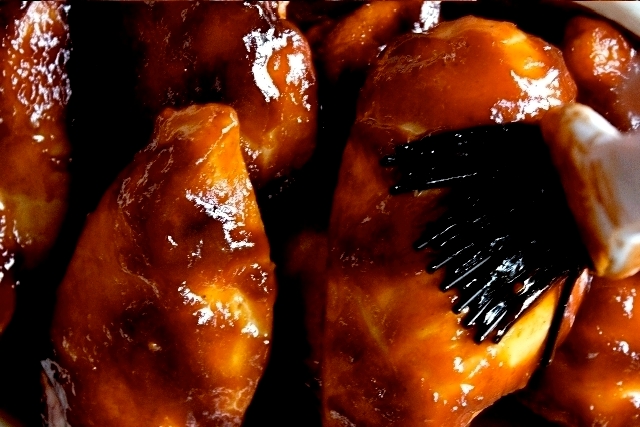
Every southern gal needs a tasty BBQ sauce recipe and I created this one last weekend upon the request of a friend. (Hi Brenda!) Why buy the mass produced, store bought sauce loaded with chemicals, when you can toss a few spices and other ingredients together in a sauce pan, heat the ingredients a couple of minutes, and have some of the sweetest, sassiest, most tongue tantalizing BBQ sauce ever? It’s that easy!
- 1 cup packed brown sugar
- 1 ½ Tablespoons Onion Salt
- 1 Tablespoon Paprika
- 1 teaspoon Dry Mustard Powder
- ¼ teaspoon Cayenne Pepper
- ½ teaspoon Black Pepper
- 1 teaspoon Celery Salt
- 2 Tablespoons Worcestershire Sauce
- 1/3 cup Vinegar
- ½ cup Ketchup
- 1 cup Frank’s Chili Sauce
- 2 Tablespoons Instant Coffee Crystals
- 1 can Tomato Puree
In saucepan stir together the sugar and all the dry ingredients. In a bowl combine all the liquid ingredients. Whisk to blend the liquid ingredients, then add wet ingredients to dry ingredients. Cook over low heat until brown sugar dissolves. Makes about 3 cups. Store covered in refrigerator. Use on poultry, pork, or even beef.
 Share on Facebook
Tags: BBQ Sauce, Sauces
Filed in Miscellaneous | One response so far
Posted by Tara on Thursday, April 19th, 2012
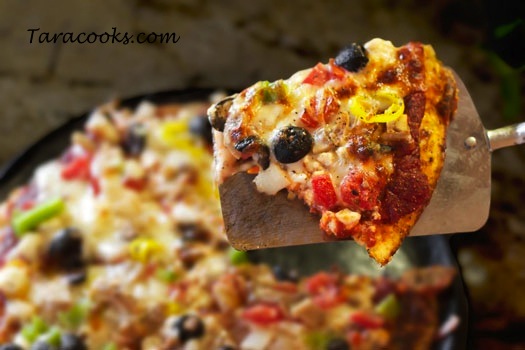
Since one family member has gone gluten free this year, I’ve had to do some changes to my menu planning, grocery shopping, and my cooking methods. I ran across this recipe on Dr. Axe’s facebook and it originated over at www.eat-drink-smile.com. I thought I would give it a try, based on the rave reviews it received. I couldn’t get over the fact that the crust is made from cauliflower. That’s right – cauliflower. So I bought us a head of cauliflower, grated it, and whipped up this pizza in no time. I really didn’t think it would pass the taste test here but am thrilled to report that it did! And I’ve made it several more times.
The recipe makes about a 9-10″ round crust and you can top it off with your favorites so I’m not going to give directions for the sauce or toppings. But here’s how easy the crust was:
Grate one head of cauliflower and place in a microwave safe bowl (you can do this in a food processor but do not puree it). Microwave cauliflower for 6-8 minutes and do not add any water to the bowl. Measure out 1 cup of cooked cauliflower and place it in a large mixing bowl. Add a large egg, 1 teaspoon oregano or Italian seasoning, a small clove of minced or pressed fresh garlic, 1/2 teaspoon garlic salt and a cup of shredded mozzarella cheese.
Preheat oven to 450 degrees. Spray an iron baker or a pizza pan with cooking spray (I actually use a little bacon drippings). Pour the crust mixture onto the baker or pizza pan. Using your hands, shape the mixture into a 9-10″ round. Brush top of crust with a little olive oil if desired. This helps with the browning. Then place the crust in the preheated oven. Bake for 10-15 minutes until desired brownness is achieved. Remove crust from oven and add sauce and toppings. Place pizza under broiler and heat just until cheese is melted (3-4 minutes). Your toppings will need to be precooked since the broiling method is used here.
 Share on Facebook
Tags: Gluten Free, pizza crust
Filed in Gluten Free,Healthy Cooking,Main Dishes | Comments Off on Gluten Free Pizza Crust – The Kids LOVED it!
Posted by Tara on Wednesday, April 4th, 2012
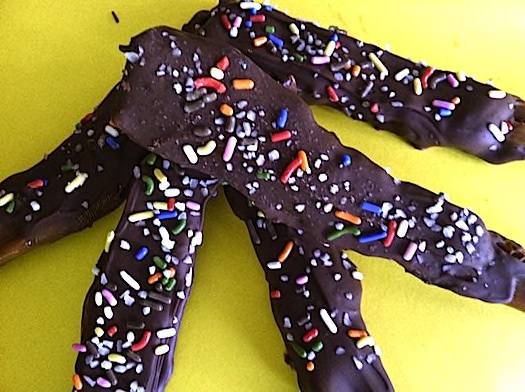
This recipe is for my typing class! Our class ends right before lunch so they often talk about food while they key away on their computers. My students have repeatedly asked me to make bacon dipped in chocolate and bring it to class. This week I took their advice. But before I plunged the cooked bacon into some melted fudgy delightfulness, I first dunked the strips in melted caramel. Then I topped them off with some sea salt and candy sprinkles for decoration. There are no words I can use to adequately describe how tasty these bacon pops are. You will just have to make them yourself!
- 1 12 oz bag good quality semi-sweet chocolate chips
- 1 11oz bag Kraft caramel bits
- 1 12 oz package bacon
- 1/4 cup (more or less) candy sprinkles
- 1-2 Tablespooons sea salt
- 12-16 wooden skewers (one for each piece of bacon)
- wax paper
- cooking spray
Separate uncooked bacon into individual pieces and place a wooden skewer lengthwise through half the bacon. Arrange strip on a microwave bacon cooker, and repeat with remaining strips of bacon. I could only fit about 6 pieces of bacon onto my bacon cooker at a time. Next cover bacon with a paper towel and cook bacon in microwave unti it is light brown and done. In my microwave it would take 4-5 minutes to cook 6 pieces of bacon. Remove bacon from microwave and allow it to cool while placing skewered pieces on a paper towel to soak up any excess grease.
While bacon is cooling, melt the Kraft caramel bits in the microwave or on stove top according to package directions. Tear off a large piece of wax paper and spray it generously with cooking spray. Then dip each piece of bacon into the caramel (or use a spatula to spread it evenly over both sides) and place dipped bacon on greased wax paper. Repeat with the dipping and spreading of the caramel until all pieces of bacon have been covered.
While the caramel is firming up on the bacon, place the semi-sweet pieces in a microwave safe bowl and cook a minute at a time, stirring after each minute, until choclate is smooth and melted. Then dip each piece of caramel coated bacon into the melted chocolate (and/or use a spatula to spread chocolate evenly over both sides) and return each “pop” to wax paper. Be sure to sprinkle a little sea salt and/or candy sprinkles over each pop before chocolate hardens. Bacon pops are ready to eat when melted. chocolate hardens.
I skewered the uncooked bacon to make “pops” which could be used in an edible arrangement. But this step could be skipped and the bacon could be dipped in caramel and chocolate and the sprinkles and sea salt added for decoration of individual pieces of bacon.
 Share on Facebook
Tags: bacon pops, candided bacon, carmel bacon, fudge bacon
Filed in Appetizers | One response so far
Posted by Tara on Tuesday, April 3rd, 2012

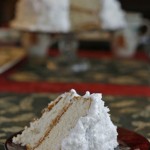
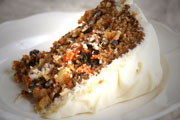
While Carrot Cake is a typical Southern Thanksgiving treat, it also deserves a place on the Easter menu as well. This cake was one of my first “from scratch” hits when I baked it nearly 25 years ago in our first newlywed love nest. Time has deepened my love for both my husband and this cake!
Preheat oven to 350 degrees. Generously grease and flour a 9×13 pan or 2 round 9” pans. Set pans aside.
Sift together in mixing bowl
-
2 cups flour
-
2 teaspoons soda
-
2 teaspoons cinnamon
-
½ teaspoon salt
In separate mixing bowl add and mix well:
-
3 beaten eggs
-
¾ cup vegetable oil
-
¾ cup buttermilk
-
3 cups sugar
-
2 teaspoons vanilla
Then add and stir well:
-
Flour mixture
-
1 8 oz can drained crushed pineapple
-
2-3 cups raw grated carrots (I pulse mine in food processor to save my knuckles!)
-
3 ½ oz (about a cup) shredded coconut
-
1 cup chopped walnuts (I don’t like walnuts, so I substitute pecans)
Pour batter into pan(s). If using round pans, test cakes after 30 minutes. If a toothpick inserted in the middle comes out clean – they are done. Cake batter put in a 9×13 pan will require up to 50 minutes to bake. Ovens vary – so rely on the toothpick test! Remove from pans when cake is cool. Then frost with Cream Cheese Frosting. Chill and keep refrigerated.
Cream Cheese Frosting:
In large mixing bowl, beat until creamy:
Then add and beat until smooth:
 Share on Facebook
Tags: cake, carrot cake, Christmas, Easter, southern, Thanksgiving
Filed in Christmas,Holidays,Pies and Cakes,Thanksgiving | Comments Off on Blue Ribbon Carrot Cake
Posted by Tara on Tuesday, March 13th, 2012
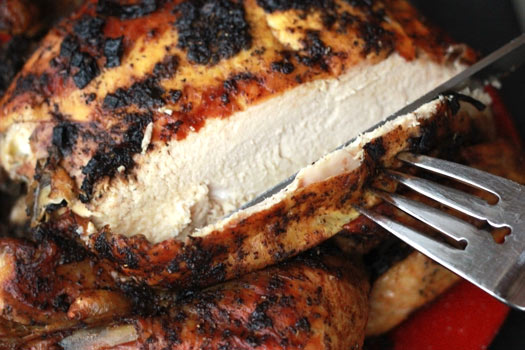
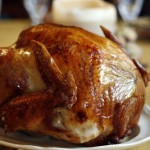
Few main dishes beat an oven roasted chicken. And nothing says “Welcome Home!” like the wafting aroma of this HERB the BIRD recipe. It’s easy. It’s healthy. And it’s gluten free. Weather you decide to roast a hen or a turkey or a turkey breast, this herb mixture will yield a tender savory main dish. This recipe is modified from Dr. Axe. Also, I like to purchase a hen or turkey which has the indicator that pops up when the bird is done.
- 1/4 cup grapeseed oil
- 1/4 cup lemon or lime juice
- 2-3 Tablespoons Bragg’s liquid amino’s
- 2Tablespoons finely chopped green onions or chives
- 1 Tablespoon rubbed sage (or can use poultry seasoning)
- 1/4 teaspoon black pepper
- 1 whole hen or a 5-6 pound turkey breast
Remove packaging from the hen or turkey and rinse well. Remove any gizzards, neck, or livers packed inside bird cavity. Pat bird dry with paper towels and place bird on a roasting pan.
In a small saucepan, combine the liquids and herbs and spices. Bring herb mixture to a boil then remove from heat. Baste the bird with the herb mixture. Place basted bird in a preheated 325 degree oven- basting every 30 minutes. Check package directions for weight of bird and appropriate cooking time. The bigger the bird – the more time to cook her! Cover bird with foil if desired brownness is achieved before full cooking time occurs.
 Share on Facebook
Tags: herb, herb chicken, oven roasted, roasted chicken, turkey, turkey breast
Filed in Main Dishes | Comments Off on HERB the BIRD
Posted by Tara on Thursday, March 1st, 2012
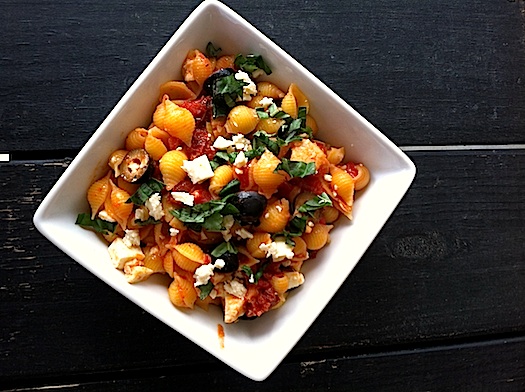
When preparing meals theses days, not only must I be frugal and healthy conscious, but also I must consider the gluten free eaters around here. Sometimes my brain stalls, sometimes it is creative, and sometimes my brain just tells me to go with what I have in the fridge/pantry.
The youngn’s were hungry here one weekday after pouring over economics, and math, and history and needed a break. We all huddled in the kitchen and together created this tasty pasta dish. You can create your variety to suit your taste buds.
I boiled a package of gluten free shells, according to the directions, and drained them. While the pasta was boiling, I took 1/2 stick real butter and sauteed half a chopped sweet onion and a couple of cloves of chopped garlic with the butter in a large skillet. Then I added 2 14 oz cans of petite diced tomatoes, 1/2 cup diced sun dried tomatoes, 1 small jar chopped artichoke hearts, a small can of sliced olives, and a bit of salt and pepper. Next I dumped the whole pot of drained, cooked pasta into the sauce and stirred it around a minute or two. Before serving I crumbled an 8 oz block of Feta cheese and tossed it into the pasta and sauce along with several leaves of fresh chopped basil. We served it up in bowls and some salad on the side. Mmmm that was one of the best school lunches we’ve had in a while.
 Share on Facebook
Filed in Frugal Friday,Gluten Free,Healthy Cooking,Italian,Meatless Monday | One response so far
Posted by Tara on Wednesday, February 22nd, 2012
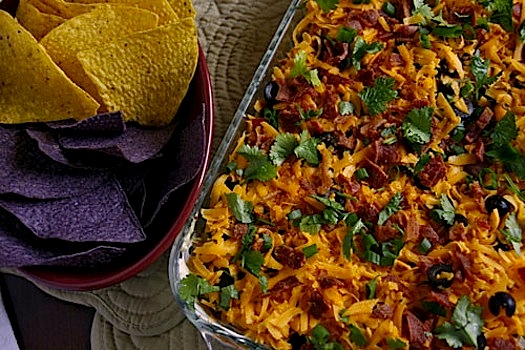
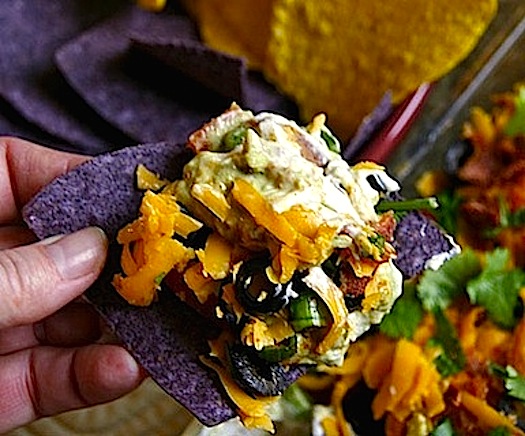
Some of the most popular recipes here are ones that originated with my grandmothers or my Mother-in-Law. Here is a tasty recipe that could actually be a one dish dinner for our family. But it also makes a nice party or holiday appetizer as well. And best of all it’s easy to put together! So next time you need a crowd pleasing, party platter – make my MIL’s Mexican Dip!
In a 9×13 baking dish layer:
- 1 14 oz can re fried beans
- 8 oz sour cream that has been mixed with 2 Tablespoons mayo
- 2 large avocados (remove peels and seeds) mashed with 1/8 teaspoon garlic powder, 1/8 teaspoon garlic salt, 1 Tablespoon lime juice, 2 Tablespoons Mayo
- 2-3 diced fresh tomatoes (seeds removed)
- 1 bunch green onions chopped
- 1 pound grated cheddar cheese
- 1 cup sliced olives (optional)
- 3/4 cup chopped fresh cilantro
- 6-8 slices cooked bacon – chopped
Layer items in order listed above, sprinkling 2-3 Tablespoons JUST TACO SEASONING between each layer. If you don’t want to use my JUST TACO SEASONING, use 2/3 packet store bought Taco Seasoning.
 Share on Facebook
Filed in Appetizers | 2 responses so far
Posted by Tara on Monday, February 20th, 2012
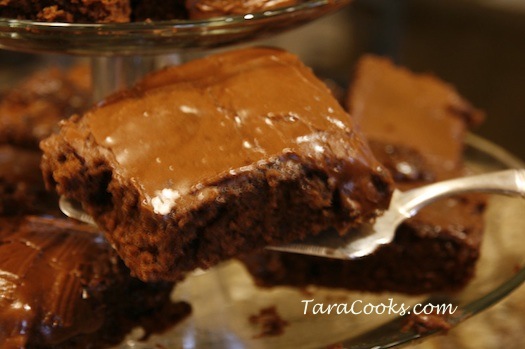
Our firstborn celebrated a birthday yesterday. He doesn’t like bakery birtrhday cake. This is the cake he wanted me to make – Dr. Pepper Cake. It’s so moist and tasty and is a variation of Coca Cola Cake. YUM!
In large bowl mix together then set aside:
- 2 cups sugar
- 2 cups plain flour
- ½ teaspoon salt
In another bowl mix together then set aside:
- 2 beaten eggs
- 1 cup buttermilk
- 1 teaspoon soda
- 1 teaspoon vanilla
- 2 teaspoons almond extract
In medium sauce pan bring to boil:
- 1 cup Dr. Pepper Soda
- ½ cup vegetable oil
- ½ cup real butter
- ½ cup cocoa
Then add the flour/sugar mixture to the boiling mixture and beat well. Remove pan from heat and add the buttermilk/egg mixture.
Pour batter into greased and floured 10xx15 sheet cake pan. Bake at 350 degrees for 20-25 minutes.
Frosting
In a saucepan combine and heat until butter melts:
- 1 stick real butter
- ½ cup cocoa
- 6 Tablespoons real cream or milk (or 6 Tablespoons Dr. Pepper)
Then add and mix well:
- 1 teaspoon vanilla
- 2 teaspoons almond extract
- ½ cup chopped pecans
- 1 pound powdered sugar
Cover cake with frosting while cake is still hot..
 Share on Facebook
Filed in Desserts | One response so far
Posted by Tara on Monday, February 13th, 2012
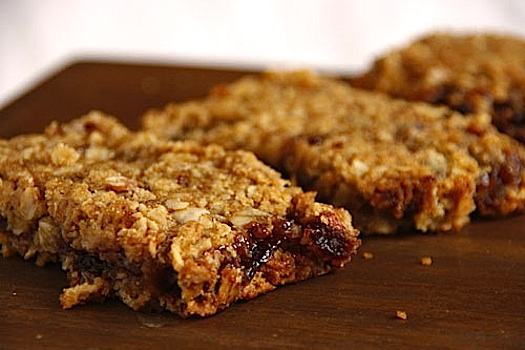
Has anyone been watching Pioneer Woman’s cooking show? I am enjoying the show very much. A couple weeks back, she made some strawberry bars. I knew I wanted to try to create a gluten free version since we have a couple people under this roof who have given up wheat. These bars were fabulous and nobody would ever guess they are gluten free. And I used some of my home made cherry preserves (from the tree my mother planted next door) instead of strawberry preserves. They were such a hit I had to bake another batch for this post. Pioneer Woman used plain flour in her bars – so if you do not want the gluten free version, just substitute plain flour for the gluten free baking mix in the recipe below. I also added nuts to my version.
- 1 1/2 cups Bob’s Gluten Free Baking Mix
- 1 1/2 oats (not quick cooking)
- 1 cup firmly packed dark brown sugar
- 2 sticks firm butter cut into 1/2 inch cubes
- 1 teaspoon baking powder
- 1/2 teaspoon salt
- 3/4 cup chopped walnuts or pecans (optional)
- 1 16 oz jar (1 pint) cherry preserves
Butter a 9×13 baking pan and set it aside. In a large mixing bowl, combine the flour, oats, and brown sugar and mix well. Add salt and baking soda. Add nuts if desired. Then use a pastry tool to cut the butter cubes into the flour/sugar/oat mixture. Be patient – this takes a few minutes. Mixture should be crumbly in texture. Pour half of the mixture into the buttered pan and press firmly to evenly coat the bottom of the pan. Then spread the preserves over the oat mixture. Top with remaining oat mixture and gently press to flatten the top layer. Place pan in a preheated 350 degree oven for 25-35 minutes, until bars are golden brown and bubbly. Let bars cook completely before cutting.
Try different types of preserves. I actually made a 3rd batch with strawberry preserves. Those bars were a little sweeter than the cherry. I think the family preferred the cherry bars to the strawberry bars. The sour/tart cherries is a nice compliment to the sweetness of the brown sugar and the richness of the butter.
 Share on Facebook
Filed in Breads, Doughs, and Crusts,Cookies, Candies, and Squares | 5 responses so far
Posted by Tara on Monday, February 13th, 2012

These cupcakes are simply adorable. They make me happy to look at them. If I could sink my teeth into one, I would be even happier. This photo has been shared numerous times on Facebook. I am disappointed there is no link to the creator of these Muppet confections. If anyone knows the origination of the photo, I would LOVE to find out who made them. Actually, Mandy found my plea and sent me her link www.cupcakeoccasions.co.uk. Check it out!
 Share on Facebook
Filed in Uncategorized | 3 responses so far


