Swiss Steak

Posted by on Wednesday, November 11th, 2009

Here is a favorite recipe from last Winter that can be made in the crock pot while you are away at work all day long. I had never experienced Swiss steak until I met the guy who would later ask me to marry him. This is my mother-in-law’s recipe and it has never failed me.


When Kroger has top sirloin beef, or round steak “reduced for quick sale” I stock up on these cuts of beef and freeze them.


  • 1 ½ -2 lbs round steak or sirloin beef (thawed)
  • 1 cup plain flour for dredging
  • A little oil
  • 1 medium onion chopped
  • 1 can cream of mushroom soup
  • 1 can petite diced tomatoes
  • Salt and pepper to taste


Cut steak into 2” squares. Toss steak pieces in a zip lock back with 1 cup plain flour. Shake bag to coat steak pieces. Cover the bottom of a 10” skillet with vegetable oil and heat to medium high. Add steak pieces and fry beef until slightly brown (a couple of minutes for each side), turn, and repeat. Remove beef from skillet and transfer to crock pot. Toss chopped onion into remaining oil. Sauté onions a couple of minutes, then add them to the crock pot. Pour canned tomatoes and mushroom soup (undiluted) over beef and onions. Add salt and pepper to taste. Simmer all day, or until the beef is tender.


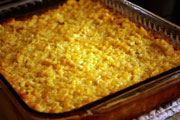
The tomatoes and mushroom soup make a tasty gravy which is excellent served over creamed potatoes, rice, or egg noodles. Although I prepared egg noodles here, my preference is to serve the beef and gravy over mashed potatoes

Printable Recipe swiss-steak

 Download Adobe Reader

Filed in Beef,Main Dishes | 4 responses so far

Lebanon’s Queen of Cakes

Posted by on Tuesday, November 10th, 2009

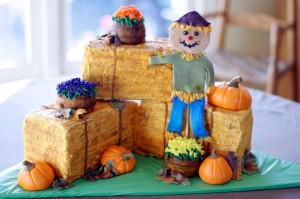
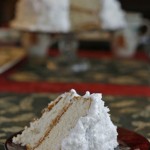
A dear friend recently turned 40.  Her sweet hubby planned a huge surprise bash and pulled off the plan without a hitch.  I volunteered to bake the cake and found out Carrot Cake is one of her favorites.  The decor theme was FALL instead of the typical OVER THE HILL with black balloons.  Although I can bake just about any flavor of cake, I am not into decorating cakes.  Enter Jennifer.  Jennifer is creative.  Jennifer is amazing.  She took my 4 carrot sheet cakes and transformed it into the fall scene you see below.  Everything is edible – the pumpkins, the leaves, the barrels of flowers, and yes, even that adorable scarecrow.  Her creation was the talk of the party and the children present gathered round the table with wide eyed anticipation as we cut and served Jennifer’s masterpiece.  If anyone has party needs, I can put you in touch with Lebanon’s Queen of Cakes!fallcake

Filed in Uncategorized | Comments Off on Lebanon’s Queen of Cakes

Kitchen Christmas Wish List

Posted by on Monday, November 2nd, 2009

My I-Tunes play list somehow switched from David Cook to my “Christmas” folder. Right now the “Charlie Brown Christmas Theme” is playing and got me thinking about wish lists. I would love to know what is on your wish list for Christmas – especially items that go in the kitchen. Here’s a sneak peak of my Kitchen Christmas Wish List. It doesn’t hurt to dream right?

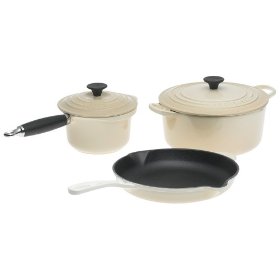
I need new cookware. The protective surface has started to wear off my 20+ year old stainless steel set. This is not healthy since the core is made of nickle and aluminum. The handles have broken off 2 skillets also. I love this set Le Creuset cast iron/enamel set from Amazon.com in Dune.cookware

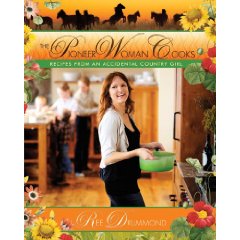
Next on my wish list is the Pioneer Woman Cooks Cookbook.  Actually, I pre ordered this as an early Christmas gift.  If you haven’t checked out Pioneer Woman’s web-site www.thepioneerwoman.comyou are really missing out.  But please don’t forget to come back and visit me here at Taracooks.com!  She’s coming to Nashville on Dec 8th and I can’t wait to have her sign my cookbook.  I will probably be ordering a few more as gifts.

pw

I could easily become obsessed with cookbooks.  I would really like to find “Mastering the Art of French Cooking”  Volumes 1 and 2 by Julia Child at an antique store or used bookstore. One that is really cheap and in pristine condition. But odds of that happening after the release of the movie “Julie and Julia” are pretty slim I’d say.  Amazon has the best deal on the set that I’ve seen so far, under $50 for both books.  The vintage sets are bringing hundreds of bucks on E-bay and Amazon auctions.  If you know someone that has a vintage set – ask them to will those to ya!

 julia

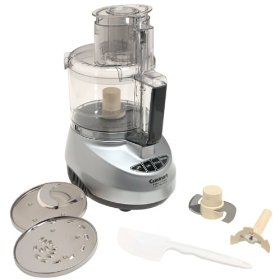
My food processor is also +20 years old and the grill is busted that fits over the motor. That means if little fingers touched the back of this buddy while it was in use, they could become nubs!  I’d love a super duper Cuisinart with different attachments since we are into canning and preserving now.  This one should do the trick nicely.

food chop

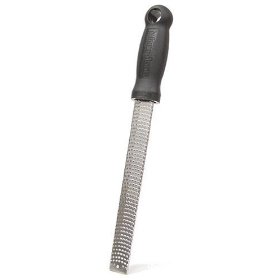
Everyone should have a microplane grater/zester in the kitchen. This makes zesting lemons, limes, and oranges so easy. And you can also produce that restaurant style Parmesan cheese with this baby. But be very careful not to grate your fingers!  I’ve got one already, but wish cooks everywhere could have one too.  Under 12 bucks from Amazon.com


microplane

I  used to have one of these hand held blenders. Boy are they a nifty gift.  Making shakes and whipping cream takes only  a few seconds.  This is also good to puree fruits and veggies for sauces, or canning, or preserving if the quantity isn’t too large.  Since mine bit the dust years ago, I think it is time for a new one.

blender

I’ve posted some neat gadgets here and most of them are probably too pricey for all of us. It’s been fun to window shop here in cyberspace!  Now back to my old pots and pans….

Filed in Uncategorized | 4 responses so far

More Fall Treats, Haystacks and Popcorn Balls

Posted by on Thursday, October 29th, 2009

I’ve got a couple more quick treats for fall gatherings.

HAYSTACKS -They disappear as quickly as they are made.

Hay-Stacks

In a large microwave safe bowl add:

  • 1/2 pound white chocolate almond bark
  • 1 12 oz package chocolate chips
  • 1 cup peanut butter OR butterscotch chips
  • 12 oz package Chow Mein Noodles
  • 1-2 cups dry roasted peanuts (optional)

Melt chocolates and peanut butter or butterscotch chips a minute at a time in the microwave, stirring after each minute until the mixture is melted and smooth. Then add the Chow Mein Noodles and peanuts. Stir until noodles and nuts are well coated. Drop by large spoonfuls onto wax paper. Let cool until firm. Store in airtight contain until ready to serve.  You could also substitute 12 oz of butterscotch chips for the chocolate and substitute peanut butter chips for the peanut butter.

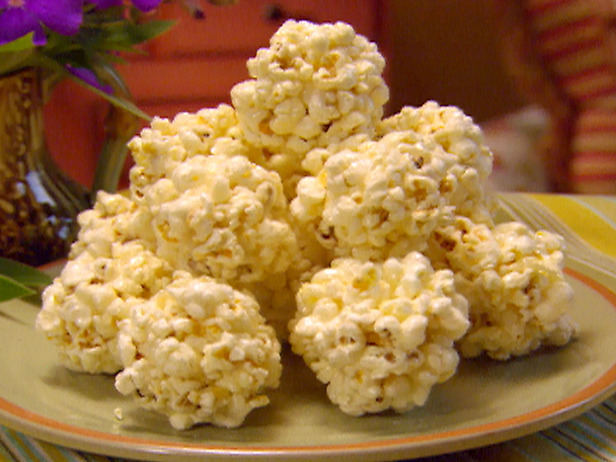
PAULA DEEN’S POPCORN BALLS
Paula is my GO TO GAL whenever I need something Southern. I can usually count on her recipe to be a hit. Try these for yourself and you be the judge!

bigpopcorn

Ingredients

  • 2 cups sugar
  • 1 1/3 cups water
  • 1/2 cup light corn syrup
  • 1 teaspoon white vinegar
  • 1/2 teaspoon salt
  • 1 teaspoon vanilla extract
  • 18 cups popped corn

Directions

In a medium saucepan, combine sugar, water, syrup, vinegar, and salt. Cook over high heat until mixture reaches 255 degrees F (hard-ball stage) on a candy thermometer. Stir in vanilla. Pour over popped corn, tossing gently to coat. When mixture is cool enough to handle, press popcorn into 3-inch balls with lightly greased hands. Cool completely on waxed paper.

Printable Recipe

Haystacks and Pop Corn Balls

Download Adobe Reader

Filed in Uncategorized | Comments Off on More Fall Treats, Haystacks and Popcorn Balls

Fall Party Ideas

Posted by on Sunday, October 25th, 2009

Here are some quick and easy treats to prepare for a Fall Festival, a Bonfire, a fall campout, or Halloween.  We aren’t big into all things scary for Halloween around here.  But we do like to celebrate God’s creation, His beauty, and harvest time for Halloween.  Following are some of our family traditions for our fall party gatherings.

Autumn Mix:
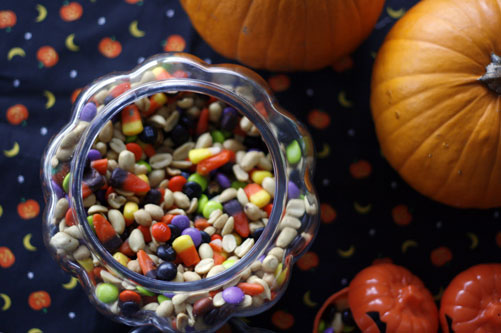
Autumn-Mix

This is pretty stored in a glass jar, a glass pumpkin, or a candy dish.  It disappears quickly, so keep extra mix on hand.

  • 1 bag Autumn Candy Corn Mix (Brach’s is the best!)
  • 1 can salted cocktail peanuts
  • 1 large bag Fall  M&M’s –
  • 1 cup raisins (optional)

Mix all ingredients together and store in a Zip-Lock Bag.  Fill a glass pumpkin or candy dish with mix right before the party.  Did you know that candy corn and salted peanuts, when eaten together, taste just like a Pay Day candy bar?

Goblins:

Our daughter likes to assemble these each year.  It’s quick and easy moms!

  • 1 bag Tootsie Pops Lollipops
  • White Kleenex Tissues
  • White Pipe Cleaners
  • 1 Black Sharpie

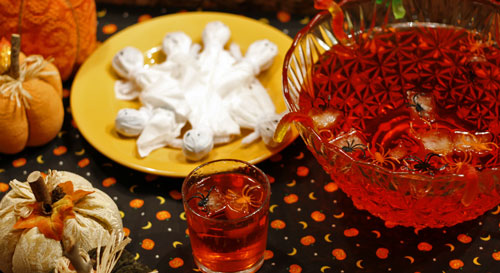
Wrap each Tootsie Pop with a white Kleenex, centering the middle of the tissue over the top of the lollipop.  Cut a pipe cleaner in half.  Wrap the cut pipe cleaner around the base of the lollipop to secure the napkin.  Make eyes by dotting the tissue with the Sharpie.
Haloween-punch-and-ghosts

Creepy Crawly  Punch:

I can’t count how many years the kids have asked for this punch.  It is also fun to do a unit study on worms and bugs this time of year.  This is a fun way to learn that God has some unique ways of expressing His creativity!

  • Gummy Worms
  • Plastic Spiders
  • Chilled Ginger Ale (2 liter)
  • Chilled Orange Soda  (2 liter)
  • Chilled can of Pineapple juice
  • Punch bowl
  • Ice Cube Trays

Crawly Cubes:

Pour Ginger Ale into ice cube trays.  Put plastic spiders or some halved gummy worms into each cube before freezing.  I like to fill 2 trays twice to have enough “crawly cubes” for my punch.

Creepy Crawly Punch:

Pour equal parts of the chilled Ginger Ale, Orange Soda, and Pineapple Juice into a punch bowl.  Add some Crawly Cubes.  Hang some gummy worms from the side of the punch bowl for decoration.  Toss a few spiders and gummy worms on the table – kids love this!

If you don’t have a punch bowl, just make the crawly cubes and serve them with the punch in a clear glass.

Moon Pie “Owls”

MoonPie-Owls

These Owls are so fun to put together.  They are cute as a decoration, stuck in pots filled with candy corn, or simply to eat.  Whatever way you choose to use them, your kids will have loads of fun making them.

  • 12 Large Moon Pies, Banana and Vanilla Flavors (I found large Moon Pies at WalGreen’s)
  • Oreos
  • Candy Corn
  • M&M’s
  • Fall Sprinkles
  • White Chocolate Almond Bark
  • Popsicle Sticks
  • Wax Paper

Melt White Chocolate Almond Bark according to package directions

Wings:

Take a knife and spread some melted white chocolate almond bark on each lower side of the Moon Pie to create “wings” then sprinkle some fall sprinkle mix over the almond bark.  Shake off the loose sprinkles.

To Make OWL eyes:

Remove tops of Oreo Cookies.  Use the halves with the cream remaining for owl eyes.  Dip the chocolate cookie side in the white chocolate almond bark, or use a knife to spread the almond bark on the cookie side.  Place the Oreo on top left side of Moon Pie, cream side up, and repeat with another Oreo and place it on the top right side of the Moon Pie.  Spread some white chocolate almond bark on one side of M&Ms for the “pupil” of each eye and stick the M&M in the center of the cookie cream.  You can also make “eyebrows” with 2 pieces of candy corn by spreading a little almond bark on one side of the candy corn.

Beak:

Spread some white chocolate almond bark on one side of a piece of candy corn. Position it in the middle of the Moon Pie for a nose.

Place finished OWLS on wax paper while white chocolate almond bark hardens.  Place a popsicle stick through the bottom center of each owl and place in pots filled with candy corn.  I used some florist Styrofoam cut to fit each pot, inserted owls, then covered the foam with candy corn.

Printable Recipe

Fall Party Ideas
Download Adobe Reader

Filed in Cookies, Candies, and Squares,Holidays | 4 responses so far

Pumpkin Nut Bread

Posted by on Thursday, October 22nd, 2009

Pumpkin-Butter

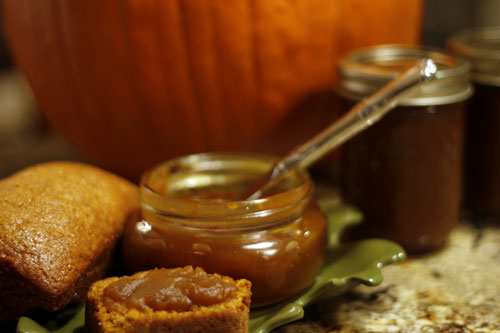
I’ve already made 2 batches of Pumpkin Nut Bread.  The first time I deviated from my favorite stand by recipe, which was my mother’s, and made Paula Deen’s.  To sum up the difference I will quote Micah, “Mom, can you make your recipe next time?  It’s a lot better.”  This recipe is simple and pretty quick and even uses canned pumpkin.  I remember Momma making this when I was a teenager.  I love it as much now as I did back then.

I still incorporate as many organic ingredients as I can afford.  My favorite flour is Kroger’s Private Selection Organic Unbleached Bread Flour.  I seem to have the best results in baking with this flour.

Sift together: (I never sift mine but go ahead if you like to follow the rules!)

  • 3 1/2 cups plain unbleached bread flour (I like to use half white/half oat flour)
  • 2 teaspoons baking soda
  • 1 1/2 teaspoons salt
  • 2 Tablespoons cinnamon
  • 1 1/2 teaspoons nutmeg
  • 1/2 teaspoon cloves

In a separate bowl mix these wet ingredients together:

  • 3 cups sugar (I’ve also substituted AGAVE nectar for the sugar)
  • 1 cup vegetable oil (I’ve also used olive oil)
  • 4 eggs
  • 2 cups pumpkin (1 can)
  • 2/3 cup filtered water

Add wet and dry ingredients with :

  • 1 teaspoon vanilla
  • 1 cup dates (optional)
  • 2 cups chopped walnuts or pecans

Pour into 2 greased/floured loaf pans and bake at 350 degrees for about an hour, until golden brown and a toothpick inserted in the middle comes out clean.  I use my Pampered Chef stoneware mini loaf pans.  This recipe will yeild 8 mini loaves.  I cook them for about 30 minutes on my convection bake setting.

We like ours sliced,buttered, grilled or toasted, with pumpkin butter or cream cheese spread on top!

Filed in Breads, Doughs, and Crusts,Desserts,Thanksgiving | 5 responses so far

Cobweb Cookies

Posted by on Friday, October 16th, 2009

Cobweb-Cookies

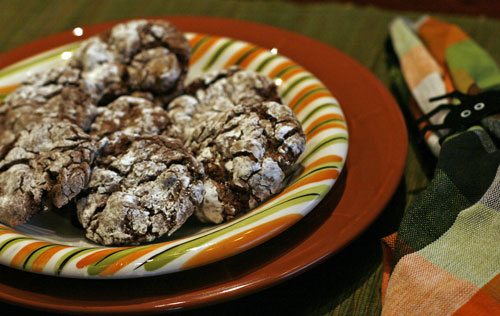
Do you need a quick and easy snack for an upcoming fall festival? Search no more. The kids love these Cobweb Cookies, made with cake mix, egg, Cool Whip, and powdered sugar. Watch out, they tend to disappear before your eyes!

  • 1 box devil’s food cake mix
  • 1 egg
  • 6 oz Cool Whip (about ¾ of 8 oz container)
  • 1 cup powdered sugar

Preheat oven to 350 degrees.

In large bowl add the cake mix, egg, and cool whip. Stir by hand, or use electric mixer to gently blend until well mixed. Use a small cookie dough scoop, or a tablespoon to scoop out enough dough to form a 1 inch ball. Drop balls into powdered sugar and toss to coat. Place powdered balls of cookie dough onto an un greased cookie sheet about 2 inches apart. Bake at 350 degrees for 10 minutes. Remove from oven and let cookies cool on cookie sheet or on wire racks. As the cookies bake, cracks form those “cobwebs.” Makes about 36 cookies.

Printable Recipe

Cobweb Cookies

Download Adobe Reader

Filed in Cookies, Candies, and Squares,Desserts | 3 responses so far

Freezing Apples

Posted by on Thursday, October 15th, 2009

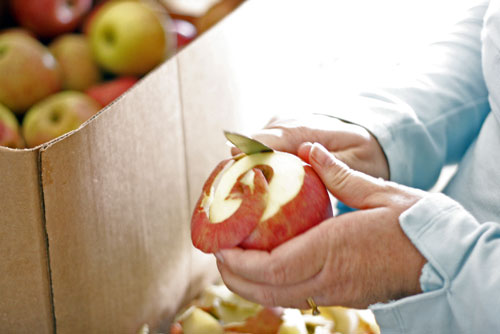
Apple-Peeling

We’ve made apple chips and apple pie and enjoyed the taste and aroma of all things apples. We’ve had fried apples and we’ve frozen several bags of apples to use through the long cold winter. There really isn’t anything complicated about peeling, slicing and freezing apples. Here’s how I prepared our winter stash from those Wine saps we got at the orchard.

First I washed the apples well. If the apples are organic, a good rinsing will suffice – otherwise you can add a cup of vinegar to a sink of water to help remove some of the pesticides and wax. If you prefer to peel the apples, as we do, just quickly rinse the apples before peeling.

I gave my peeling knife a good sharpening first. It is fun to get the older kids or the whole family involved in the peeling party. The kids like to see if they can peel the whole apple without breaking the peeling.

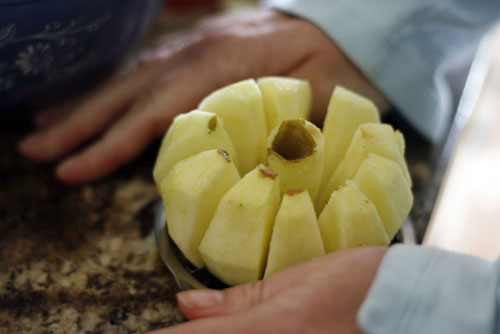
Use an apple corer/slicer to core and slice in one step.

Apple-Coring

I sliced each slice again.

Toss sliced apples into a bowl of water with the juice of one lemon added. This slows down the oxidation of the apple juices – keeping the apples from turning so brown.

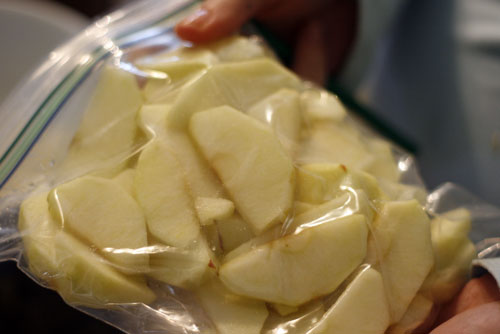
After slicing about 4 apples, I had enough apples prepared to place in a Zip-Lock quart freezer bag.

You can purchase one of those gadgets to remove the air from the freezer bags. Or you can go about this the frugal, red-neck way. I zipped the bag almost all the way to the corner, inserted a straw, and sucked all the remaining air out. Then I quickly removed the straw and finished sealing the bag.

Apples-in-bag

Then the apples went straight to the freezer until someone gets a hankerin’ for some fried apples or apple pie.

Apples-in-bag-2

Printable Recipe

Freezing Apples

Download Adobe Reader

Filed in Canning,Healthy Cooking | 5 responses so far

Chicken Asparagus Soup

Posted by on Wednesday, September 30th, 2009

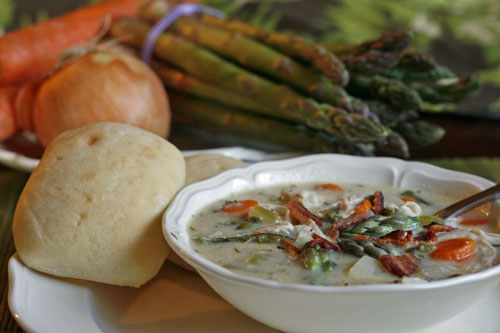
Chicken-Asparagus-Soup

When Richard’s cousin Renee posted a Facebook status that she was preparing Chicken Asparagus Soup for dinner recently, several people asked for her recipe.  I am so thankful she was willing to share it, because chilly nights are here now, and we all could use a new soup recipe for the long cold months ahead.  I made this soup tonight and shared it with the in-laws.  It was fabulous, filling, and nutritious with all that asparagus.  If you’ve never prepared asparagus – give it a try. You’ll be glad you did!

  • 1 broiler fryer chicken (3 to 3 1/2 lbs.) ( I used 4 large chicken breasts, with skins and ribs)
  • 1 1/2 to 2 quarts of water ( I used 2 quarts of water + 32 oz chicken broth)
  • 2 tsp. chicken bouillon granules (I use NO CHICKN bullion – because it has NO MSG)
  • 1 stalk celery, cut into thirds
  • 1 bay leaf
  • 1 onion, cut in half

———————
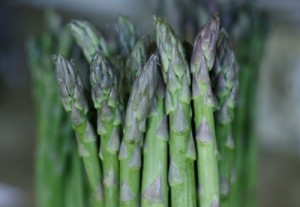
Asparagus

  • 5 bacon strips, diced (I used natural cured bacon and fried 7 strips)
  • 4 medium carrots, chopped
  • 1 medium onion, chopped
  • 1/2 lb. fresh asparagus, cut into 1/2 inch pieces ( I used 2 bunches of fresh asparagus tops, and upper stems)
  • 2 cups cubed, peeled potatoes
  • 1 tsp. dried thyme
  • 1/2 tsp. pepper
  • 1 T. salt
  • 1/2 cup all-purpose flour
  • 1 cup heavy cream (I used organic)
  • 2 T. chopped fresh parsley

Place chicken, water, bouillon, celery, onion and bay leaf in a Dutch oven or soup kettle. Cover and bring to a boil; skim fat (I didn’t skim the fat, there wasn’t much to skim). Reduce heat; cover and simmer for 1 to 1 1/2 hours or until chicken is tender. Remove chicken and let it cool. Strain broth to remove vegetables and bay leaf. Remove 1 cup broth and set aside; return remaining broth to Dutch oven or kettle.

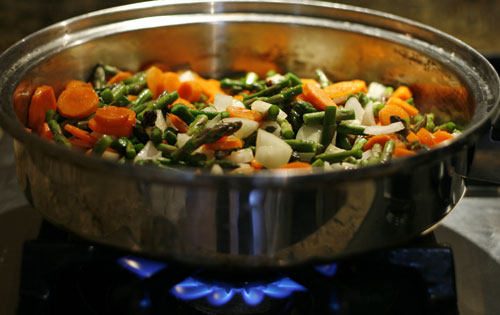
In a skillet over medium heat, cook bacon until crisp.(I used the microwave).  Remove bacon; drain and discard all but 2 T. drippings (I saved ALL the drippings for sautéing J). Saute carrots, onion and asparagus in drippings over medium heat until crisp-tender.

Asparagus-&-Veggies

Add to the kettle along with potatoes, salt, thyme and pepper; return to a boil (This is where I added the extra chicken broth. Most of mine boiled away when I cooked the chicken breast). Reduce heat; cover and simmer for 20 minutes or until potatoes are tender. Combine flour and reserved 1 cup broth; stir into soup. (I ran this through a strainer first because mine was lumpy).  Bring to a boil; cook and stir for 2 minutes. Debone chicken and cut into thin strips; add to soup along with cream and parsley. Heat through (do not boil). Sprinkle with bacon just before serving.

Yield: 16 to 18 servings (We had 7 at dinner tonight, served this with bread and salad, and only had 1 bowlful left over! Everyone had seconds though.)

Printable Recipe

Chicken Asparagus Soup

Download Adobe Reader

Filed in Soups and Salads | Comments Off on Chicken Asparagus Soup

Apple Chips

Posted by on Saturday, September 26th, 2009

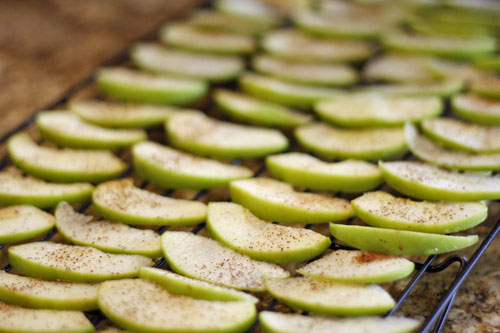
Apple-Chips
The apples are ready to harvest now. Local folks can take the family to Breeden’s in Mt Juliet to pick apples right off the trees to save some buck$ or buy prepicked ones. Many preschools and daycares take little ones to Breeden’s for field trips so you might want to plan a weekend trip. But hurry – the apples won’t last forever.

I will be posting some of our favorite apple delights this week. A sweet friend of mine made apple chips recently. They were FABULOUS! There’s no need to stock the pantry with sugary treats when you can make apple chips so easily. My friend found this recipe here, www.realfoodforrealpeople.blogspot.com. Although the recipe isn’t mine, the photos are ours. I only wish you could smell those apples.

Oven-drying apple chips is a great way to get your fruit in snack form. It doesn’t take a lot of work and it doesn’t require a dehydrator, but it does require some patience. The chips won’t get crispy for a while, and they stay deceptively pliable until after they’re actually well dried.
Apple chips are crispy and delicious, and they make an excellent snack for adults and kids alike. If you have a food processor or mandoline, you can use it to get the apple slices as thin as possible. If not, just slice your apples paper thin. Placing the apple slices on top of a rack in the oven allows air to circulate underneath them, speeding up the drying process.
Don’t be tempted to increase the oven temp to speed things along ~ you want to dry the apple slices, not roast them. Feel free to use a dehydrator if you have one.

  • 2 apples suitable for baking (I used Fuji), washed, quartered, and cored
  • 2 tablespoons freshly squeezed lemon juice
  • Bowl of ice water

Preheat oven to 225 degrees F. Line a baking sheet with parchment and place a footed cooling rack on top of the parchment.

Slice apple quarters thinly. (I ran mine through my food processor with the slicing blade in place.) Add the lemon juice to the bowl of ice water, and place the apple slices in the water as soon as they’re cut. Let the apple slices soak in the water until the oven is preheated and all the apple quarters have been sliced, about 5 minutes.
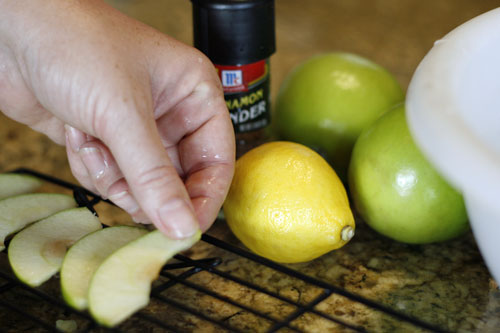
Remove the apple slices from the water with a slotted spoon and place on paper towels. Blot dry. Arrange in a single layer on the rack on the baking sheet. Sprinkle with cinnamon sugar, if desired.Cinnamon sugar for sprinkling, if desired
Bake apples at 225 degrees F for about 3 hours, or until they seem dry and are becoming crisp. They will shrink and darken. They should feel dry and papery to the touch. They may not, however, feel crisp. If they’re done, they will crisp up as they cool. Remove the baking sheet from the oven and let cool for 10 minutes. Test the apple slices. They should feel dry and crispy. If not, return to oven, checking after 1/2 hour.
Store apple chips at room temperature in an air-tight container. They’ll keep for about a week.

When I made these apple chips, tripled the recipe and used a McCormick cinnamon grinder instead of the cinnamon/sugar mix.

Apple-Chips-2

Printable Recipe

Apple Chips

Download Adobe Reader

Filed in Uncategorized | One response so far

« Newer Entries - Older Entries »